Photo AI
The image on the right shows a package for Doritos tortilla chips - Leaving Cert DCG - Question B-1 - 2019
Question B-1
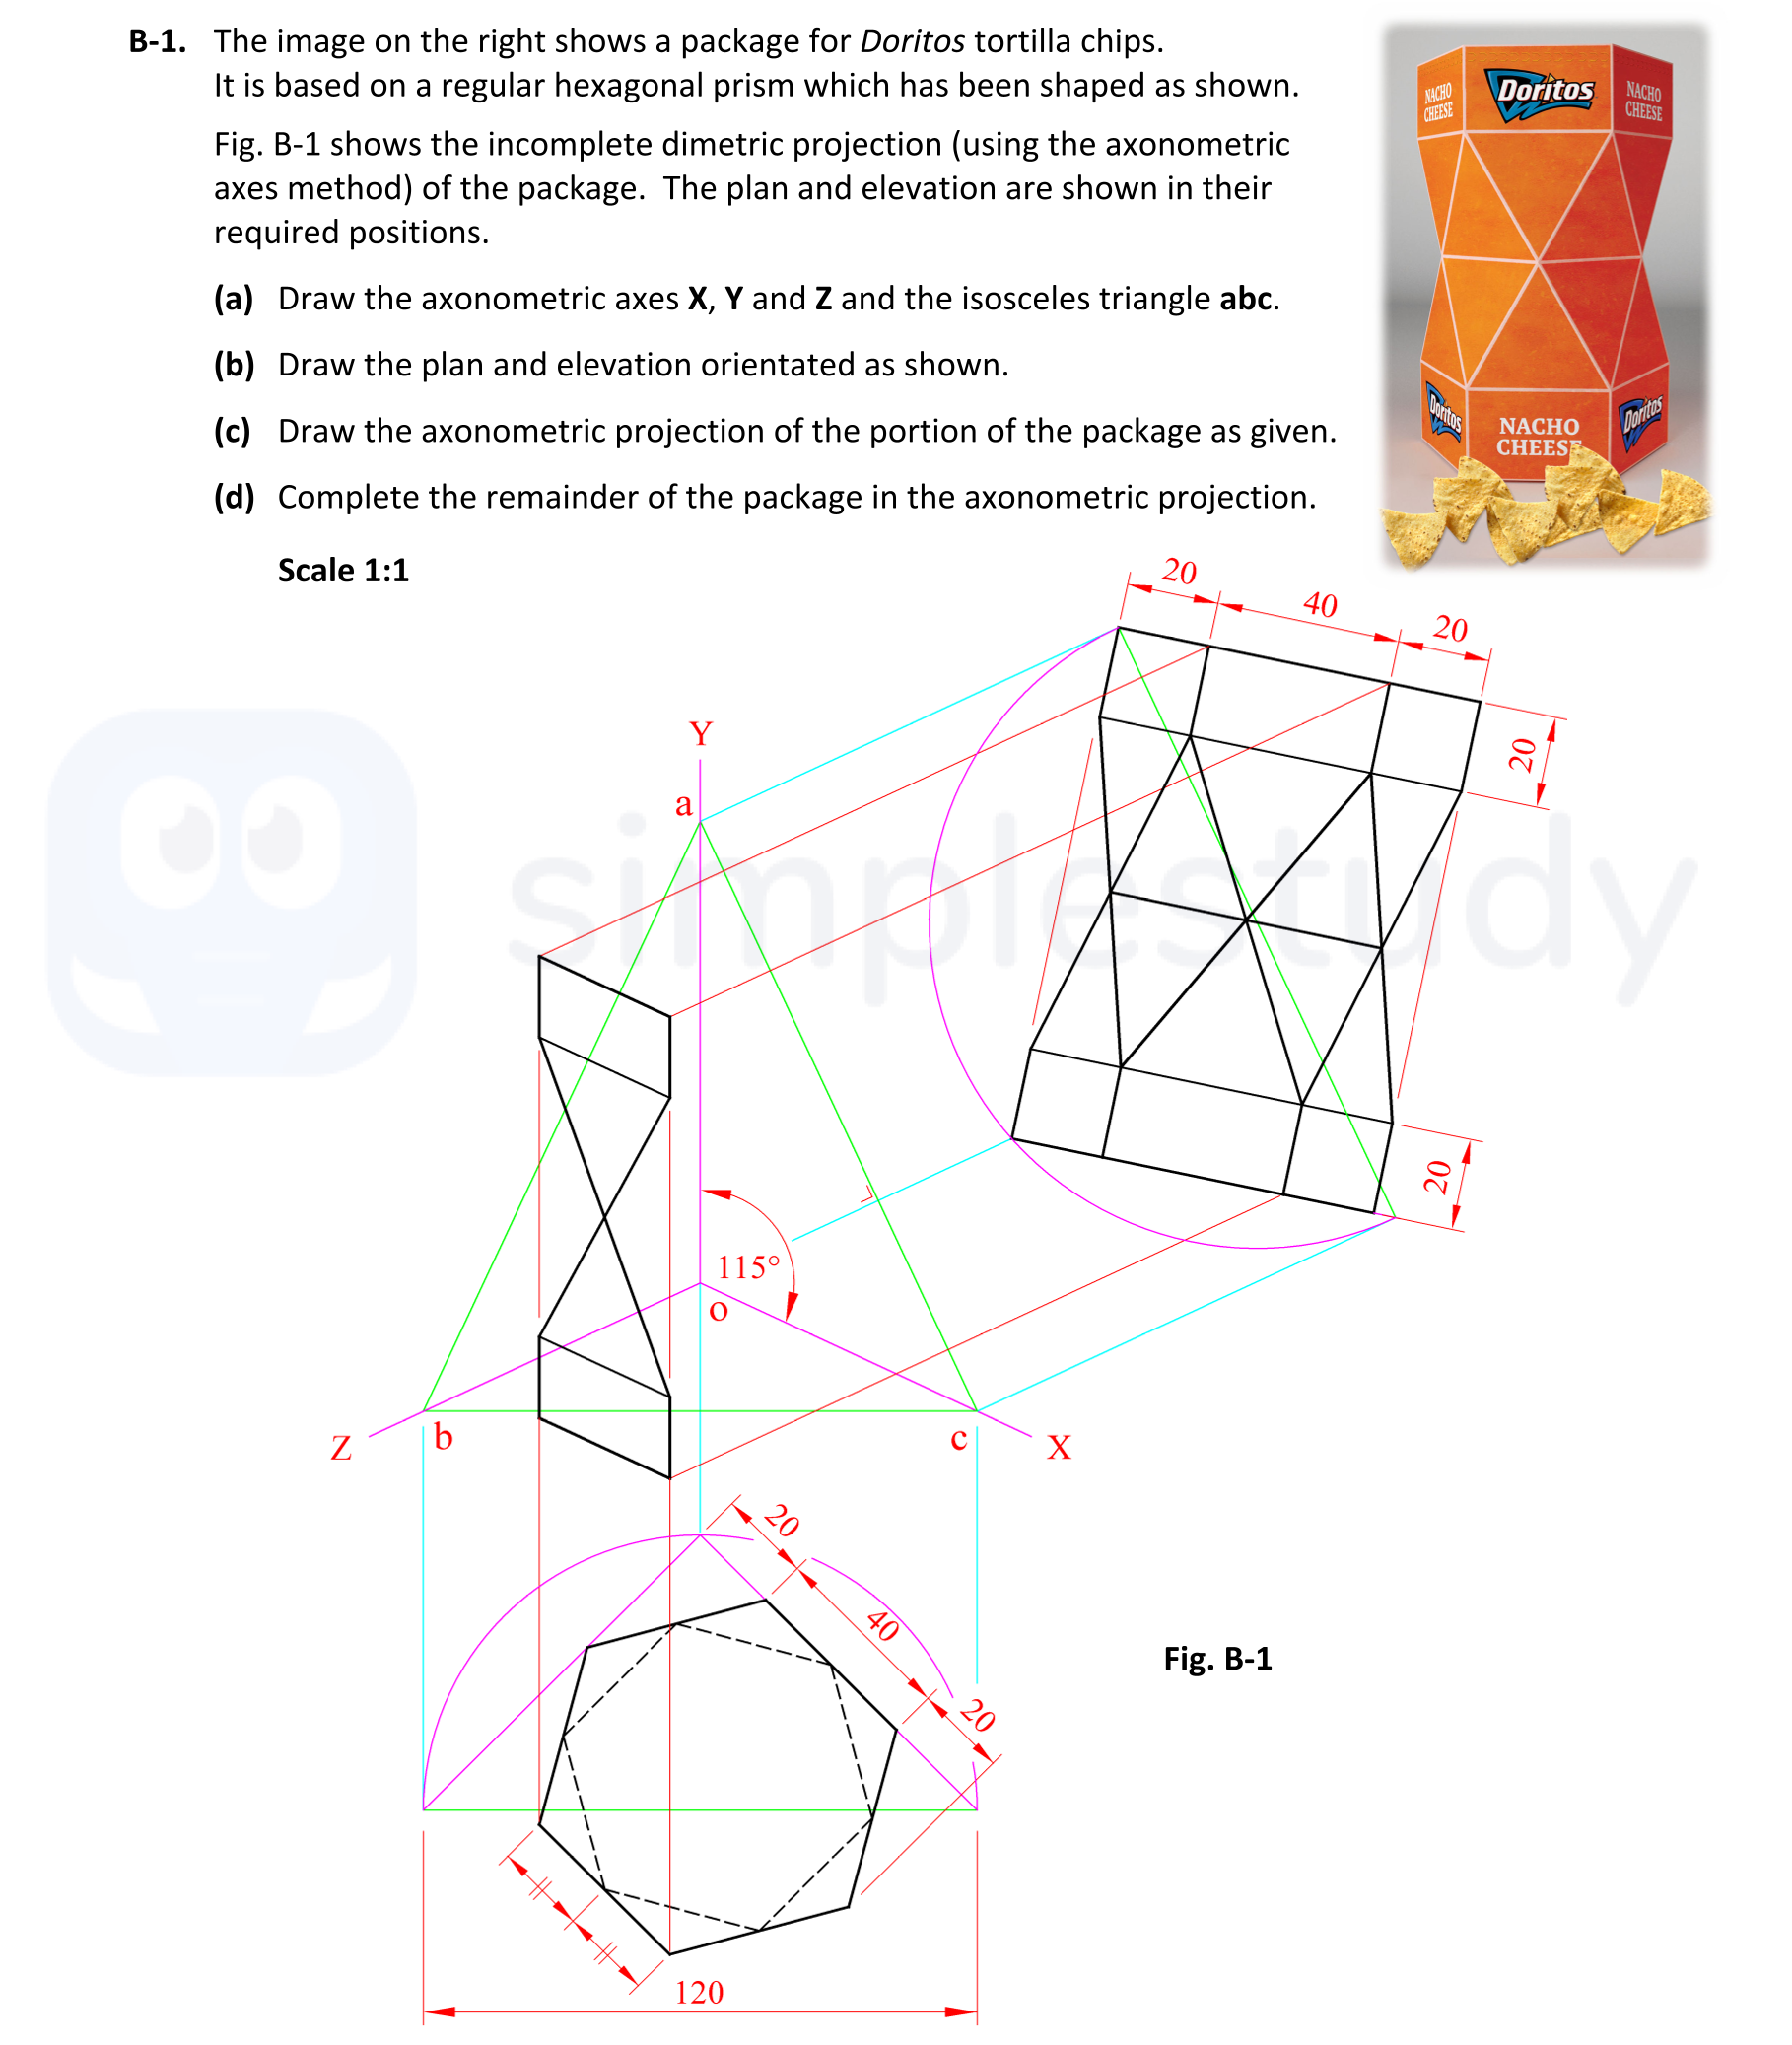
The image on the right shows a package for Doritos tortilla chips. It is based on a regular hexagonal prism which has been shaped as shown. Fig. B-1 shows the inco... show full transcript
Worked Solution & Example Answer:The image on the right shows a package for Doritos tortilla chips - Leaving Cert DCG - Question B-1 - 2019
Step 1
Draw the axonometric axes X, Y and Z and the isosceles triangle abc.

Answer
Begin by establishing the axonometric axes. The X-axis should extend horizontally, the Y-axis should be drawn at an angle of 15 degrees to the horizontal, and the Z-axis should be vertical. Use a ruler to accurately represent these axes in the required positions.
For the isosceles triangle abc, ensure that both sides 'ab' and 'ac' are equal and the angle at 'a' is the vertex, which will show the relationship between the axes and the triangle.
Step 2
Draw the plan and elevation orientated as shown.
Answer
Start with the plan view on the XZ plane. Ensure that the hexagon has proper orientation, with all sides clearly marked. The size can be derived directly from the measurements in Fig. B-1.
Next, draw the elevation on the XY plane. This should reflect the height of the package accurately, ensuring that the hexagonal shape is maintained. Be attentive to the angles illustrated in the marking scheme.
Step 3
Draw the axonometric projection of the portion of the package as given.
Answer
Project the portion of the package onto the appropriate axes, maintaining the proportional relationships between all edges and vertices. The projection technique should adhere to the axonometric representation, ensuring that depth and heights are conveyed correctly.
Step 4
Complete the remainder of the package in the axonometric projection.
Answer
To complete the package, add the necessary horizontal and vertical surfaces as indicated in the marking scheme. Ensure that your connections between surfaces are consistent with the axonometric view. Key steps include:
- Establishing four additional vertical rectangular surfaces.
- Drawing inclined connecting lines on the right-hand side (RHS) of the package.
- Marking the extreme midpoint on the left-hand side (LHS) in the projection.
- Completing the middle section of the axonometric projection clearly and accurately.
- Finalize with the top surface lines, clearly defining the hexagonal outline.