The 3D graphic below shows a jar of honey and a label which is to be wrapped around it - Leaving Cert DCG - Question A-4 - 2012
Question A-4
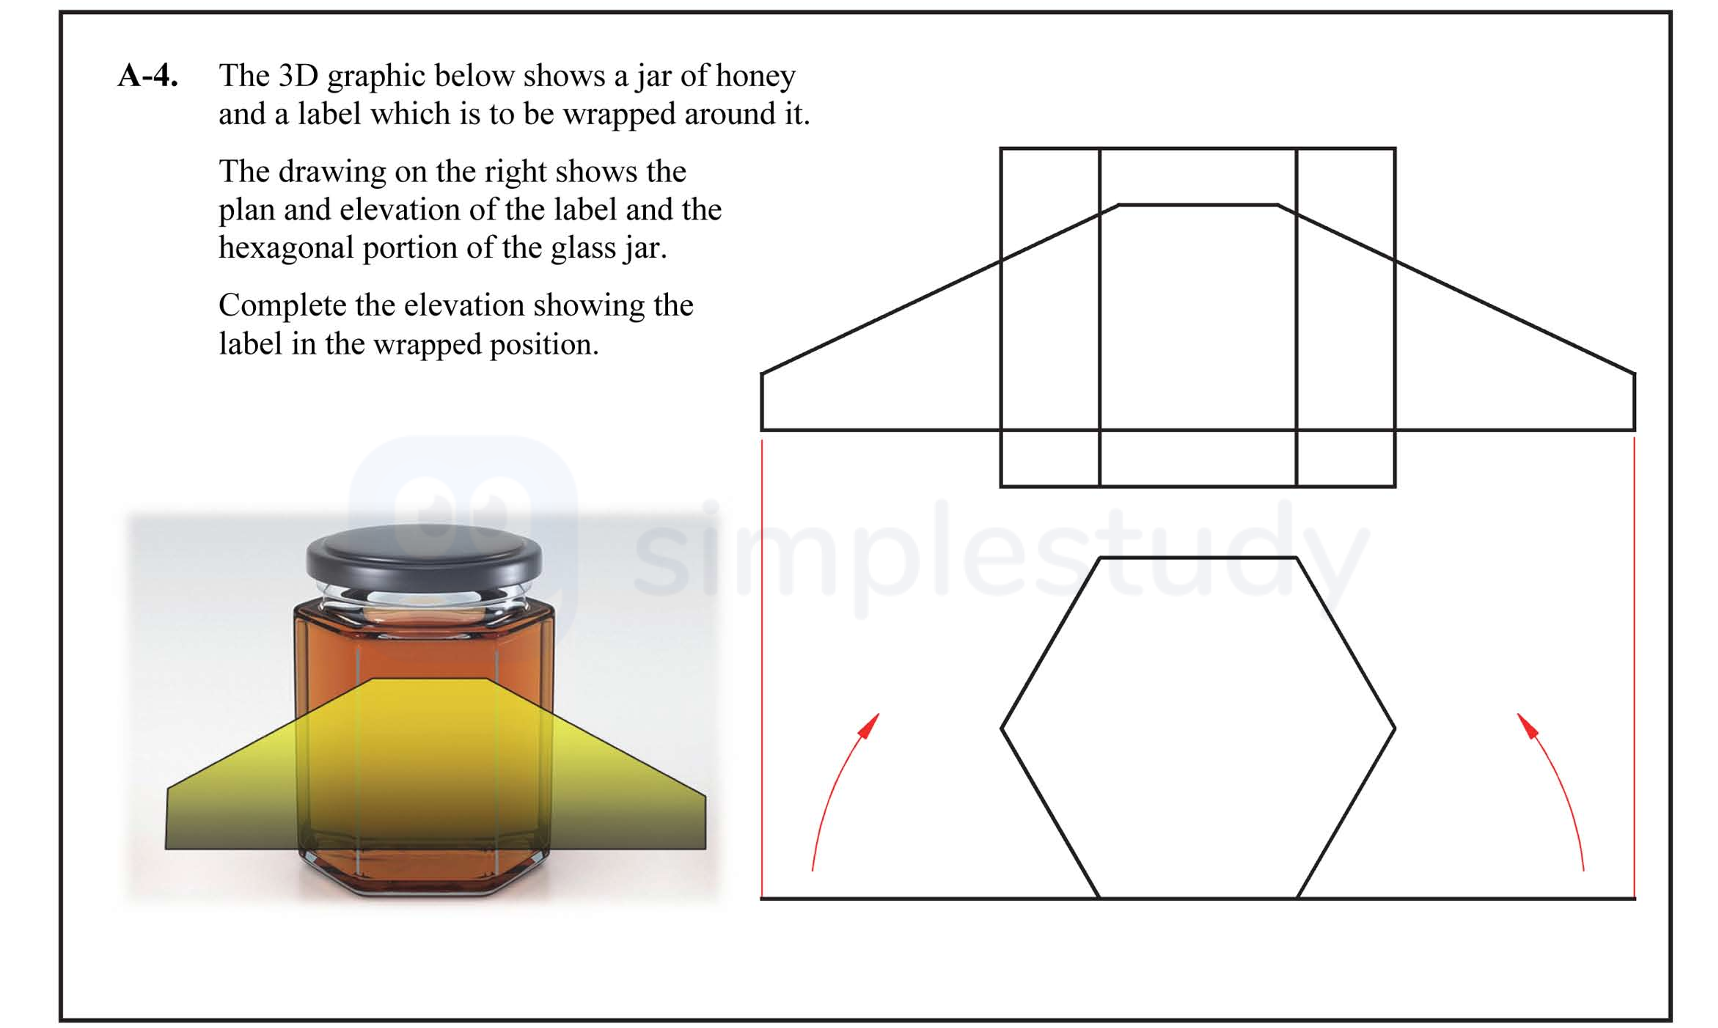
The 3D graphic below shows a jar of honey and a label which is to be wrapped around it.
The drawing on the right shows the plan and elevation of the label and the h... show full transcript
Worked Solution & Example Answer:The 3D graphic below shows a jar of honey and a label which is to be wrapped around it - Leaving Cert DCG - Question A-4 - 2012
Step 1
Prism widths transferred to label in plan
96%
114 rated
Only available for registered users.
Sign up now to view full answer, or log in if you already have an account!
Answer
Begin by measuring the widths of the hexagonal prism (the jar) at each side. Transfer these measurements accurately to the label's plan view on the left, ensuring that the proportions are consistent with the overall dimensions of the jar.
Step 2
Label transferred to prism in plan
99%
104 rated
Only available for registered users.
Sign up now to view full answer, or log in if you already have an account!
Answer
Next, take the dimensions of the label and represent them in the plan view of the prism. Ensure that the edges of the label align perfectly with the measurements of the jar.
Step 3
Projections to elevation
96%
101 rated
Only available for registered users.
Sign up now to view full answer, or log in if you already have an account!
Answer
From the plan view, project vertical lines to create an elevation of the label. Use the measurements taken earlier to ensure the elevation reflects the true dimensions of the label as it wraps around the jar.
Step 4
Identify points on envolpement
98%
120 rated
Only available for registered users.
Sign up now to view full answer, or log in if you already have an account!
Answer
Clearly label significant points on the enveloped elevation, such as the top, bottom, and points where the label meets the edges of the jar. This will help in visualizing how the label wraps around the jar.
Step 5
Drawing of envelopement
97%
117 rated
Only available for registered users.
Sign up now to view full answer, or log in if you already have an account!
Answer
Draw the enveloped label in an accurate elevation view. Make sure to capture the curves and angles of the label as it fits around the jar, ensuring that it flows smoothly along the shape of the jar.
Step 6
Hidden detail
97%
121 rated
Only available for registered users.
Sign up now to view full answer, or log in if you already have an account!
Answer
Include any hidden details, such as the adhesive area or overlaps of the label. This will enhance the understanding of how the label interacts with the jar.
Step 7
Presentation
96%
114 rated
Only available for registered users.
Sign up now to view full answer, or log in if you already have an account!
Answer
Present your final drawing neatly and professionally. Use consistent line weights and include color if appropriate to enhance visual clarity. Make sure all parts are labeled correctly and that the elevation matches the intended wrapping of the label.
Join the Leaving Cert students using SimpleStudy...