Photo AI
The 3D graphic on the right shows a model of a fireplace - Leaving Cert DCG - Question B-3 - 2011
Question B-3
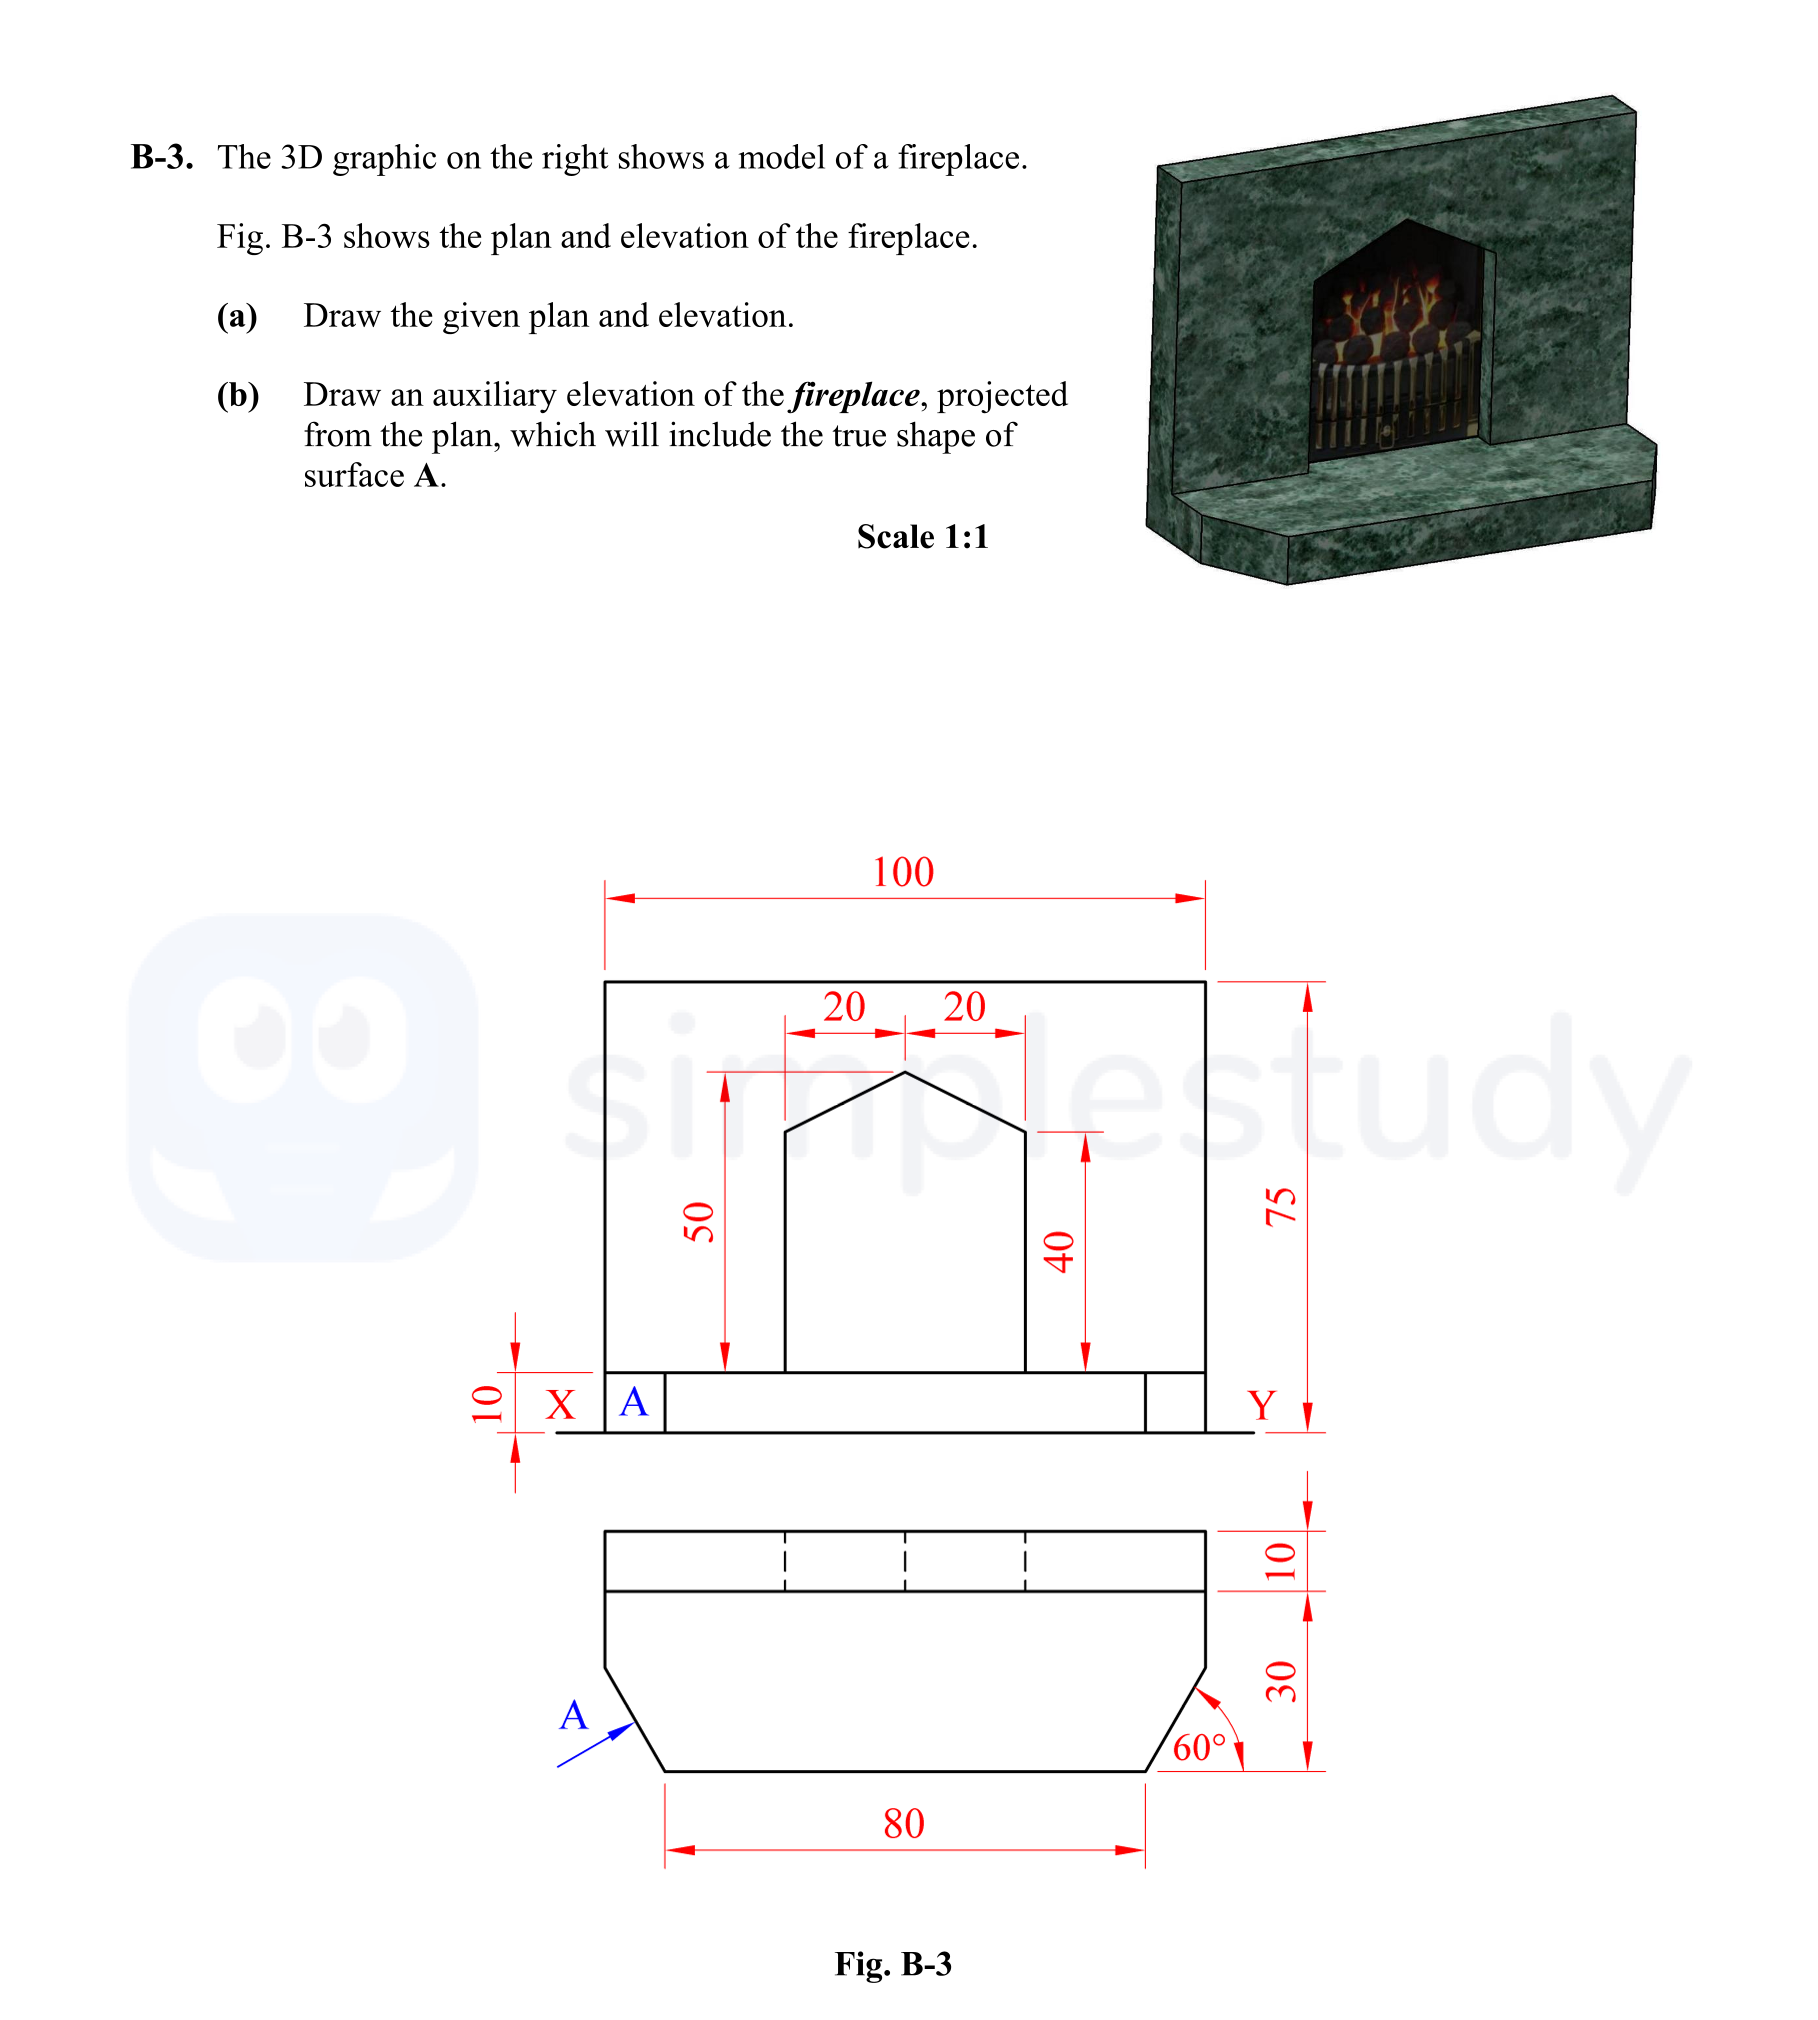
The 3D graphic on the right shows a model of a fireplace. Fig. B-3 shows the plan and elevation of the fireplace. (a) Draw the given plan and elevation. (b) Draw ... show full transcript
Worked Solution & Example Answer:The 3D graphic on the right shows a model of a fireplace - Leaving Cert DCG - Question B-3 - 2011
Step 1
Draw the given plan and elevation.

Answer
To produce the plan and elevation of the fireplace:
-
Outline of Elevation: Start by outlining the elevation view from the provided 3D graphic. This includes marking the profiled shape of the fireplace's structure, particularly being careful with the proportions according to the measurements provided in the plan.
-
Complete the Elevation: Add details such as the grating and any decorative elements visible in the elevation view. Ensure that the height values are accurate as indicated by the height markings on the drawing.
-
Outline of Plan: Create a top view of the fireplace (the plan view). The plan view should align with the elevation and must consider all dimensions given, ensuring that the outline is correct in form and scale.
-
Complete the Plan: Finally, include internal details in the plan view, such as the dimensions of the inner workings of the fireplace, and ensure all elements solidly match the structure shown in the elevation view.
Step 2
Draw an auxiliary elevation of the fireplace, projected from the plan, which will include the true shape of surface A.
Answer
For the auxiliary elevation:
-
X1, Y1, parallel to plan of surface A: Start by setting up the X1 and Y1 lines parallel to the plan at surface A, making sure to maintain the scale of 1:1.
-
Projections from Plan: Use the existing plan as a reference to project lines that represent other parts of the fireplace that are not directly visible in the plan view. This is crucial for maintaining accurate proportions.
-
Transfer Heights from Elevation: Take the height measurements obtained from the elevation view and transfer them along the projecting lines to ensure that any height discrepancies are properly accounted for in the auxiliary elevation.
-
Draw Surface A: Once all projections are made, sketch the true shape of surface A using the guidelines drawn in the previous steps. Make sure that it accurately reflects the three-dimensional aspects of the surface.
-
Complete Auxiliary Elevation: Finally, finalize the auxiliary elevation by adding necessary details and ensuring all lines are accurately represented and labeled. Include any shading or line weight variations to enhance clarity and depth in the drawing.