Formatting Cells: Further Features (Grade 10 NSC Matric Computer Application Technology): Revision Notes
Formatting Cells: Further Features
When working with spreadsheets, you'll often need to format your data to make it look professional and easy to read. There are several advanced formatting features that can help you display your information more effectively. These include text wrapping, cell merging, text orientation, AutoFill, and proper data types.
Text wrapping and merging
Sometimes the content in your cells doesn't fit properly in the default cell size. When this happens, you have two main options: you can wrap the text to display it across multiple lines within the same cell, or you can merge the cell with adjacent cells to create a larger space.
These two techniques serve different purposes - text wrapping keeps content within a single cell while making it readable, whereas cell merging creates larger spaces for headers and titles that span multiple columns.
What is text wrapping?
Text wrapping allows you to display long text content across multiple lines while keeping it all within a single cell. This is particularly useful when you have lengthy descriptions or titles that would otherwise be cut off or overflow into neighbouring cells.

Instead of making columns extremely wide or having text disappear, text wrapping automatically breaks the content into multiple lines within the same cell boundaries.
How to wrap text
Step-by-Step: Applying Text Wrapping
Step 1: Select the cells containing the text you want to wrap
Step 2: Go to the Home tab and find the Alignment group
Step 3: Click on the "Wrap Text" command
The selected cells will now display their content across multiple lines, making all the text visible without expanding the column width.
Troubleshooting text wrapping
Sometimes text wrapping doesn't work as expected. Here are common problems and their solutions:
Common Text Wrapping Issue: If your row doesn't automatically expand after applying text wrapping, you'll need to manually resize the row height. Remember that text wrapping only creates a visual change when there's actually too much text to fit in the current column width.
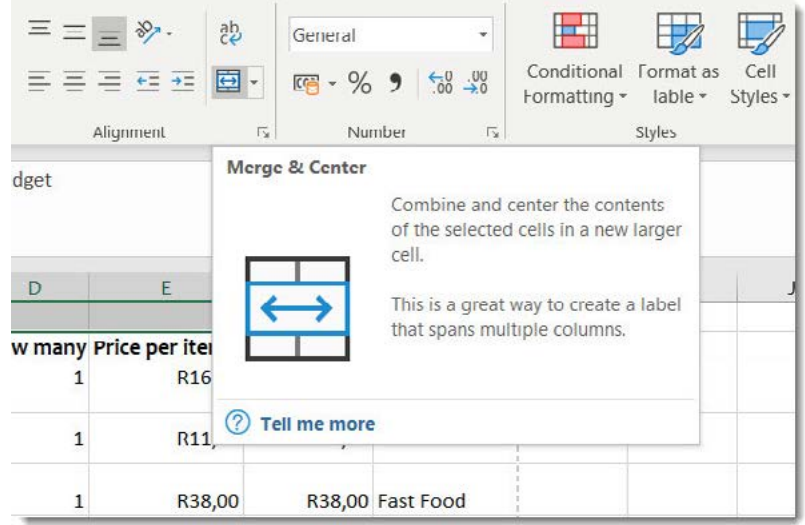
What is cell merging?
Cell merging combines two or more adjacent cells into one larger cell. This is extremely useful for creating titles, headers, or labels that span across multiple columns. When you merge cells, the content is typically centred across the new larger cell.
How to merge cells
Step-by-Step: Merging Cells
Step 1: Select the range of cells you want to merge (for example, A1 to E1 for a title)
Step 2: Go to the Home tab and find the Alignment group
Step 3: Click on "Merge & Centre"
The selected cells will combine into one large cell, and any text will be centred within the merged area.
Additional merge options
There are actually several different merge options available:
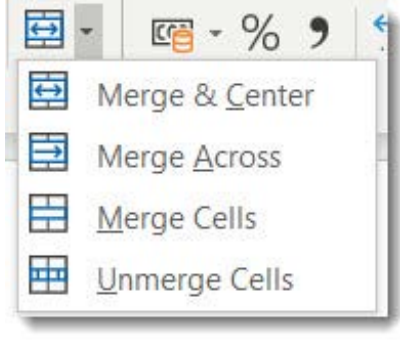
- Merge & Center: Combines selected cells and centres the text
- Merge Across: Merges cells in each row separately
- Merge Cells: Combines cells without centring the text
- Unmerge Cells: Separates previously merged cells
Choose the merge option that best fits your needs - Merge & Centre is most common for titles, while Merge Across is useful when working with multiple rows of data.
Unmerging cells
If you need to separate cells that have been merged, simply select the merged cell and choose "Unmerge Cells" from the merge dropdown menu, or use the Unmerge command.
Text orientation
Text orientation allows you to change the direction or angle of text within cells. This is particularly helpful when you want to create vertical headers or make your spreadsheet more compact and easier to read.
Step-by-Step: Changing Text Orientation
Step 1: Select the cells containing the text you want to rotate
Step 2: Go to the Home tab and find the Alignment group
Step 3: Select the alignment dialogue box launcher or use the Format Cells dialogue
Step 4: Choose your desired text angle
Text orientation can make your headers more distinctive and help you fit more information in a smaller space. You can rotate text to various angles, including completely vertical text.
AutoFill
AutoFill is a powerful feature that automatically continues patterns or sequences in your spreadsheet. This can save you enormous amounts of time when entering repetitive data like dates, days of the week, or number sequences.
How AutoFill works
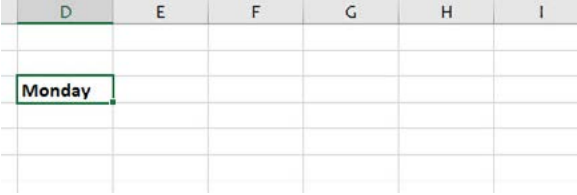
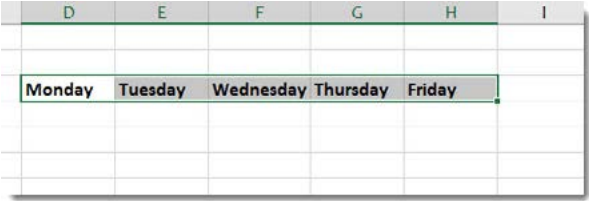
AutoFill recognises patterns in your data and continues them automatically. For example, if you type "Monday" in one cell, AutoFill can automatically fill in the rest of the weekdays.
The AutoFill handle appears as a small square in the bottom-right corner of your selected cell. When you hover over it, you'll see a "+" sign.
Using AutoFill for sequences
Step-by-Step: Using AutoFill
Step 1: Enter the starting value or pattern in your cell
Step 2: Select the cell and look for the AutoFill handle (the small square)
Step 3: Drag the handle across the cells where you want the pattern to continue
AutoFill works with many different types of data including days, months, numbers, and even custom lists you create.
AutoFill for formulas
AutoFill is also extremely useful for copying formulas. When you create a calculation in one cell, you can use AutoFill to copy that formula to other cells, and it will automatically adjust the cell references.
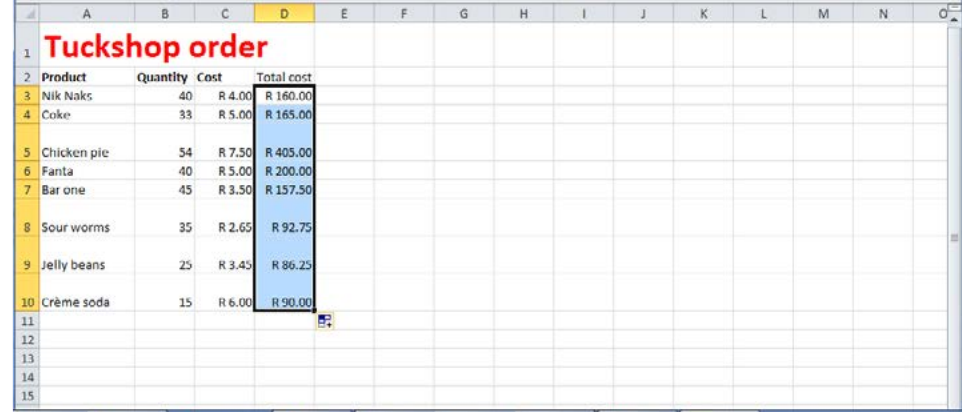
This feature is essential for creating calculations across multiple rows or columns without having to manually type each formula. AutoFill saves time and reduces errors in formula entry.
Data types
Every cell in your spreadsheet has a data type that determines how the information is stored and displayed. Understanding data types helps ensure your data appears correctly and functions properly in calculations.
Common data types
The main data types you'll encounter are:
- General: For any text or numerical values
- Number: For numerical values used in calculations
- Currency: For monetary values in various currencies
- Text data: For any text input
- Time: For time formatting based on your settings
- Date: For date formatting in short or long formats
Why data types matter
Critical Concept: Data Type Selection Using the correct data type ensures your spreadsheet behaves as expected. For example, if you want to perform calculations with numbers, they need to be formatted as the Number data type rather than Text.
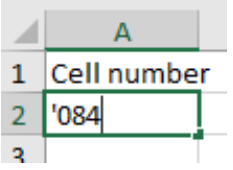
If you need to enter what looks like a number but want it treated as text (like a phone number), you can start with an apostrophe (') to force text formatting.
Custom date formatting
You can create custom date formats using special codes.
These codes allow you to display dates exactly how you want them to appear, whether you prefer short formats like "02/01/2019" or long formats like "Wednesday, 02 January 2019".
Setting data types
Step-by-Step: Setting Data Types
Step 1: Select the cells you want to format
Step 2: Go to the Home tab and find the Number group
Step 3: Choose the appropriate data type from the dropdown
Step 4: For custom formats, select "More Number Formats" and create your own
Remember that choosing the correct data type from the beginning will save you time and prevent formatting issues later.
Key Points to Remember:
- Text wrapping displays long content across multiple lines within the same cell - perfect for lengthy descriptions or titles
- Cell merging combines adjacent cells into one larger cell - ideal for creating headers and titles that span multiple columns
- Text orientation lets you rotate text at different angles - useful for creating distinctive headers and saving space
- AutoFill automatically continues patterns and sequences - a huge time-saver for repetitive data entry
- Choosing the correct data type ensures your spreadsheet functions properly - numbers for calculations, text for labels, and appropriate formats for dates and currency