Computer Management (Grade 12 NSC Matric Computer Application Technology): Revision Notes
Computer Management
Introduction
Building on the file management skills you developed in Grade 10, this unit expands your understanding of how to effectively organise and control files and folders on your computer system. Computer management involves understanding how files work, where they're stored, and how to access detailed information about them.
This unit builds directly on concepts from Grade 10, so you'll be applying and extending skills you've already learned while discovering more advanced file management techniques.
Files and folders
Understanding files
Files represent any digital document you create or save on your computer. This includes text documents you write, spreadsheets with data, images you capture or download, and music files you collect. Every file can be identified by looking at its file extension, which appears as a series of letters following a dot at the end of the filename.
Common file extensions
Different software applications create files with specific extensions that help your computer understand which programme should open them:
- .txt - Plain text files from Notepad or similar basic text editors
- .docx (or .doc) - Microsoft Word documents for formatted text
- .xlsx (or .xls) - Microsoft Excel spreadsheets for calculations and data
- .pptx (or .ppt) - Microsoft PowerPoint presentations for slideshows
- .pdf - Portable Document Format files that maintain formatting across devices
- .html or .htm - Web pages that display in internet browsers
- .png, .jpg, .tiff - Various image file formats for pictures
- .mp3 - Compressed audio files for music
- .mp4 - Video files for moving pictures
File Extension Example:
If you see a file named "MyHomework.docx", you can immediately tell that:
- The file is called "MyHomework"
- The ".docx" extension indicates it's a Microsoft Word document
- Double-clicking it will open Microsoft Word (if installed)
Understanding folders
Folders serve as digital storage containers that help organise your files in a logical structure. Think of them as filing cabinets where you can group related documents together. You can create new folders, rename existing ones, and even create folders within folders to build a hierarchical organisation system. Folders can be stored on your computer's hard drive or transferred to external storage devices like USB drives, CDs, DVDs, or cloud storage services.
Creating a well-organized folder structure from the beginning will save you significant time when searching for files later. Consider organising by subject, project, or date depending on your needs.
Searching for files
When you need to locate a specific file among hundreds or thousands stored on your computer, Windows provides efficient search tools to help you find what you're looking for quickly.
Using the search function
To find a file on your system, you can use Windows' built-in search functionality which is much faster than manually browsing through folders.
Step-by-Step File Search Process:
- Access the Start menu by clicking the Windows button
- Type "File Explorer" and select the File Explorer option to open a new window
- Locate the Quick Search box, typically positioned in the top-right corner of the File Explorer window
- Enter the name or part of the name of the file you're seeking
- Browse through the search results and double-click the correct file to open it
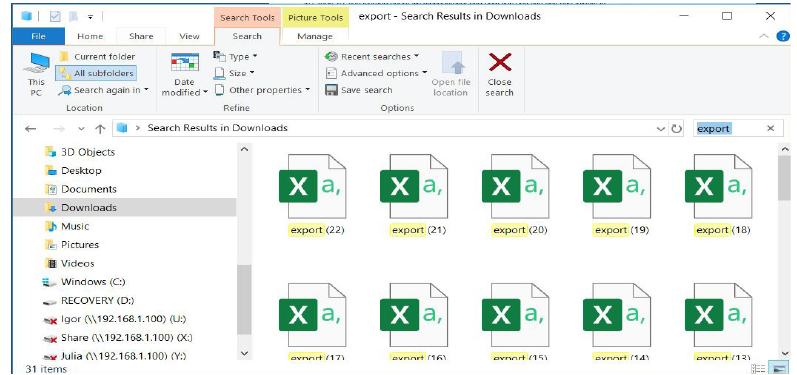
This search method is particularly useful when you remember the filename but can't recall exactly where you saved it.
Search Tip: You don't need to type the complete filename - Windows search will find files that contain the letters or words you type, making it easy to locate files even with partial information.
File properties
Accessing file properties
Once you've located a file, you can discover detailed information about it through the File Properties window. This feature provides valuable insights about the file's characteristics, location, and history.
Opening File Properties:
- Navigate to the folder containing your target file
- Right-click on the file to display the context menu
- Scroll through the menu options and select Properties
- A new window will appear showing comprehensive file information
Understanding the properties window
The File Properties window organises information into four distinct tabs, each serving a specific purpose:
| Tab | Description |
|---|---|
| General | Shows fundamental file information including file type, storage location, document size, and important timestamps (when created, modified, and last accessed). Also displays file attributes such as Read-only and Hidden settings |
| Security | Displays user permissions and access controls, showing who can view, edit, or modify the document and what actions they're authorised to perform |
| Details | Contains metadata about the file, such as the document title, author information, and other properties specific to the file type |
| Previous versions | Shows historical versions of the document, allowing you to access earlier saved states if available |
The General tab is usually the most useful for everyday file management, as it shows file size, location, and when the file was last modified - information that helps you identify the correct file and understand its recent usage.
Working with file attributes
Understanding read-only files
The Read-only attribute serves as a protection mechanism that allows you to view a file's contents without accidentally modifying them. When a file has this attribute enabled, you can open and read it, but you cannot make changes or save modifications.
Removing Read-only Protection:
To modify a read-only file, you need to remove this protection by:
- Opening the File Properties window
- Locating the Read-only checkbox in the General tab
- Unchecking the box to remove the read-only restriction
- Clicking OK to apply the changes
Working with hidden files
The Hidden attribute makes files invisible during normal folder browsing, which can be useful for system files or personal documents you want to keep private. However, you can still access these files when necessary.
Revealing Hidden Files:
To view hidden files on your system:
- Open the Start menu
- Type "control panel" and select the Control Panel option
- Open the File Explorer options from the available settings
- Navigate to the View tab in the new window
- Under Advanced Settings, locate and select Show hidden files, folders and drives
- Click OK to save your preferences
Your computer will now display previously hidden files and folders, typically shown with slightly faded icons to indicate their hidden status.
Be Careful with Hidden Files: Many hidden files are system files that are essential for your computer's operation. Avoid modifying or deleting hidden files unless you're certain of their purpose.
Summary
Key Points to Remember:
- File extensions identify file types - The letters after the dot in a filename tell you which programme created it and can open it
- Use Quick Search to find files quickly - Type the filename in File Explorer's search box rather than manually browsing through folders
- File Properties provide comprehensive information - The four tabs (General, Security, Details, Previous versions) give you complete details about any file
- Read-only protects files from accidental changes - Remove this attribute through File Properties when you need to edit protected files
- Hidden files can be revealed through Control Panel - Use the View settings in File Explorer options to show files that are normally invisible