Riveting (Junior Cert Engineering): Revision Notes
Riveting
What is riveting?
Riveting is a method used to create permanent connections between materials, particularly metals. Unlike screws or bolts that can be removed, rivets form lasting joints that cannot be easily undone. This makes riveting ideal for applications where strong, permanent connections are required.
Hot rivets offer a particular advantage because they shrink as they cool down. This shrinking action pulls the joined parts tighter together, creating an even stronger connection. Cold rivets can also be used when heating is not practical or desired.
Types of rivet heads
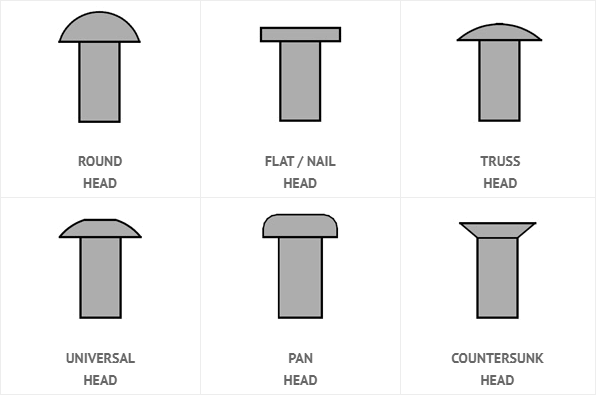
Different rivet head shapes are designed for specific applications and finish requirements:
Snap head rivets have a rounded, dome-shaped head that sits proud of the surface. These are commonly used where the protruding head won't cause problems.
Countersunk head rivets sit flush with the surface when properly installed. The rivet hole must be countersunk (angled) to accommodate the sloped head shape.
Pan head rivets have a low, rounded profile that provides a neat appearance whilst still protruding slightly from the surface.
Flat head rivets create a completely flat finish and are used where a smooth surface is essential.
Riveting tools and equipment
Several specialised tools are needed for successful riveting operations:
Rivet snap is used to finish and shape the final head of a rivet after it has been roughly formed with a ball pein hammer. Different snaps create different head shapes.
Bolster or dolly provides support for the existing rivet head whilst the new head is being formed on the opposite end. This prevents the rivet from being pushed out of the hole during hammering.
Rivet set is used to force the parts being joined tightly together before the riveting process begins. This ensures there are no gaps between the materials.
Ball pein hammer is used for the initial shaping of the rivet head before finishing with the rivet snap.
Standard riveting process
The riveting process must be completed methodically to ensure strong, properly formed joints.
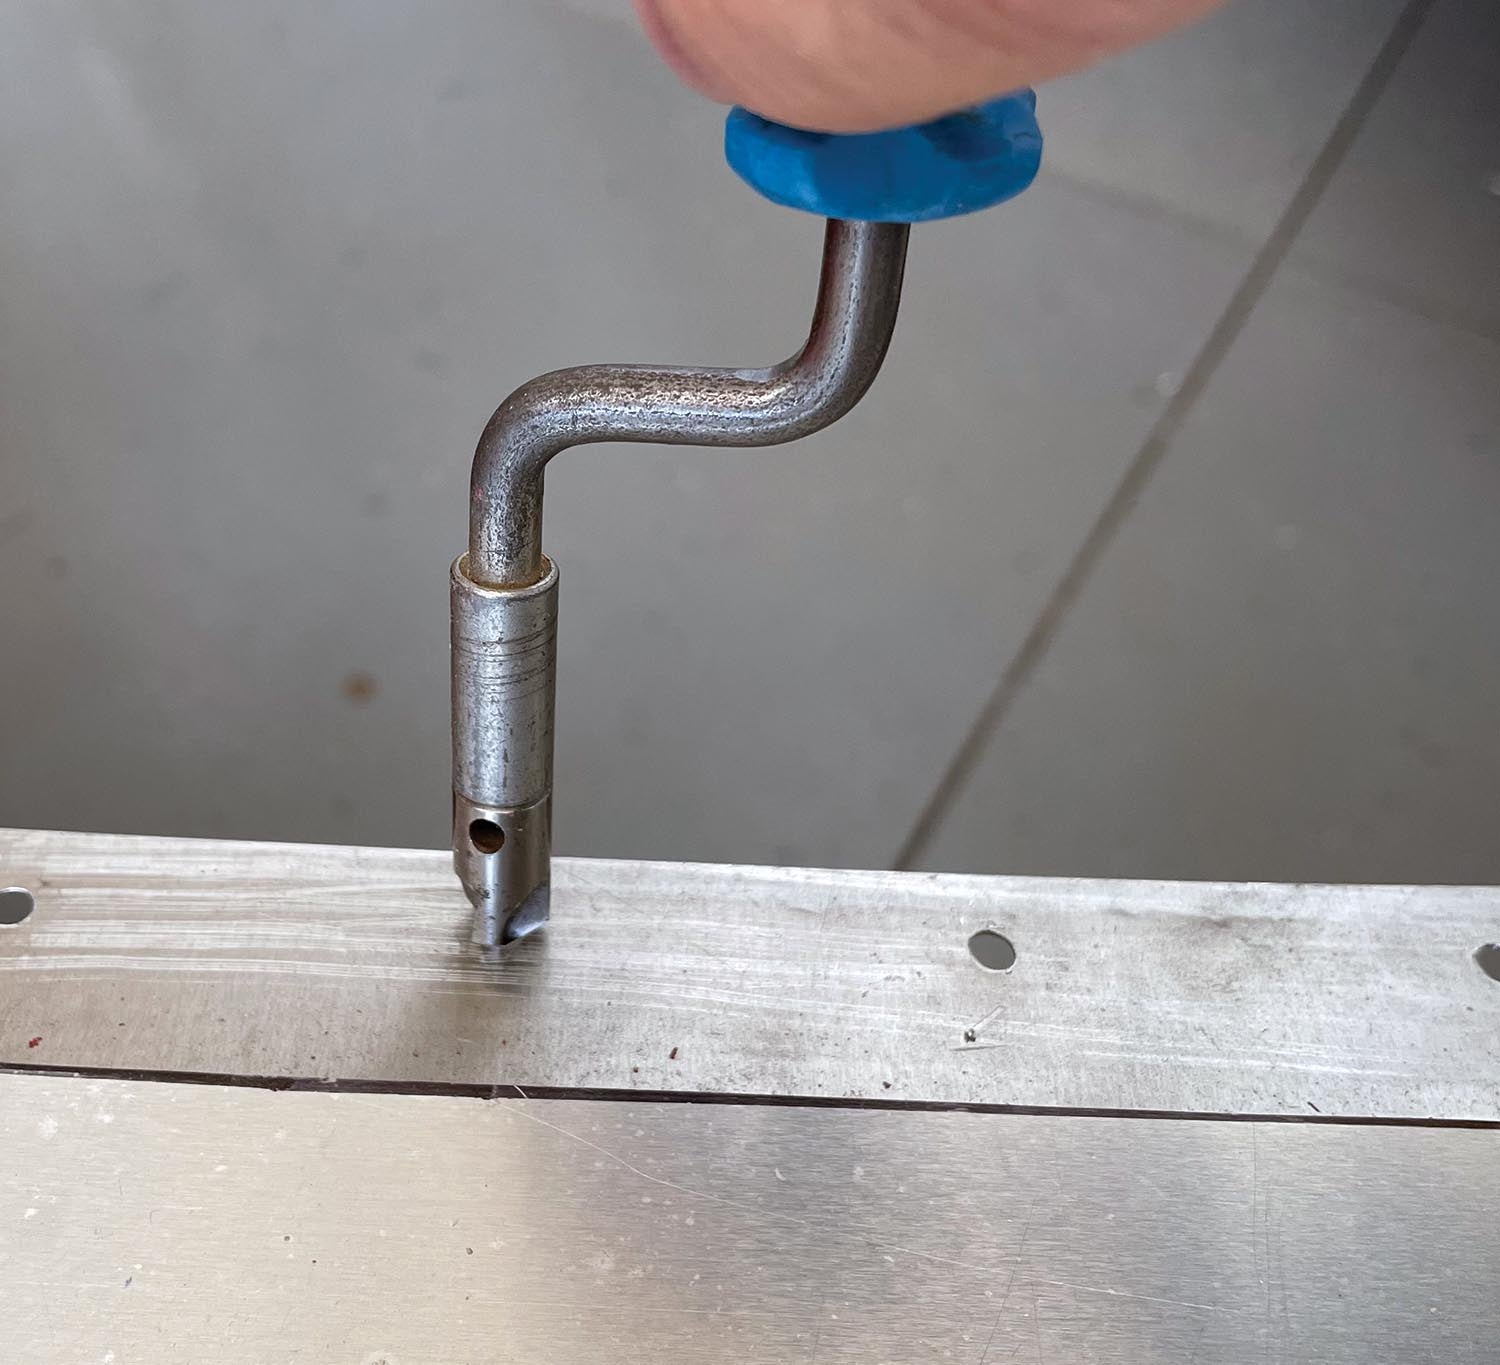
Drilling and alignment procedures
When using multiple rivets in a single joint, proper hole alignment is crucial. All holes should be drilled in one part first, then in the other part. Position one rivet through both parts to align them properly, then clamp the parts together. The remaining holes can then be drilled by passing the drill through the first holes. This technique ensures perfect alignment of all holes.
Forming rivet heads
The amount of rivet shank (the smooth cylindrical part) that extends beyond the materials being joined is critical for proper head formation:
For snap heads: Allow a shank length equal to (where = rivet diameter)
For countersunk heads: Allow a shank length equal to , and the rivet hole must be countersunk to match the head angle
Worked Example: Creating a Snap Head Rivet
- Insert the rivet through the aligned holes with the correct shank length protruding
- Force the parts together using a rivet set whilst supporting the existing head with a bolster
- Place the assembly on a flat surface with the preformed head supported
- Use a ball pein hammer to roughly shape the new head
- Finish the head shape using the appropriate rivet snap
Steps for creating a countersunk head
- Ensure the rivet hole is properly countersunk before starting
- Insert the rivet with the correct shank length ()
- Force the parts together as with snap head rivets
- Form the head using hammer and finishing tools
- File or draw-file the surface smooth to achieve a flush finish
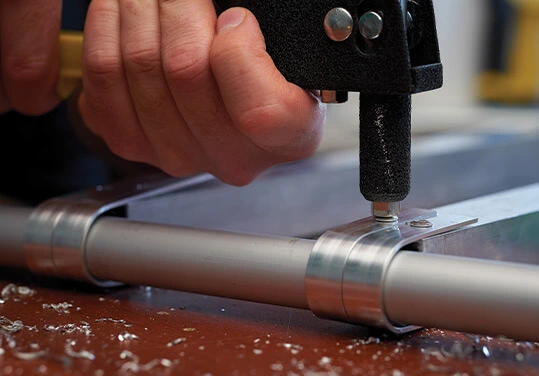
Pop riveting
Pop riveting offers a convenient alternative when you can only access one side of the joint. This method is particularly useful for light-duty applications and thin materials.
Pop rivets work by inserting a special rivet with a pin through its centre into the drilled hole. Pop riveting pliers are then used to pull the pin through the rivet. As the pin is drawn through, it expands the blind end of the rivet to form the second head. When sufficient expansion has occurred, the pin breaks off and comes away, leaving the rivet head behind.
The main advantage of pop riveting is that it can be completed where only one side of the joint is accessible. This makes it ideal for joining thin sheet materials, repairs in confined spaces, or assembly work where traditional riveting would be impractical.
Key Points to Remember:
-
Permanent connections - Rivets create joints that cannot be easily removed, making them ideal for structural applications
-
Correct shank length - Snap heads need , countersunk heads need (where = rivet diameter)
-
Proper hole alignment - Drill one part first, use a rivet to align, then drill matching holes for perfect alignment
-
Pop rivets for accessibility - Use pop riveting when you can only reach one side of the joint
-
Hot rivets shrink - Hot rivets create tighter joints as they cool and contract, pulling parts together more securely