Document Layout and View Options (Grade 10 NSC Matric Computer Application Technology): Revision Notes
Document Layout and View Options
Customising margins
Margins are the white spaces around the edges of your document pages. Word allows you to change these margins to suit different document types and printing requirements. Understanding how to customise margins is essential for creating professional-looking documents.
Word provides several predefined margin options that you can choose from:
- Normal: Standard margins suitable for most documents (2.54 cm on all sides)
- Narrow: Smaller margins to fit more content (1.27 cm on all sides)
- Moderate: Medium-sized margins for a balanced look
- Wide: Larger margins for a more spacious appearance
- Mirrored: Special margins for double-sided printing
To customise margins, you need to access the Layout tab in Word's ribbon. From there, you can select the Margins command and choose from the predefined options, or select Custom Margins to set your own specific measurements.
When you choose custom margins, the Page Setup dialogue box will appear, allowing you to enter exact margin values for the top, bottom, left, and right sides of your document. You can also preview how your changes will affect the document layout.
Mirror margins
Mirror margins are particularly useful when creating documents that will be printed on both sides of the paper, such as books, brochures, or magazines. With mirror margins, the left page margins are a mirror image of the right page margins. This ensures that when the document is bound, the text appears evenly positioned on both odd and even pages.
Use of the gutter
The gutter setting adds extra space to your margins specifically for binding purposes. This prevents important text from being hidden or cut off when documents are hole-punched, spiral-bound, or bound in other ways. You can set the gutter to add space to the left, right, top, or bottom margins depending on how your document will be bound.
Always consider your document's final use when setting margins. Documents for binding need gutters, while digital-only documents can use narrower margins to maximise screen space.
Headers and footers
Headers and footers are special sections that appear at the top and bottom of every page in your document. They help make long documents more organised and professional by providing consistent information throughout.
The header appears in the design background at the top of each page, while the footer appears at the bottom. These sections typically contain information such as:
- Page numbers
- Document titles
- Author names
- Dates
- Company logos or information
One of the most powerful features of headers and footers is their ability to use fields. Fields are special codes that update automatically without you having to change anything manually. For example, if you insert a date field in your header, it can automatically show the current date whenever the document is opened or printed.
Creating a header or footer
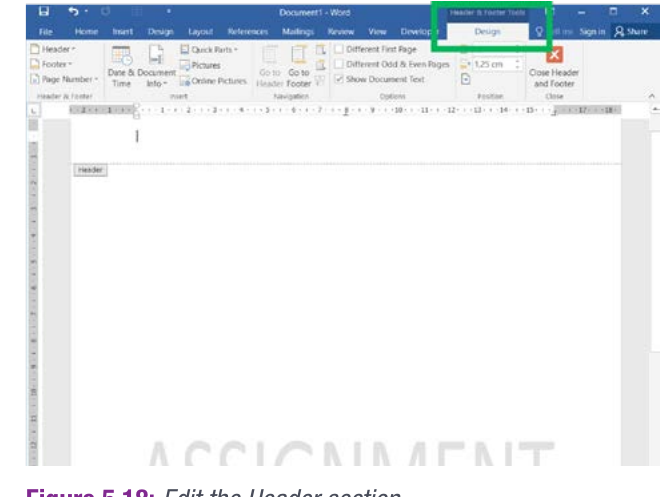
To create a header or footer, you can right-click in the top or bottom margin of your document. This will open the header or footer space and automatically select the Design tab, which contains all the tools you need for editing these sections.
You can then type in the text or information you want to appear, or use the Quick Parts feature to insert automatic fields like the author's name or current date. The Quick Parts menu provides access to various pre-formatted information that will update automatically.
When you insert fields like dates, you can choose from different formats and even set them to update automatically each time the document is opened. This is particularly useful for documents that need to show current information.
To finish editing your header or footer, you can select Close Header and Footer from the ribbon, or simply press the Esc key or double-click on the body of the document.
Cover pages
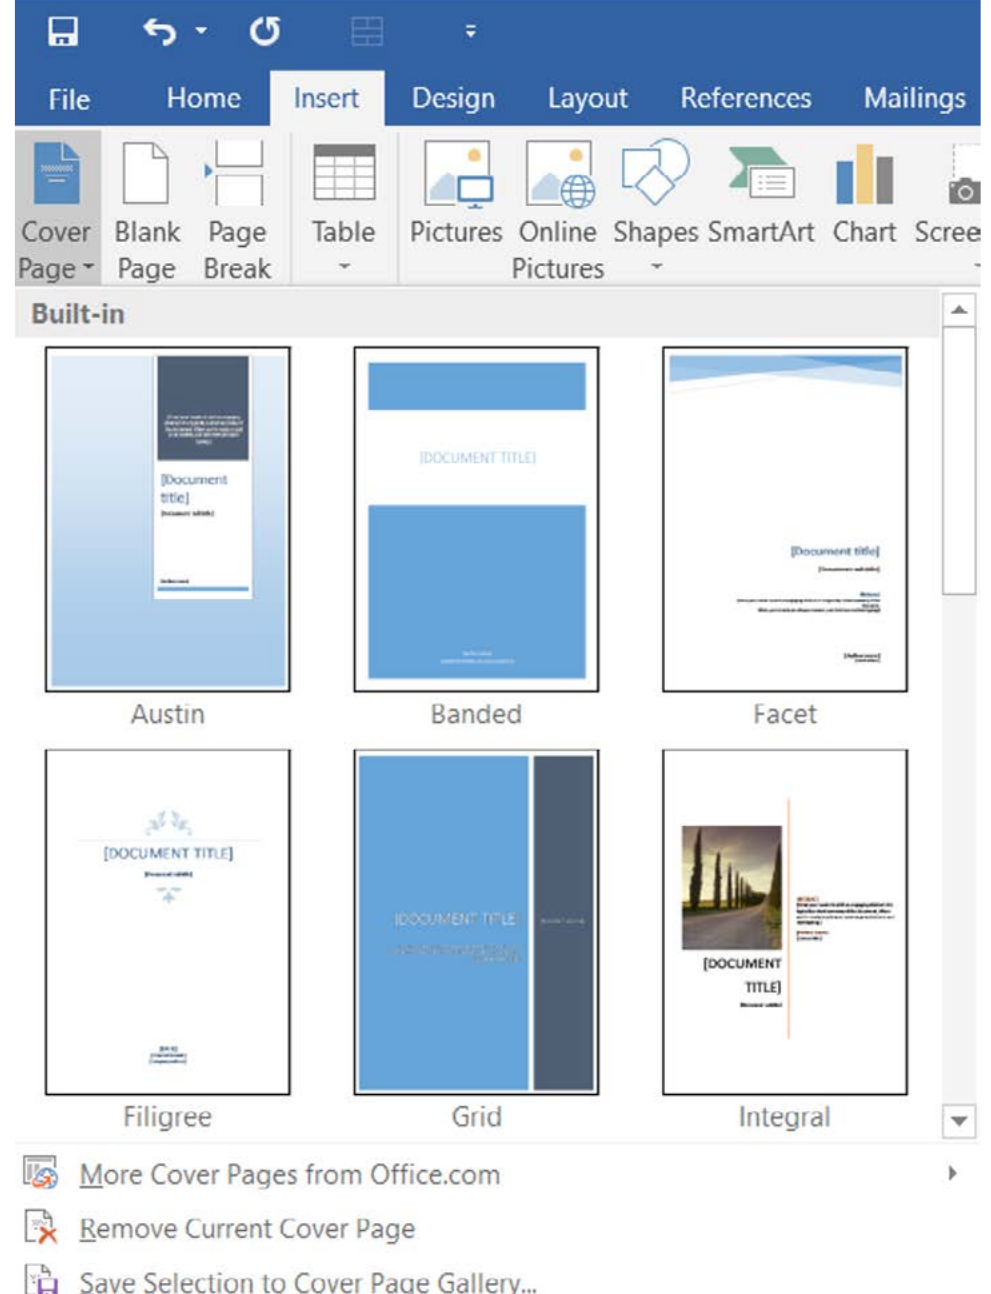
A cover page is essential when creating professional reports or documents. It serves as the first impression for your readers and helps introduce your topic in an attractive, organised way. Microsoft Word offers a variety of pre-designed cover page templates that you can use and customise.
To insert a cover page, navigate to the Insert tab, find the Pages group, and select Cover Page. This will display a gallery of built-in templates including:
- Austin: A blue and white professional layout
- Banded: A solid blue design
- Facet: A clean, minimalist white design
- Filigree: A decorative white template
- Grid: A blue and dark grey split design
- Integral: A template featuring professional photography
You can also access additional cover page templates from Office.com if you need more options, or even save your own custom designs to the cover page gallery for future use.
When working with multiple documents

Sometimes you need to work with several Word documents at the same time, perhaps to compare information or copy content between files. Word provides several tools in the View ribbon tab to help you manage multiple documents effectively.
The key options for working with multiple documents include:
Switch Windows: This feature displays all your open Word documents, allowing you to quickly switch between different files. It's particularly useful when you have several documents open and need to move between them frequently.
Arrange All: This option arranges all your open documents side by side on your screen simultaneously. This is helpful when you need to see multiple documents at once and compare their contents.
View Side by Side: This feature allows you to open two different documents and compare them directly. You can scroll through both documents simultaneously, making it easy to spot differences or compare information.
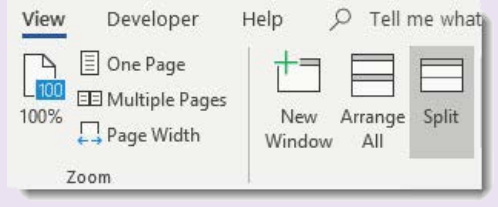
Split: This tool splits the current Word window so you can view different parts of the same document simultaneously. This is useful for long documents where you need to reference information from one section while working on another.
Practical Example: Comparing Documents
If you're writing an essay and need to compare your work with source material, you might use the View Side by Side feature to display both documents simultaneously. You can also use the synchronous scrolling option to scroll both documents together, or turn it off to scroll them independently.
Zooming
The zoom feature is essential when you want to get a closer look at your document details or see more of the document content at once. Word provides several ways to adjust the zoom level to suit your needs.
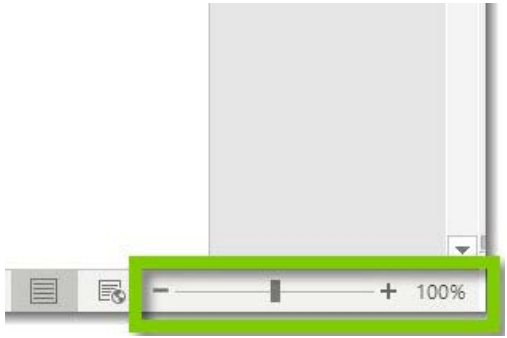
The easiest way to zoom is using the zoom slider located at the bottom right of the Word window. You can drag the slider left to zoom out (see more of the document at smaller size) or drag it right to zoom in (see less content but larger and clearer).
You can also set specific zoom percentages by accessing the View tab and selecting from the Zoom group. Common zoom options include:
- 200%: Very close view for detailed editing
- 100%: Standard viewing size
- 75%: Slightly reduced view
- Page width: Fits the page width to your window
- Text width: Optimises for reading text
- Whole page: Shows the entire page in the window
- Many pages: Displays multiple pages simultaneously
A quick keyboard shortcut for zooming is to hold down the Ctrl key while scrolling with your mouse wheel. This provides smooth, continuous zoom control.
Document views
Word offers several different ways to view your document, each designed for specific tasks and preferences. Understanding these view modes will help you work more efficiently.
Draught view
Draught view presents your document in a simplified format where pages appear as a continuous "roll" without showing individual page breaks. This view focuses purely on the text content, making it ideal for writing and editing. However, you won't see headers, footers, or the exact page layout in this view.
To access Draught view, go to the View tab and select the Draught button. When you're finished working in Draught view, you can return to Print Layout to see how your document will actually appear when printed.
Full screen reading

Full Screen Reading mode minimises the ribbon and other interface elements, allowing you to focus entirely on reading the document content. This view is perfect when you want to review a document without distractions from toolbars and menus.
To enter Full Screen Reading mode, navigate to the View tab and select the Read Mode button. When you're done reading, you can return to normal editing view by selecting View and then Edit document from the simplified menu.
This view mode is particularly useful for reviewing long documents, proofreading, or when presenting documents to others on screen.
Key Points to Remember:
- Margins can be customised using predefined options or custom measurements through the Page Setup dialogue box
- Mirror margins are essential for double-sided documents, while gutters provide extra space for binding
- Headers and footers appear on every page and can include automatic fields that update without manual intervention
- Cover pages provide professional first impressions using built-in templates that can be customised
- Multiple document tools like View Side by Side and Split help you compare and work with several files simultaneously
- Zoom controls allow you to adjust document magnification using the slider, specific percentages, or keyboard shortcuts