Working with Sheets (Grade 10 NSC Matric Computer Application Technology): Revision Notes
Working with Sheets
When working with spreadsheets, you'll often need multiple worksheets within a single workbook to organise different types of data. This section covers essential skills for managing worksheets effectively, including renaming them, controlling their visibility, customising their appearance, and preparing them for printing.
Renaming sheets
Giving your worksheets meaningful names is crucial for staying organised, especially when working with complex spreadsheets containing multiple sheets. Instead of using generic names like "Sheet1" or "Sheet2", you can rename them to reflect their content, such as "Food budget", "Sales data", or "Monthly report".
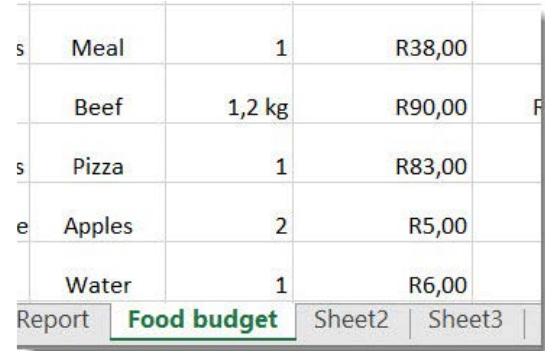
To rename a worksheet, you need to access the sheet tab at the bottom of your spreadsheet. The process involves right-clicking on any sheet tab to bring up a context menu with various options.
Renaming a Worksheet: Step-by-Step
- Right-click on the sheet tab you want to rename
- Select "Rename" from the context menu
- Type the new name for your worksheet
- Press Enter to confirm the change
This simple process helps you create a more professional and organised workbook structure that makes it easier to navigate between different sections of your data.
Using descriptive names like "January Sales", "Budget 2024", or "Customer Data" instead of generic sheet names makes your workbook much more user-friendly and professional.
Managing sheet visibility
Sometimes you may have sheets in your workbook that you don't need to see all the time, but you don't want to delete them permanently. Spreadsheet applications allow you to hide and unhide worksheets as needed, which helps keep your workspace tidy whilst preserving all your data.
Hiding worksheets
To hide a worksheet, you follow a similar process to renaming. Right-click on the tab of the sheet you want to hide, and from the context menu that appears, select "Hide". The worksheet will immediately disappear from view, though all its data remains safely stored in the workbook.
Unhiding worksheets
When you need to access a hidden worksheet again, you can easily bring it back into view. Right-click on any visible sheet tab and select "Unhide" from the menu. This will show you a list of all currently hidden sheets in your workbook. Simply select the sheet you want to make visible again, and it will reappear in your tab bar.
Hidden sheets preserve all their data completely - nothing is deleted when you hide a sheet. If you've hidden multiple sheets, the unhide function will show you a complete list of all hidden sheets, making it easy to bring back exactly the sheet you need.
Customising sheet appearance
Adding tab colours
Visual organisation becomes even more effective when you add colours to your worksheet tabs. Different colours can represent different categories of data, time periods, or importance levels, making it much easier to navigate through your workbook quickly.
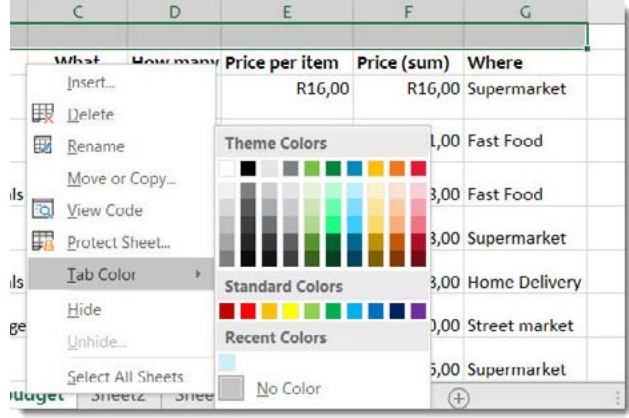
To add colour to a sheet tab, right-click on the tab and select "Tab Colour" from the context menu. This opens a colour palette where you can choose from theme colours, which are designed to work well together, or select from a range of standard colours. You can also access recently used colours if you want to maintain consistency across multiple sheets.
The colour you select will appear on the tab, making it instantly recognisable amongst your other worksheets. This visual system is particularly helpful when working with large workbooks containing many different sheets.
Headers and footers
Headers and footers are essential elements for creating professional-looking printed documents. A header appears at the top of each printed page, while a footer appears at the bottom. These elements can contain useful information such as page numbers, dates, workbook names, or other identifying details.
Headers and footers are only visible when you're in Page Layout view, not in the standard Normal view that you typically use for data entry. This is because headers and footers are specifically designed for printed output rather than on-screen work.

Understanding page layout view
Before you can work with headers and footers effectively, you need to understand the difference between Normal view and Page Layout view. Page Layout view shows your worksheet as it will appear when printed, including space for headers and footers.
Adding headers and footers
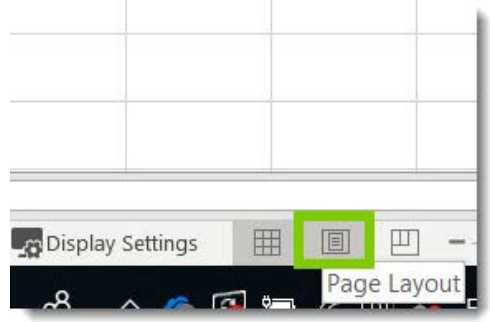
To work with headers and footers, you first need to switch to Page Layout view. You can do this by navigating to the bottom right-hand side of your workbook interface and selecting the Page Layout view option. Once you're in this view, your worksheet will display how it will look when printed, including space for headers and footers.
In Page Layout view, you can click directly in the header or footer areas to add content. The Header & Footer Tools will appear in the ribbon, providing you with various options for inserting page numbers, dates, workbook names, and other elements. These tools make it easy to create professional-looking documents with consistent formatting across all pages.
When you return to Normal view, the headers and footers won't be visible on screen, but they will still be there and will appear when you print or work in Page Layout view again.
Printing worksheets
Printing spreadsheets effectively requires understanding several key concepts that help you control exactly what gets printed and how it appears on paper.
Setting print areas
Rather than printing an entire worksheet, you might want to print only specific sections of your data. The print area feature allows you to select exactly which cells should be included when you print.
Setting a Print Area: Step-by-Step
- Select the range of cells you want to print
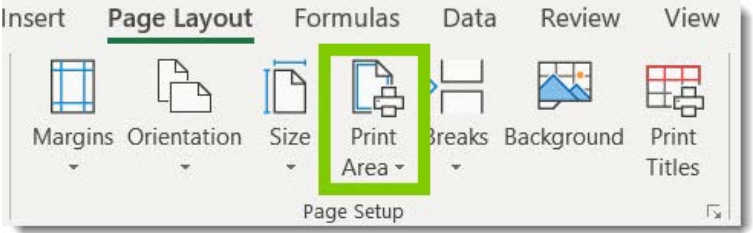
- Navigate to the Page Layout tab in the ribbon
- Look for the Page Setup group
- Click on "Print Area"
- Select "Set Print Area" from the dropdown menu
This feature is particularly useful when you have large spreadsheets with data that extends far beyond what's relevant for a particular report or when you want to print different sections for different audiences.
Adjusting page dimensions
When your spreadsheet contains more data than will fit comfortably on a standard page, you can use scaling options to make everything fit properly. The Scale to Fit options allow you to automatically adjust the size of your worksheet content so it prints on a specific number of pages.
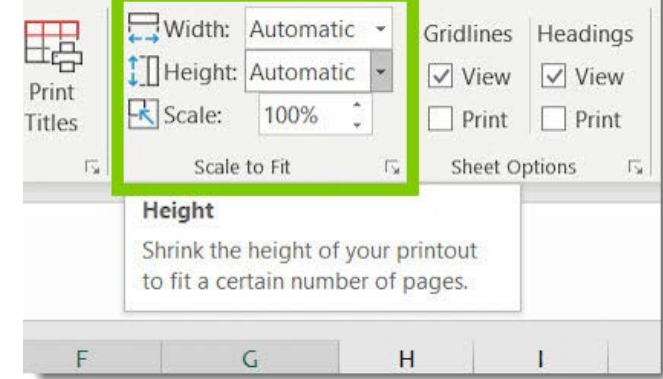
You can access these options through the Page Layout tab, where you'll find width and height settings that can be set to "Automatic" or customised to your needs. You can also adjust the scale percentage manually if you prefer more precise control over the final appearance.
Additional print settings
The print interface provides many additional options similar to those found in word processing applications. You can choose whether to print the active sheet, the entire workbook, or just a selection of worksheets. You can also control page orientation (portrait or landscape), paper size, and margins to ensure your printed output looks exactly as you intended.
Understanding these printing options helps ensure that your spreadsheets translate effectively from screen to paper, maintaining their professional appearance and readability in printed form.
Key Points to Remember:
- Right-click sheet tabs to access renaming, hiding, and colour options - this is your primary tool for sheet management
- Use meaningful names for your worksheets to stay organised, especially in complex workbooks with multiple sheets
- Hidden sheets preserve all data - they're safely stored even when not visible, and can be unhidden whenever needed
- Headers and footers only appear in Page Layout view - switch views when you need to work with printing elements
- Set print areas to control exactly what gets printed, avoiding unnecessary pages and focusing on relevant data