Text in Word Processing (Grade 10 NSC Matric Computer Application Technology): Revision Notes
Text in Word Processing
Word processing is the foundation of creating digital documents. Understanding how to effectively work with text will make you more efficient when creating reports, assignments, and other documents. This section covers the essential skills you need to enter, edit, and format text in word processing applications.
Mastering these fundamental text handling skills will significantly improve your productivity and help you create more professional-looking documents. These techniques form the building blocks for all advanced word processing features.
Entering text
When you open a new document, you'll notice a blinking vertical line that shows you exactly where your text will appear when you start typing. This is a fundamental concept you need to understand before diving into more advanced features.
The insertion point
The insertion point is your starting position for any text entry. Think of it as your digital pen tip - wherever it's positioned, that's where your words will appear on the page.
The insertion point is a blinking vertical line that indicates exactly where text will be entered when you start typing. This is one of the most basic yet crucial concepts in word processing - you must understand where your text will appear before you begin typing.
In a blank document, you'll find the insertion point positioned at the top-left corner of the page. This positioning makes sense because we read and write from left to right, top to bottom. When you begin typing, your text flows naturally from this starting position.
Understanding the cursor
While working in text documents, your mouse pointer transforms into what's called a cursor. You'll recognise it as an "I" shape, which is specifically designed for text work. When you click anywhere in your document, the insertion point moves to that exact location, ready for you to continue typing.
Basic text entry techniques
Creating professional documents requires understanding these fundamental techniques:
Essential Text Entry Methods:
Adding spaces: Use the spacebar to create gaps between words and characters. This seems obvious, but proper spacing is crucial for readable documents.
Creating new paragraphs: Press the Enter key to start a new paragraph line. This moves your insertion point to the beginning of the next line, giving you a fresh start for new ideas or sections.
Working with symbols and special characters
Sometimes you need characters that aren't available on your keyboard - mathematical symbols, currency signs, or special punctuation marks. Word processors provide easy access to these through their symbol insertion features.
Inserting symbols
To access symbols and special characters, you'll need to navigate to the Insert section of your word processor and locate the Symbols group. This opens up a world of possibilities beyond your standard keyboard.
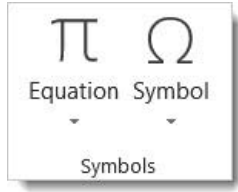
Step-by-Step Symbol Insertion:
Step 1: Position your insertion point where you want the symbol to appear
Step 2: Access the Insert tab and find the Symbols section\
Step 3: Choose from the dropdown selection of commonly used symbols
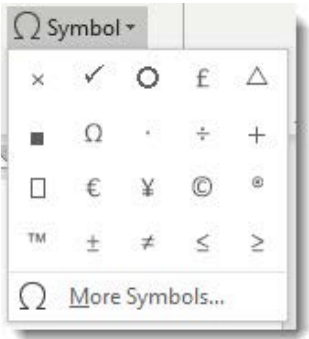
Accessing more symbols
When the basic symbol menu doesn't contain what you need, look for a "More Symbols" option. This opens an expanded dialogue box with hundreds of additional characters organised by categories.
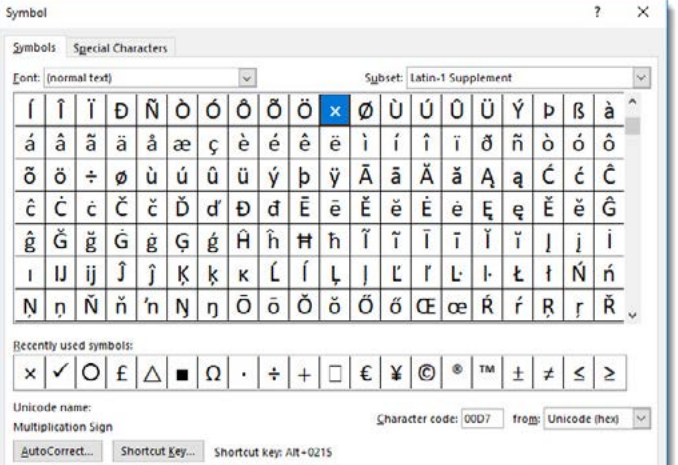
This expanded symbol library includes:
- Mathematical operators and equations
- Currency symbols from around the world
- Accented letters for different languages
- Trademark and copyright symbols
- Geometric shapes and arrows
Professional Tip: Many symbols have keyboard shortcuts listed in the dialogue box. Learning these shortcuts can speed up your document creation significantly.
Text editing fundamentals
Creating documents isn't just about entering text - you'll frequently need to modify, rearrange, and refine your content. Understanding text editing techniques is essential for producing polished, professional documents.
Selecting text effectively
Before you can edit any text, you must first select it. Think of text selection as highlighting the specific words or passages you want to modify. There are two primary methods for selecting text, each with their own advantages.
Mouse selection techniques
Using your mouse for text selection gives you precise visual control over exactly which text you're choosing. The process is intuitive and matches how you might highlight text with a physical marker.
Mouse Text Selection Process:
Step 1: Click and hold at the beginning of the text you want to select
Step 2: Drag your mouse across the text you want to highlight
Step 3: Release the mouse button when you've covered all desired text
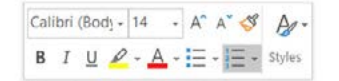
The selected text will appear highlighted in a different colour, showing you exactly what will be affected by your next action. When you successfully select text, you'll often see a small toolbar appear with common formatting options.
Quick selection shortcuts:
- Double-click on any word to select just that word
- Triple-click anywhere in a paragraph to select the entire paragraph
These shortcuts can save significant time when you're working with longer documents.
Keyboard selection methods
Keyboard shortcuts offer speed and precision, especially when you're already typing and don't want to reach for your mouse. The key to keyboard selection is the Shift key combined with navigation keys.
The Shift key acts as your selection modifier. Hold it down while using arrow keys to extend your selection in any direction:
| Selection Task | Key Combination |
|---|---|
| Select characters to the right | Shift + → |
| Select characters to the left | Shift + ← |
| Select text upward by lines | Shift + ↑ |
| Select text downward by lines | Shift + ↓ |
| Select to end of line | Shift + End |
| Select to beginning of line | Shift + Home |
Pro tip: To select all text in your document instantly, use Ctrl+A. This is incredibly useful when you need to apply formatting to an entire document.
Text deletion and modification
Sometimes you need to remove text from your document entirely. Understanding different deletion methods helps you work more efficiently and avoid accidentally removing the wrong content.
Deletion methods
Key Deletion Differences:
Backspace key method: The Backspace key removes characters to the left of your insertion point. If you've selected a block of text, pressing Backspace will delete the entire selection.
Delete key method: The Delete key removes characters to the right of your insertion point. Like Backspace, if you have text selected, it will remove the entire selection.
Remember: Backspace deletes left, Delete key deletes right - this distinction is frequently tested in assessments.
Mouse selection deletion: First select the text you want to remove using any of the selection methods described earlier, then simply start typing your replacement text. The selected text will be automatically replaced, or you can press Delete or Backspace to remove it entirely.
Punctuation and spacing
Professional documents require proper punctuation and spacing. Poor spacing can make even well-written content appear unprofessional and difficult to read.
Spacing rules
The Golden Rule of Document Spacing:
Use only one space between words and after punctuation marks. This might feel different if you learned to type on older typewriters, which required two spaces, but modern word processors are designed for single spacing.
Checking your spacing
Word processors include tools to help you identify spacing problems. Look for the Show/Hide symbol (¶) in your formatting toolbar. When activated, this feature reveals hidden formatting marks, including spaces, paragraph breaks, and tabs.
This visibility tool helps you:
- Identify multiple spaces between words
- See unnecessary paragraph breaks
- Understand document structure better
- Troubleshoot formatting problems
Exam tips and common pitfalls
Understanding these common mistakes can help you avoid them and perform better in assessments:
Common Student Mistakes to Avoid:
Selection mistakes: Students often struggle with text selection, either selecting too much or too little text. Practice the double-click and triple-click shortcuts - they're frequently tested and incredibly useful in real work.
Symbol insertion confusion: Remember that symbols are found in the Insert tab, not the Home tab. The process is always: Insert → Symbols → choose your symbol.
Deletion direction confusion: Remember that Backspace deletes to the left (backwards) and Delete removes to the right (forwards). This distinction is often tested in practical assessments.
Spacing errors: One of the most common mistakes is using multiple spaces between words. Always use single spaces only - this is considered professional standard.
Key Points to Remember:
- The insertion point shows you exactly where text will appear when you type
- Symbols and special characters are accessed through Insert → Symbols
- Text must be selected before it can be edited or formatted
- Shift + arrow keys provide precise keyboard text selection
- Use only one space between words and after punctuation marks
- The Show/Hide symbol helps you see and fix spacing problems