Assembly Diagrams (Grade 10 NSC Matric Mathematical Literacy): Revision Notes
Assembly Diagrams
What are assembly diagrams?
When you purchase items like furniture, electronics, or DIY kits, they often come unassembled to save space and shipping costs. These items include assembly instructions to help you put them together correctly.
Key Definitions:
Assembly instructions are step-by-step directions (usually short sentences) that describe how to assemble an item.
Assembly diagrams are annotated pictures with labels and numbers that show in detail how to assemble an item visually.

Assembly diagrams are essential because they help you avoid the frustration of incorrect assembly. They provide both visual and written guidance to ensure successful completion.
Common symbols in assembly diagrams
Assembly diagrams use standard symbols to represent tools and actions. Learning these symbols helps you understand instructions quickly:
| Symbol | Tool | Purpose |
|---|---|---|
| ✂️ | Scissors | Cutting materials |
| 🔩 | Screw | Fastening components |
| 🪛 | Screwdriver | Tightening or loosening screws |
| 🔨 | Hammer | Driving nails or fitting parts |
Understanding these symbols is vital to ensure you know what tools are needed for each step of assembly.
Reading assembly instructions
Assembly diagrams combine visual elements with written descriptions. Each step is typically:
- Numbered to show the correct sequence
- Illustrated with clear diagrams
- Described in simple, direct language
Some assembly instructions provide only pictures to avoid translation issues, while others include written steps. You must be able to interpret both types effectively.
Understanding step-by-step instructions
Worked Example: Dog kennel assembly
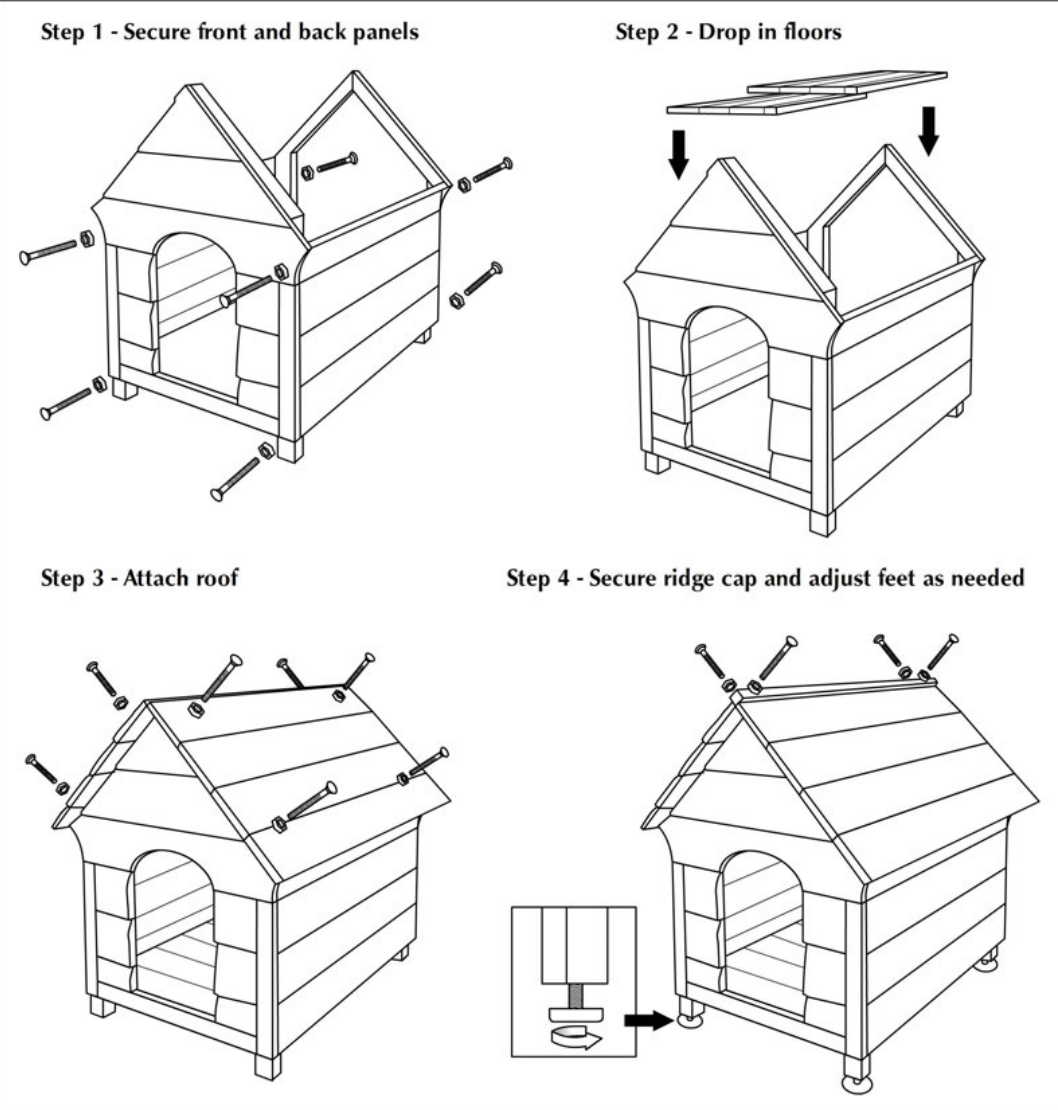
Let's examine how to read a typical assembly diagram:
Step 1: Secure the front and back panels by aligning them properly and inserting screws in the indicated positions. The screws may not be provided with the kennel initially.
Step 2: Insert the floor piece from the top. The floor should fit snugly inside without requiring screws for support.
Step 3: Attach the roof using 8 screws placed in the positions marked on the diagram. This creates the peaked roof structure.
Step 4: Install the ridge cap at the roof peak using four screws, then adjust the levelling feet at the base to ensure the kennel sits level.
Worked Example: Entertainment system setup
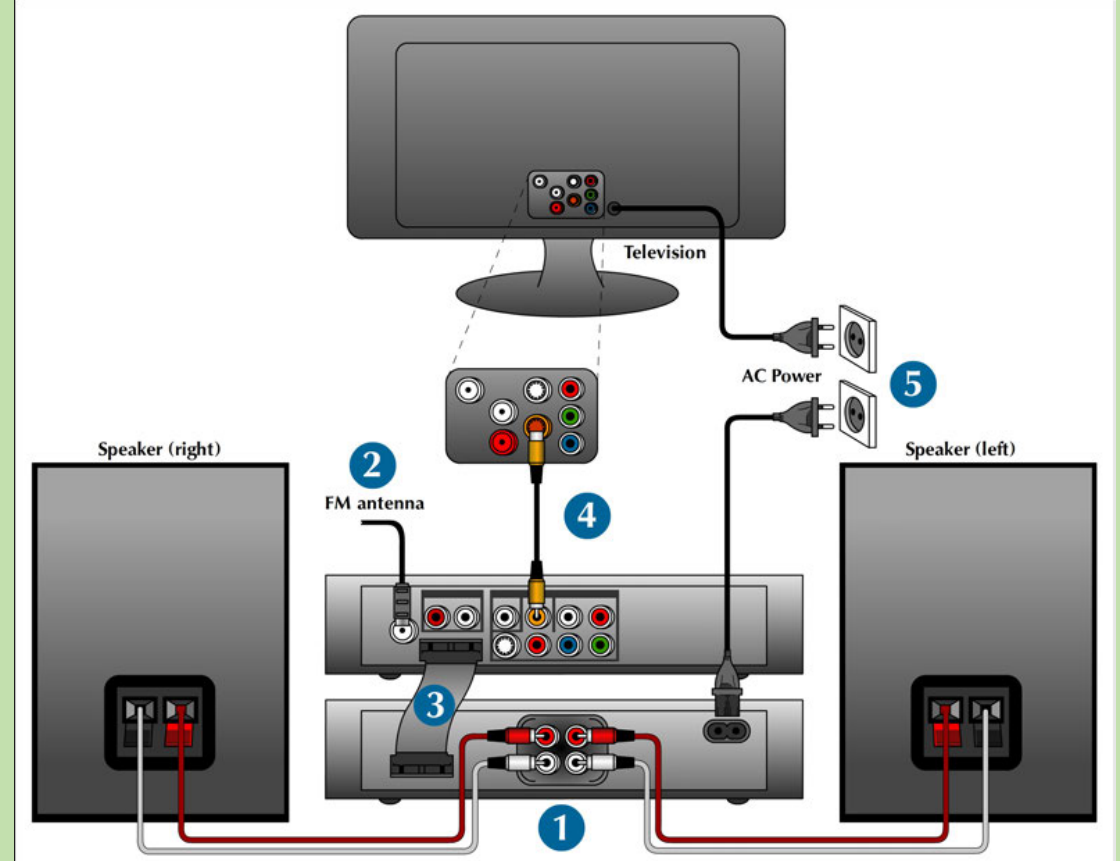
In this diagram, numbered steps correspond to specific connection tasks:
| Step | Description |
|---|---|
| 1 | Connect the speaker cables |
| 2 | Connect the FM antenna |
| 3 | Connect the control cable |
| 4 | Connect the composite video cable to TV |
| 5 | Connect the power cables for system and TV |
This example shows how complex assembly can be broken into simple, manageable steps.
Writing assembly instructions
When creating assembly instructions, you must use clear communication principles:
Essential Requirements for Assembly Instructions:
- Use clear, simple language
- Number each step in logical order
- Include directional cues (up, down, left, right)
- Specify tools required for each step
- Mention safety precautions where needed
Worked Example: SIM card installation
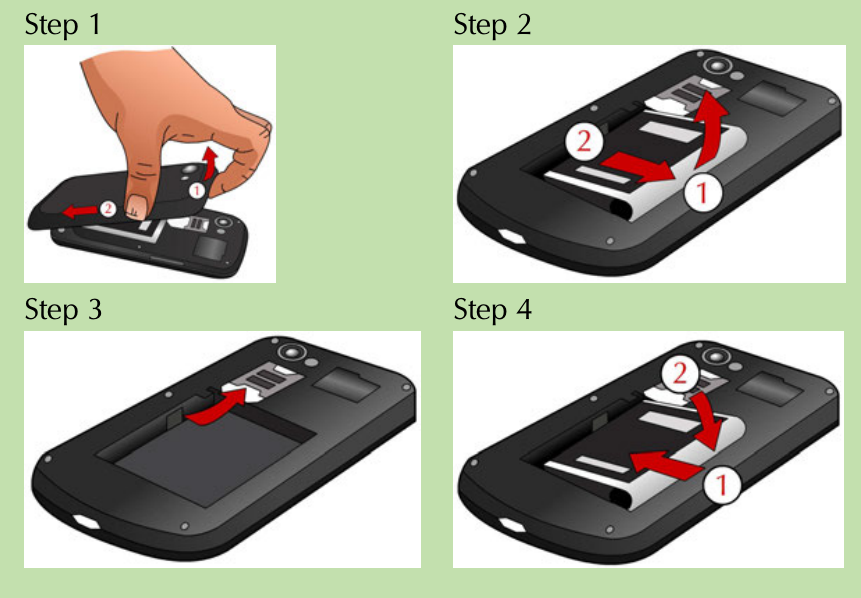
Step 1: Use the SIM ejector tool to press the release button and lift the back cover.
Step 2: Remove the battery by sliding your finger underneath and lifting it out of the phone.
Step 3: Insert the SIM card into the designated socket, ensuring the gold contacts face downward.
Step 4: Replace the battery by sliding it back into position and pressing down firmly.
Key safety considerations
CRITICAL SAFETY WARNING
When working with electrical components, safety is paramount:
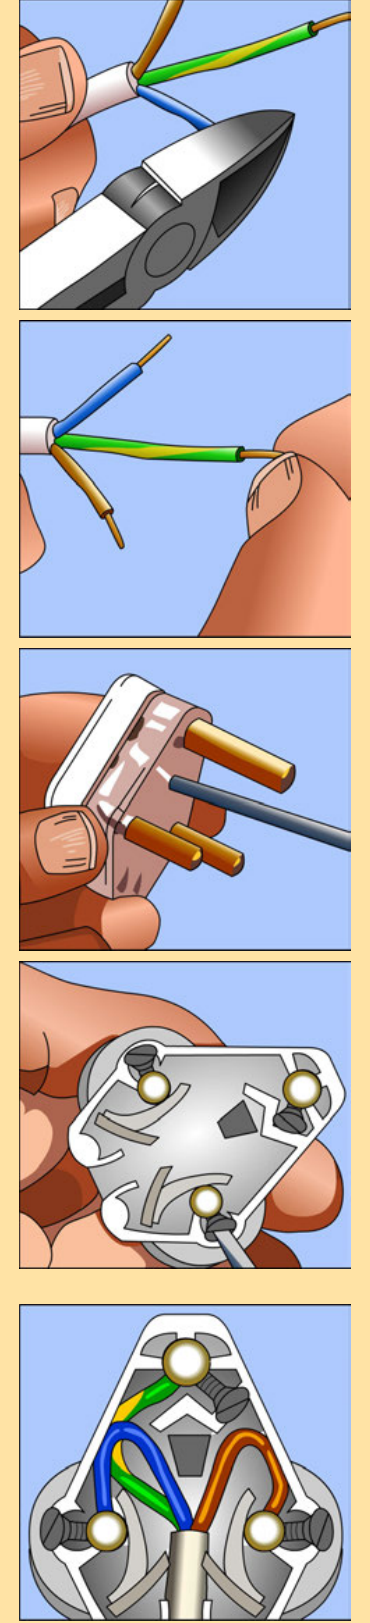
Electrical wiring safety rules:
- Never attempt electrical work without proper supervision
- Always disconnect power before beginning work
- Use appropriate tools for electrical connections
- Follow colour coding for wires:
- Green/Yellow: Earth wire (top prong)
- Blue: Neutral wire (left prong)
- Brown: Live wire (right prong)
Electrical appliances can cause serious injury or death if wired incorrectly. Always seek qualified help for electrical assembly tasks.
Complex assembly projects
Some assembly projects involve multiple intricate steps requiring careful attention to detail:
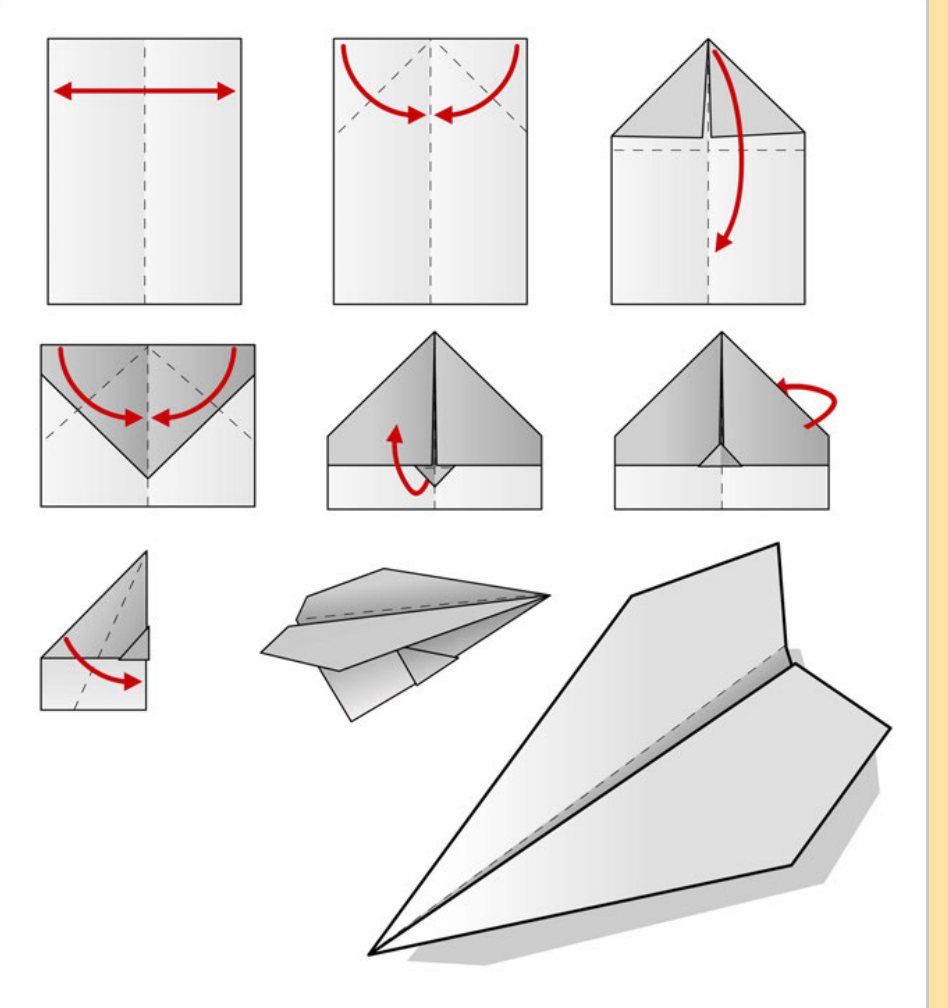
This paper aeroplane example demonstrates how even simple projects benefit from clear, sequential instructions. Each fold must be completed accurately for the final product to function correctly.
Exam tips for assembly diagrams
Key Exam Strategies:
- Read all instructions before starting assembly
- Identify required tools from symbols shown
- Follow the numbered sequence exactly
- Match written descriptions to visual steps
- Pay attention to directional arrows and orientation cues
- Consider safety requirements especially for electrical items
- Double-check connections before testing equipment
Remember - Key Points to Master:
- Assembly diagrams combine pictures and words to show how to build something step-by-step
- Learn common symbols like scissors, screws, screwdrivers, and hammers to understand instructions quickly
- Always follow the numbered sequence - skipping steps leads to mistakes
- Safety first - never attempt electrical assembly without proper supervision and knowledge
- Practice interpreting both visual-only and text-with-picture instructions for exam success