3D Trigonometry (AQA GCSE Maths): Revision Notes
3D Trigonometry
Introduction to working with 3D problems
Working with trigonometry in three dimensions might seem challenging at first, but it actually uses the same fundamental principles you already know from 2D trigonometry. The key is to break down complex 3D problems into simpler 2D triangles that you can solve using familiar methods.
The beauty of 3D trigonometry lies in its simplicity - you're not learning entirely new concepts, just applying familiar 2D techniques to three-dimensional situations. This makes it much more manageable than it might initially appear.
Finding angles between lines and planes
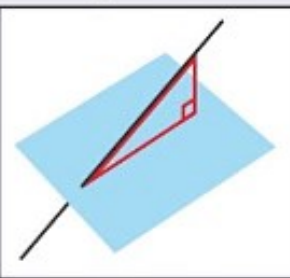
When you need to find the angle between a line and a plane, there's a systematic approach that makes the problem much more manageable. This method involves three essential steps that help you convert a 3D problem into a 2D one.
The three-step method
Master the Three-Step Method:
This systematic approach is your key to solving any line-plane angle problem. Each step builds on the previous one, so don't skip any steps!
Step 1: Create a right-angled triangle Start by identifying where your line meets the plane and construct a right-angled triangle. This triangle should include the line you're interested in and show its relationship to the plane clearly.
Step 2: Draw a 2D sketch Take your 3D triangle and redraw it as a simple 2D diagram. Mark the lengths of at least two sides on your sketch. You may need to use Pythagoras' theorem to calculate one of these lengths if it's not immediately obvious.
Step 3: Apply trigonometry Use the appropriate trigonometric ratio (sine, cosine, or tangent) to find the angle. Remember that you'll often need to use inverse trigonometric functions to find the actual angle value.
Worked example with a pyramid
Worked Example: Finding the Angle in a Square-Based Pyramid
Consider a square-based pyramid where you need to find the angle between an edge and the base.
Step 1: Identify the right-angled triangle formed by the edge, the base, and the vertical height.
Step 2: Sketch this triangle in 2D, calculate any missing side lengths using Pythagoras' theorem.
Step 3: Use trigonometry to find the required angle.
This systematic approach transforms a complex 3D problem into a manageable 2D calculation.
Using trigonometric rules in 3D shapes
The sine rule and cosine rule aren't just limited to 2D problems - they work perfectly well in three dimensions too. When you encounter triangles within 3D shapes that aren't right-angled, these rules become particularly useful.
The cosine rule in 3D contexts
For triangles that don't have a right angle, the cosine rule allows you to find unknown angles or sides. The formula remains the same:
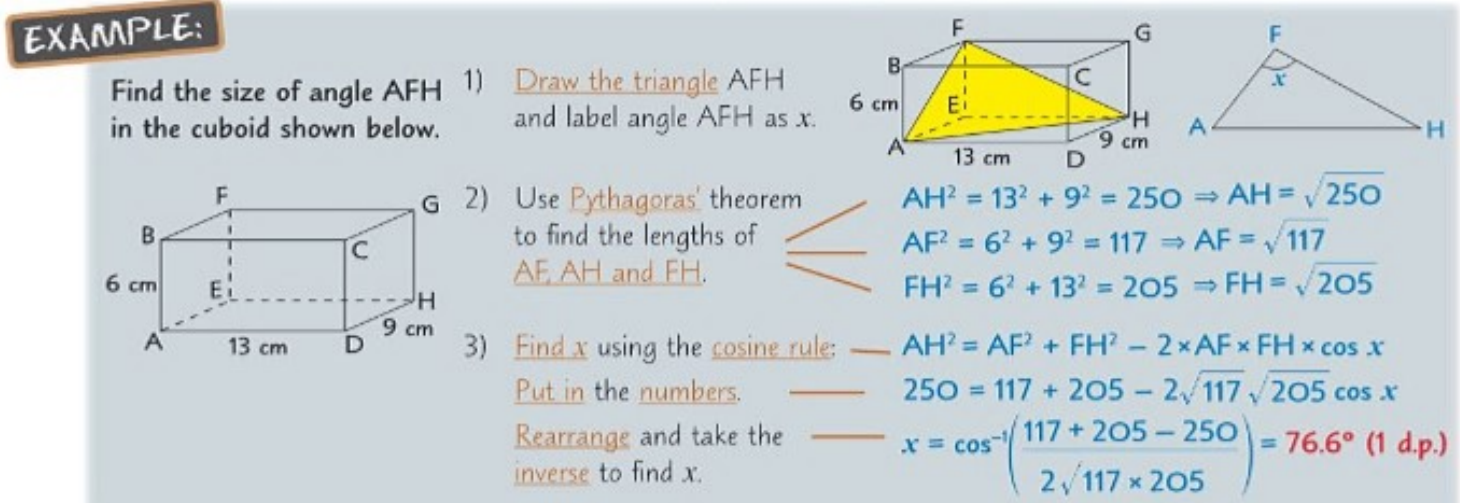
This is especially helpful when working with cuboids, pyramids, or other 3D shapes where you need to find angles between different edges or faces.
Practical application steps
Applying the Cosine Rule in 3D Problems:
When working with non-right-angled triangles in 3D contexts, follow this systematic approach to ensure accuracy and clarity in your calculations.
When applying the cosine rule in 3D problems:
- Identify the triangle you need to work with
- Use Pythagoras' theorem to find the lengths of the triangle's sides
- Apply the cosine rule to calculate the required angle
- Don't forget to use the inverse cosine function to find the angle from the cosine value
Working with cuboids and rectangular prisms
Cuboids provide excellent examples for practising 3D trigonometry because their structure creates clear right-angled triangles. When finding angles between diagonal lines in a cuboid, you often need to work with multiple triangles and combine different trigonometric approaches.
The process typically involves identifying key triangles within the cuboid, using Pythagoras' theorem to find diagonal lengths, and then applying trigonometric ratios or the cosine rule to find the required angles.
Why Cuboids Are Perfect for Practice:
Cuboids are ideal for learning 3D trigonometry because they naturally create right-angled triangles. This makes it easier to identify the triangles you need and apply familiar trigonometric concepts.
Problem-solving strategies
General Problem-Solving Approach:
Remember that confidence in 3D trigonometry comes from systematic thinking and clear visualisation. Don't rush - take time to understand the geometry before applying calculations.
When faced with any 3D trigonometry problem, remember that the same fundamental rules apply. Don't be intimidated by the three-dimensional aspect - instead, focus on breaking the problem down into manageable 2D components.
Always start by clearly identifying what you're looking for and what information you have. Draw diagrams to help visualise the problem, and don't hesitate to use Pythagoras' theorem to find missing lengths before applying trigonometric ratios.
Common Mistake to Avoid:
Don't try to solve 3D problems directly in three dimensions. Always break them down into 2D triangles first - this approach is far more reliable and less prone to errors.
Summary
Key Points to Remember:
- 3D trigonometry uses exactly the same rules as 2D - just applied to three-dimensional shapes
- The three-step method (make a right-angled triangle, sketch in 2D, use trigonometry) is your key tool for line-plane angle problems
- Pythagoras' theorem is often needed to find missing side lengths before you can apply trigonometric ratios
- The sine rule and cosine rule work perfectly well in 3D contexts for non-right-angled triangles
- Always draw clear diagrams to help visualise the problem and identify the triangles you need to work with