Fireplace Construction (Leaving Cert Construction Studies): Revision Notes
Fireplace construction
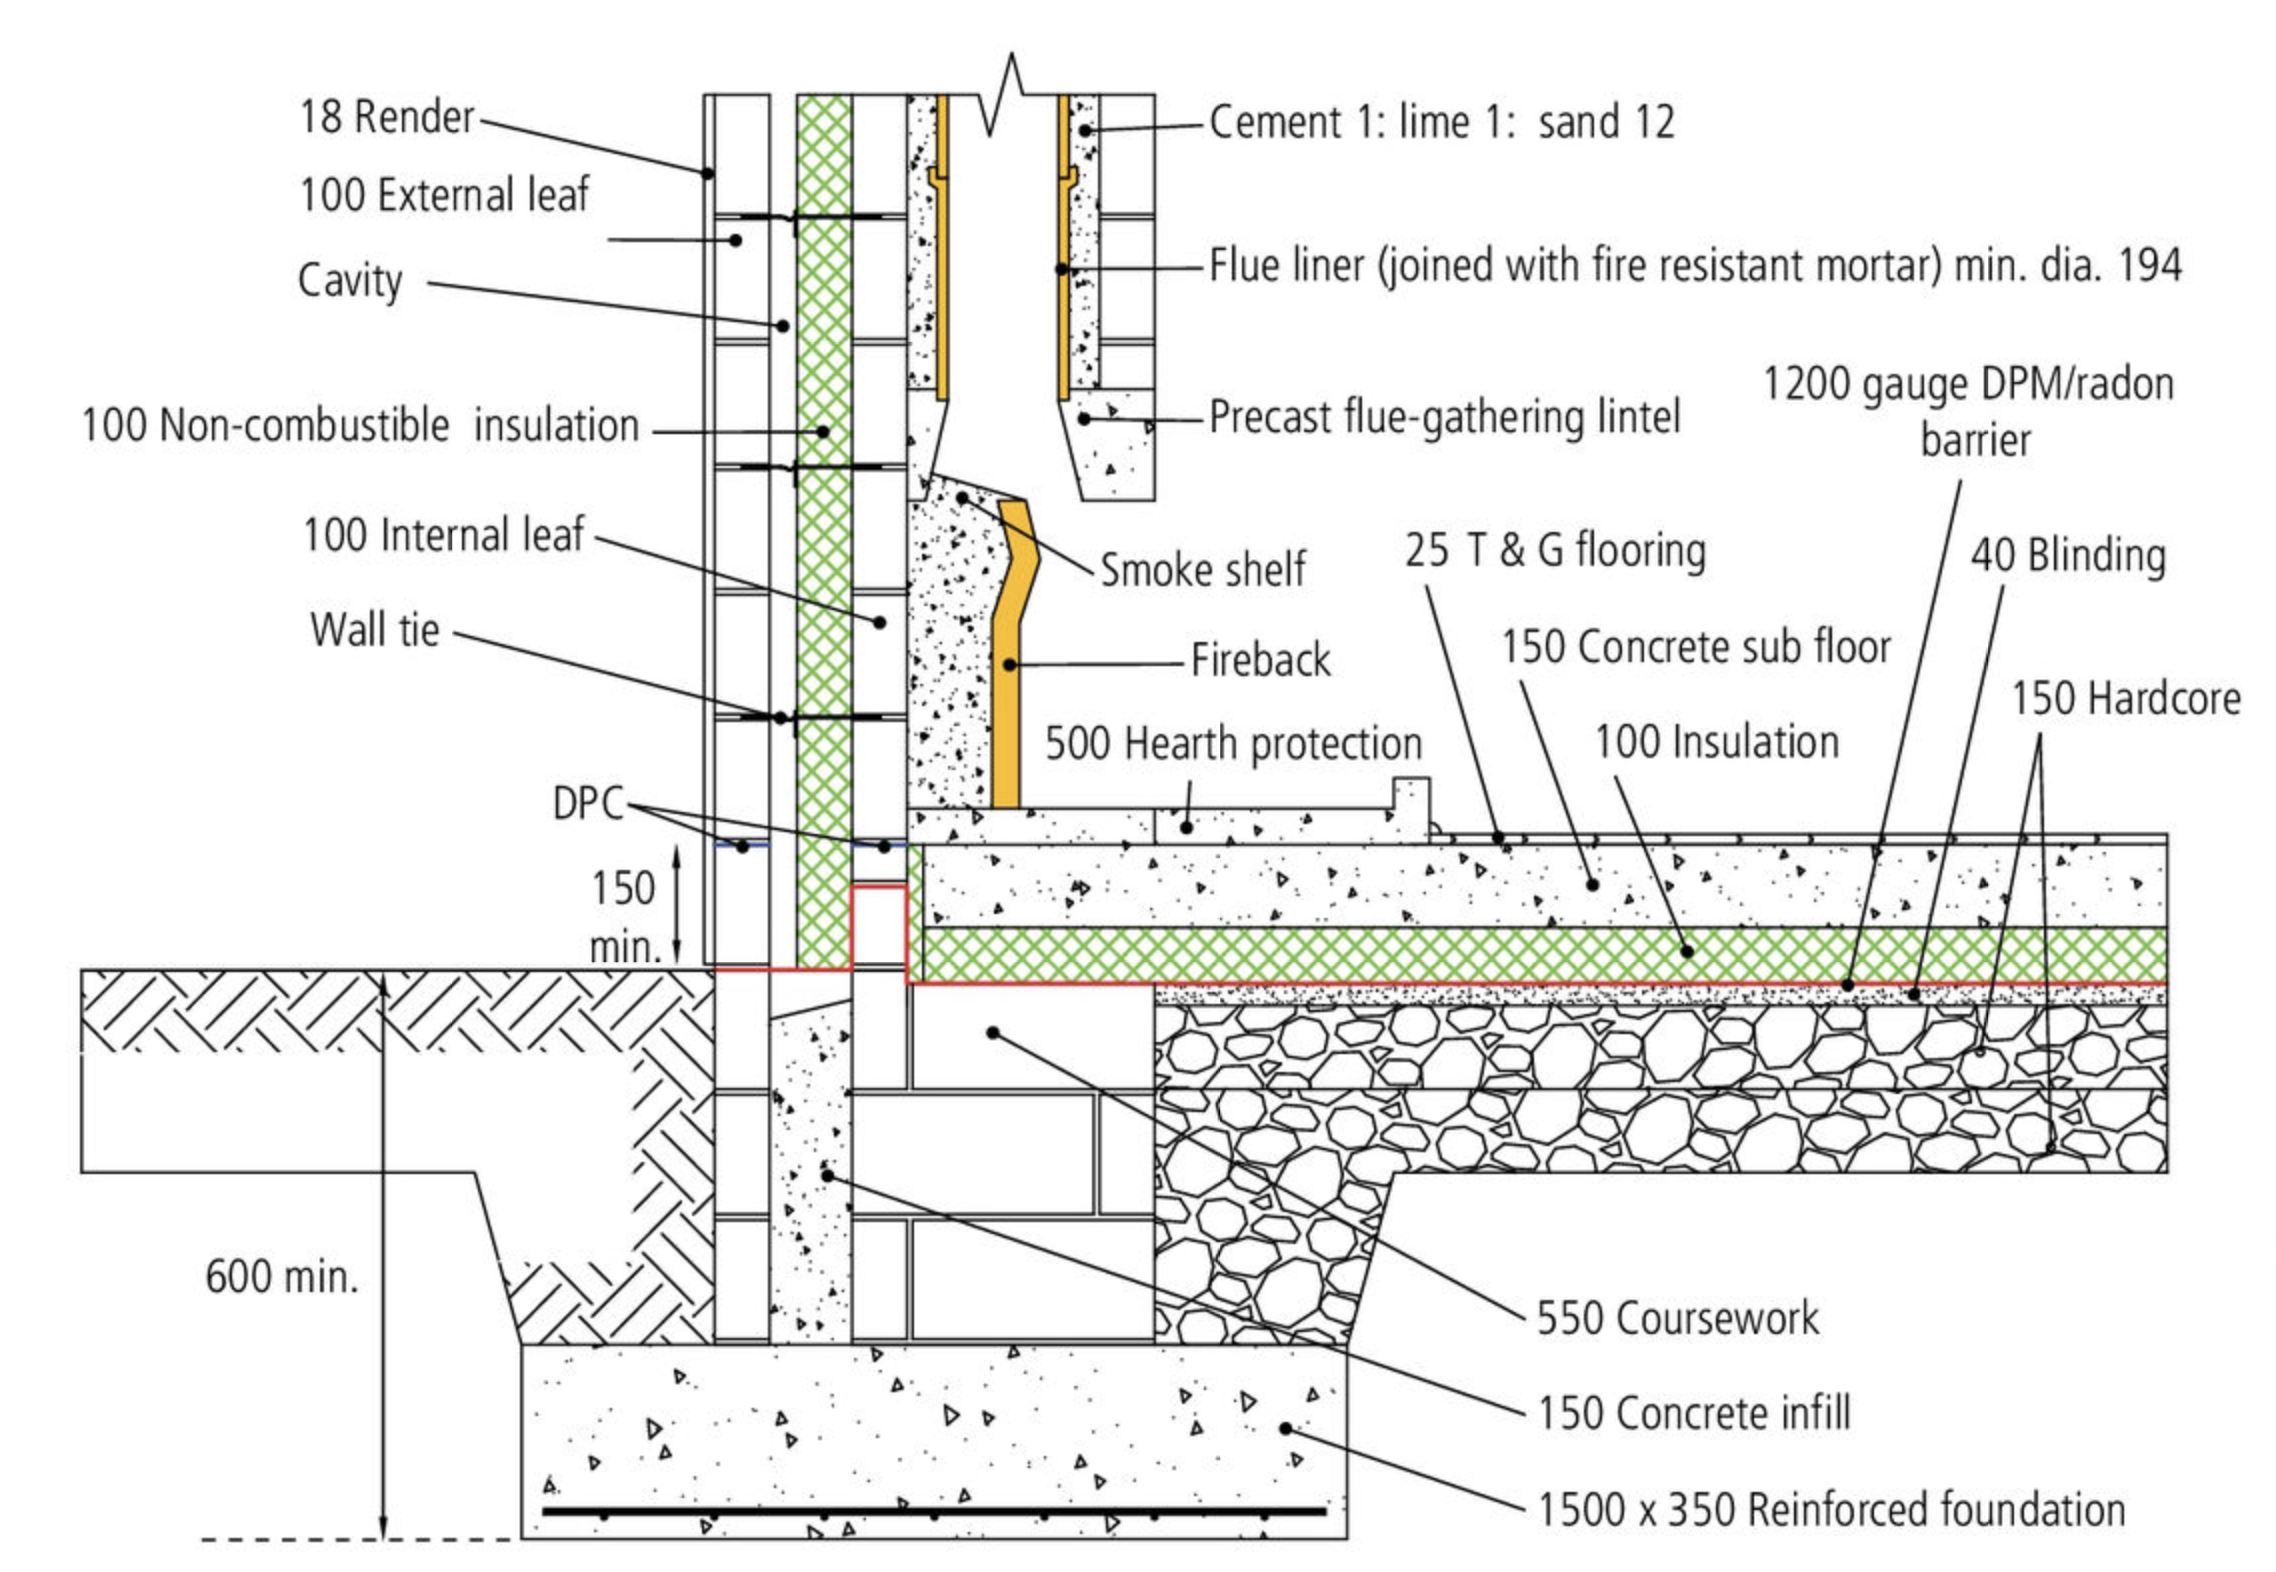
A fireplace is constructed using blockwork to create an opening that houses a fire source. The construction process involves creating a recess in the wall, installing key components, and ensuring proper ventilation and weatherproofing systems are in place.
The success of fireplace construction depends on precise measurements and proper component integration to ensure safe operation and effective smoke removal.
Essential fireplace components
Fireback
The fireback is a solid, cast concrete sheet positioned at the back of the fireplace opening. This component serves as the rear wall of the fire chamber and its dimensions determine the size of the recess that needs to be created in the blockwork.
Flue-gathering lintel
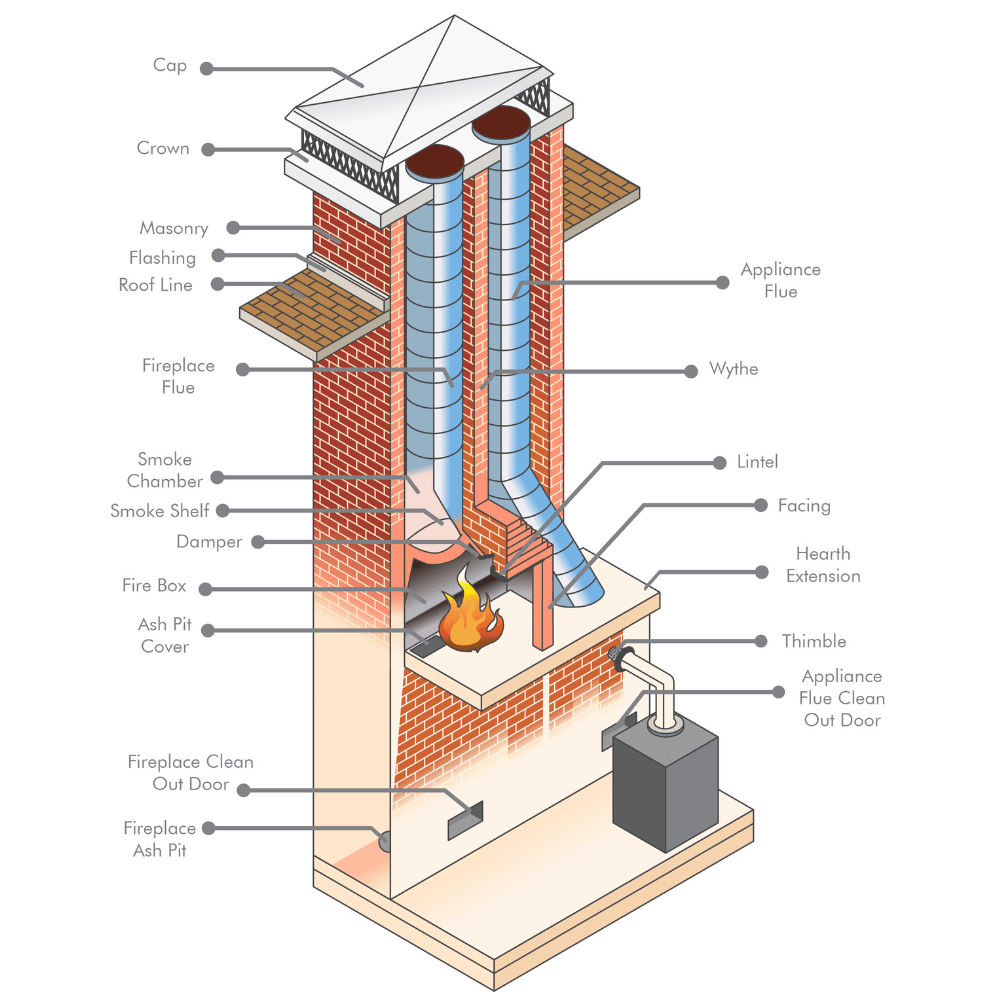
A precast flue-gathering lintel sits on top of the blockwork jambs or piers. This component supports the top opening of the fire chamber and contains a hole that allows combustion gases to escape upwards into the flue system.
Smoke shelf and throat
The smoke shelf is located just above the fireback and serves a critical function in preventing downdraughts that could push smoke back into the room. The throat is the narrowed opening between the fireback and the flue system.
The smoke shelf is essential for preventing downdraughts - without it, smoke can be forced back into the living space, creating dangerous conditions.
Construction process
Creating the opening
Blockwork jambs or piers are built to create the fireplace opening. The width and depth of this recess must accommodate the specific fireback being installed, as the fireback sits within this recessed area.
Installing the flue-gathering lintel
The precast flue-gathering lintel is placed on top of the jambs. For proper operation, the distance between the fireback and the inner circular surface of the precast flue-gathering lintel must be exactly 100mm. This creates the necessary upward draught to prevent smoke from entering the room.
The 100mm gap between fireback and flue-gathering lintel is critical for proper draught - this measurement must be exact for safe operation.
Building the chimney stack
The chimney stack construction happens in stages. The internal portion uses flue liners with a minimum diameter of 200mm. These liners are fixed using fire-resistant mortar and do not make direct contact with the outer chimney stack.
Technical specifications
Insulation requirements
The cavity between the flue liners and the chimney stack must be filled with either:
- A dry mix of cement, lime and sand in the ratio
- Insulating concrete
Non-combustible insulation fills the cavity wall behind the fireplace and chimney stack to prevent heat transfer.
The cement-lime-sand ratio provides the right balance of insulation properties and structural integrity for cavity filling.
Foundation and structural support
The fireplace requires a reinforced foundation measuring 1500mm × 350mm. Above this sits concrete infill and coursework to provide a stable base for the entire structure.
Timber frame construction considerations
When building a chimney stack in timber frame construction, preventing heat transfer to wooden components is essential. Three methods can be used:
Widening the back wall
Making the back of the chimney stack wider provides greater separation between the heat source and timber elements.
Positioning away from timber
Locating the chimney stack away from the timber frame wall creates a safe distance.
Deepening the back wall
Making the back of the chimney stack deeper increases the thermal barrier between fire and timber.
Each method requires a minimum 40mm gap or 200mm separation depending on the approach used. These distances are critical for fire safety in timber frame construction.
Weatherproofing systems
Effective weatherproofing requires multiple integrated components working together to prevent water penetration and protect the chimney structure.
DPC tray system
The DPC (Damp Proof Course) tray is built into the chimney during construction. Its right-angled design prevents dampness from penetrating into the stack. The front surface includes drainage channels and weepholes that allow water to escape through the masonry.
Apron flashing
Positioned at the front of the chimney, apron flashing sits on top of roof slates with its upper edge covered by the DPC tray. This prevents moisture from entering between the slates and the front of the chimney, extending 100mm down over the slates.
Soakers
Individual soakers are installed alongside each slate that runs next to the chimney stack. Each soaker covers one course of slate and stands upright against the chimney by 75mm minimum, with the width covered by slate underlay of 100mm minimum.
Back gutter
The back gutter is placed on the upper part of the sloping roof behind the chimney stack. Its purpose is directing water away from the back to the sides of the chimney. The gutter covers the back corners and is raised at the back to prevent water seeping under the slates.
The back gutter is often the most critical weatherproofing element as it handles the largest volume of water runoff from the roof slope.
Cover flashing
Cover flashing is installed on all four sides of the chimney and guides water from the chimney face down onto other weatherproofing components. The top of the cover flashing is chased into the masonry using lead wedges to ensure no water can penetrate the brickwork.
Chimney capping
A chimney cap sits at the very top of the chimney stack and serves multiple protective functions. These caps can be manufactured from stainless steel, galvanised steel, or copper.
Functions of chimney caps
- Protects against rain and snow entry
- Prevents birds from entering the chimney
- Stops downdraughts that could affect fire performance
- Provides final weatherproofing for the stack
Types of caps
Various styles are available including simple cone shapes, decorative cowls with multiple openings, and precast concrete caps that integrate with the overall stack design.
Key Construction Points to Remember:
- The fireback determines the recess dimensions and sits at the back of the fireplace opening
- A 100mm gap between fireback and flue-gathering lintel creates proper upward draught
- Flue liners must be minimum 200mm diameter and fixed with fire-resistant mortar
- Multiple weatherproofing elements work together - DPC tray, apron flashing, soakers, back gutter, and cover flashing
- Timber frame construction requires special heat protection measures with minimum separation distances