Surface treatments and finishes (AQA GCSE Design and Technology): Revision Notes
Surface treatments and finishes
Surface treatments are techniques used to improve both the functional and aesthetic qualities of papers and boards. These processes can make printed materials more durable, visually appealing, and suitable for their intended purpose. Understanding different surface treatments helps you choose the right finishing technique for specific printing projects.
Surface treatments are typically applied after the main printing process is complete, adding an extra finishing step that can significantly enhance the final product's value and appeal.
Printing processes
All printing methods work by transferring ink or toner to paper through either direct contact or indirect (offset) methods. The choice of printing process depends on factors like quantity needed, quality requirements, cost considerations, and the type of material being printed.
Key factors for choosing printing processes:
- Quantity needed (short runs vs. large volumes)
- Quality requirements (detail level and colour consistency)
- Budget constraints (setup costs vs. per-unit costs)
- Material compatibility (paper types and surfaces)
 Offset lithography
This widely-used commercial printing method uses plates mounted on rotating cylinders to transfer ink to paper. The process works well for high-volume printing jobs because it produces consistent, high-quality results across large quantities. While the initial setup costs can be significant, the per-unit cost becomes very economical for large print runs. However, the process requires flat surfaces and can be affected by damp conditions, which may cause the paper to stretch or the colours to appear less vibrant.
Flexography
Flexographic printing uses flexible relief plates mounted on rotating cylinders, with paper fed from large rolls. This method excels at high-speed production and works particularly well for packaging materials. The process allows for quick ink drying, making it efficient for continuous operation. However, it requires substantial initial investment and may not deliver the finest detail quality compared to other methods, especially for print runs exceeding 500,000 copies.
Screen printing
This versatile printing technique pushes ink through a finely woven mesh screen, with non-printing areas blocked off. Screen printing works exceptionally well for short production runs and can print on various surfaces beyond just paper. The process allows for vibrant colours and works well with thick inks. The main drawbacks include longer drying times and the time-intensive process of creating photo screens, though the screens generally provide good detail reproduction.
Gravure printing
Gravure uses engraved cylinders with recessed cells that hold ink, which is then transferred to paper under pressure. This method provides excellent speed and consistent colour quality across very large print runs. It works well with various paper types and produces high-quality results. However, the high setup costs and time-intensive preparation make it most suitable for very large print runs rather than smaller jobs.
Photocopying
Digital photocopying works by exposing an original document to light, with toner fixing to charged areas before being transferred to paper through heat and pressure. This process offers excellent speed for small batches and can produce double-sided copies conveniently at relatively low cost. However, the print quality can fade over time, and the cost per copy becomes expensive for large quantities compared to other printing methods.
Print Quality vs. Cost Trade-off: Generally, methods with higher setup costs (like offset lithography and gravure) provide better quality and lower per-unit costs for large runs, while methods with lower setup costs (like screen printing and photocopying) are more economical for smaller quantities.
Embossing and debossing
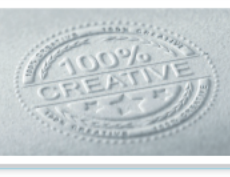
Embossing creates raised, three-dimensional effects on paper and board surfaces that you can both see and feel. The process involves creating matching male and female dies that contain the desired pattern or design. These dies are then pressed into the paper or board using significant heat and pressure, permanently shaping the material.
Worked Example: The Embossing Process
Step 1: Design creation - The desired pattern is carved into matching male and female dies Step 2: Material preparation - Paper or board is positioned between the dies Step 3: Pressure application - Heat and pressure are applied to permanently shape the material Step 4: Quality check - The raised effect is inspected for consistency and clarity
The embossing process typically happens after the main printing is completed, adding an extra finishing step that enhances the final product's appeal. Common applications include creating textured patterns on packaging materials to improve their visual appeal, adding raised areas that can be read by touch (such as Braille text), and creating decorative elements that make products stand out.
Debossing works as the opposite process, creating depressions or indented areas in the paper surface. This technique leaves an imprint of the design pressed down into the material rather than raised above it. Both embossing and debossing add tactile elements that can significantly improve the perceived quality and visual interest of printed materials.
UV varnishing
UV varnishing applies a protective coating to printed materials that serves both functional and aesthetic purposes. The varnish gets sprayed or applied onto the paper or board surface after the printing process is complete. This coating protects the underlying print from wear, moisture, and fading while providing an attractive high-gloss finish that makes colours appear more vibrant.
The varnish can be either oil-based or water-based, though it must be completely dried before any additional processing like folding or cutting takes place. To speed up the drying process, printed sheets pass under ultraviolet lights that instantly cure and fix the varnish coating.
UV Curing Advantage: The UV curing process provides immediate results, allowing finished products to be handled and processed right away without waiting for air-drying. This efficiency makes UV varnishing particularly valuable in commercial printing where quick turnaround times are essential.
UV varnishing offers several specialised options for different effects. Sparkle varnish contains metallic particles that create eye-catching reflective surfaces, perfect for promotional materials or packaging that needs to stand out. Fragrance varnish can be activated by scratching, releasing scents when touched - commonly used for perfume advertisements or novelty items. Silver latex varnish creates scratchable surfaces, frequently seen on lottery cards and promotional scratch-off games where information is revealed by removing the coating.
Timing is Critical: UV varnishing must be applied after all printing is complete, and the varnish must be fully cured before any folding, cutting, or additional processing can take place.
Key Points to Remember:
-
Printing process selection depends on quantity needs, quality requirements, and budget - offset lithography for large volumes, screen printing for short runs and versatility
-
Embossing creates raised effects while debossing creates depressed areas, both adding tactile elements that enhance perceived quality and visual appeal
-
UV varnishing provides protection and high-gloss appearance, with specialised types like sparkle, fragrance, and silver latex offering unique interactive features
-
Surface treatments enhance both function and aesthetics - they protect printed materials while making them more visually appealing and engaging
-
Process timing matters - embossing and varnishing typically occur after main printing is complete, requiring proper planning in production workflows