Loci (OCR GCSE Maths): Revision Notes
Loci
What is Loci?
Loci refers to the set of points that satisfy certain conditions or rules. Imagine tracing a point that follows a specific path according to a rule – this path creates a "locus" (plural: loci). Loci have various practical applications, especially in fields like architecture and engineering, where precision in design is crucial.
Key Points:
- Loci involves tracing the paths of points as they move according to specific rules.
- Loci can be used in real-life applications such as ensuring buildings are positioned correctly.
- If you enjoy geometry and shapes rather than algebra, this might be an exciting topic for you!
Example 1: Locus of Points - A Practical Problem with a Penguin!
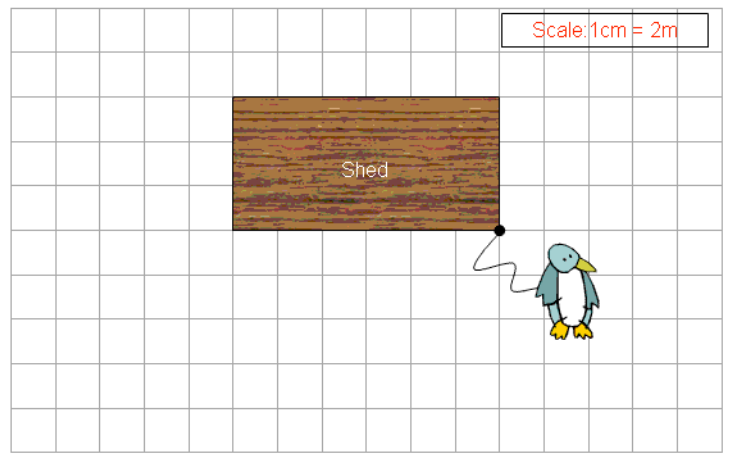
Problem: Your pet penguin has been tied by a 10-metre rope to the corner of a shed as shown below. Draw and shade the area within which your penguin can move.
Steps:
- Understanding the Scale:
- The problem states that the scale is 1 cm on the diagram represents 2 metres in real life.
- The penguin is tied with a 10-metre rope, which translates to on the diagram.
Action: Mark out 5 cm on your compass. This represents the maximum distance the penguin can move from the point where it is tied.
- Drawing the Initial Circle:
- The penguin can move freely in all directions as far as the rope allows, creating a circular area of movement.
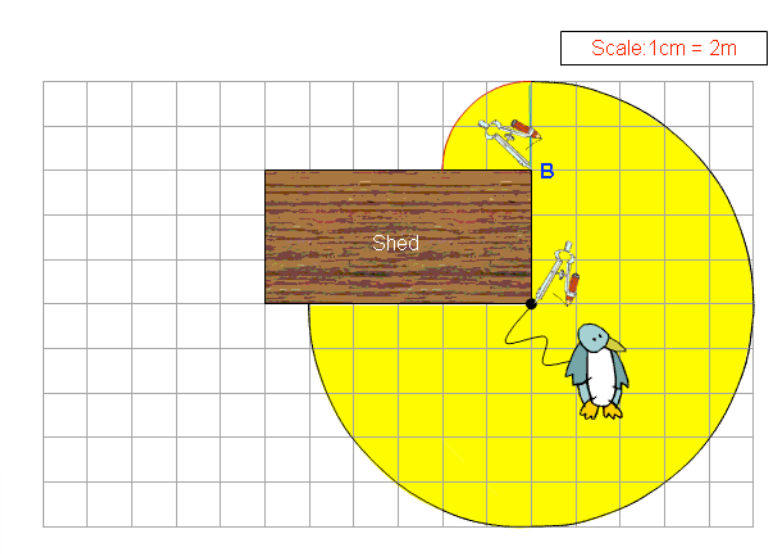
- Place the point of your compass on the corner of the shed where the penguin is tied and draw a circle with a radius of 5 cm. This circle shows the maximum area the penguin could reach if there were no obstacles. Explanation: The circle you've drawn represents all the points that are 5 cm away from the shed corner. However, the shed itself restricts part of this area, so the penguin cannot move into the area where the shed is.
- Considering the Shed as an Obstacle:
- Since the penguin cannot pass through the walls of the shed, its movement is restricted. The penguin can walk along the side of the shed.
- Let's say the penguin can move 3 cm along the shed's side to a point . From point , the penguin can move another 2 cm in all directions. Action: Adjust your compass to 2 cm and place the point on (which is 3 cm along the shed's side). Draw another circle with a radius of 2 cm centred at .
- Final Locus Area:
- The total area where the penguin can walk is now defined by the original circle minus the section obstructed by the shed, plus the additional small circle drawn around .
- Shading the area: Shade the combined area from both circles, except the part covered by the shed. This represents the total area within which the penguin can roam freely.
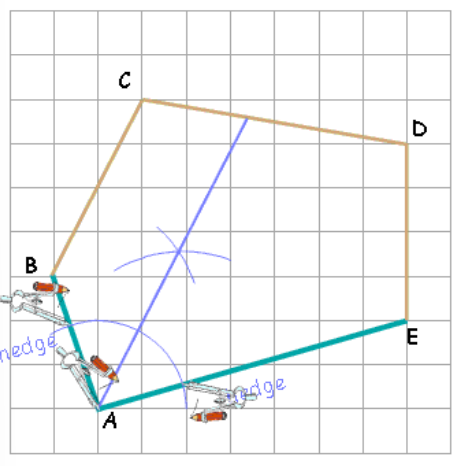
Example 2: Bisecting Angles to Place a Water Pipe
Problem:
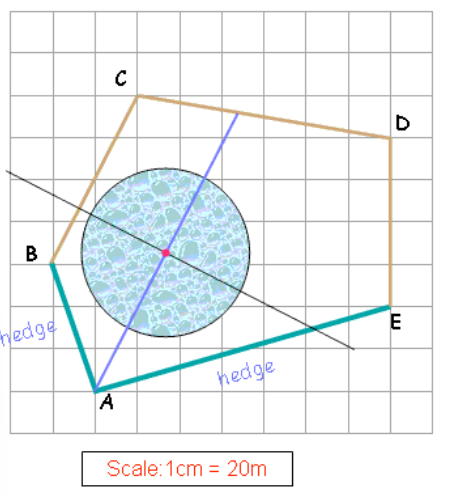
A farmer wants to lay a water pipe across his field so that it is equidistant from two hedges. He also wants to connect a sprinkler in the exact centre of the pipe, which will water the field for 40 metres in all directions.
Steps and Solutions:
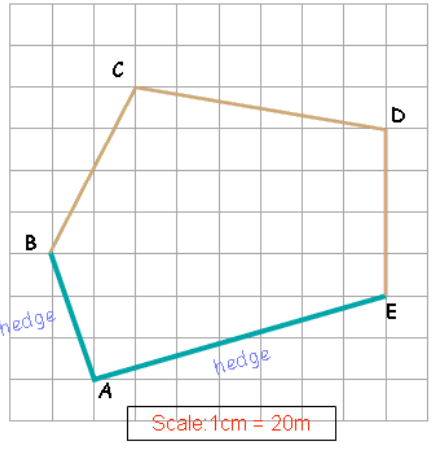
Part (a): Show the position of the pipe inside the field**.**
Steps:
- Understand the Requirement:
- The pipe must be equidistant from two lines and . This can be achieved by bisecting the angle at point where these two lines meet.
- Set Up Your Compass:
- Place the compass point on and draw arcs that cut across both and . Label these points of intersection on and as and respectively.
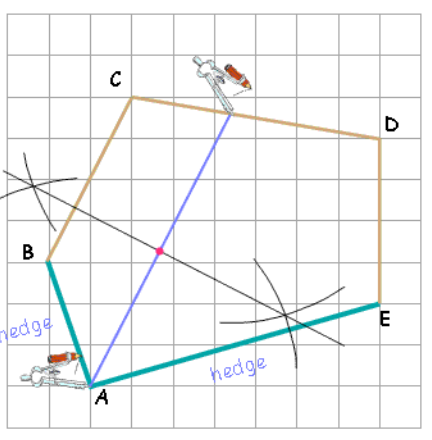
- Bisect the Angle :
-
Without changing the compass width, place the compass point on and draw an arc in the interior of the angle. Repeat this by placing the compass on to draw another arc that intersects the first. Label the point where these arcs cross as .
-
Draw a straight line from A through . This line is the bisector of and represents the position of the pipe.
Result: The line shows the position of the water pipe inside the field.
Part (b): Mark the Point of Connection for the Sprinkler
Steps:
- Finding the Exact Centre of the Pipe:
- It's essential to find the exact midpoint of the pipe to place the sprinkler correctly. Simply measuring it with a ruler might be tempting, but to ensure accuracy, it's better to bisect the line.
- Set Up the Compass:
-
Place the compass point on one end of the pipe, say at , and draw an arc that crosses the line on both sides.
-
Without changing the compass width, place the compass point on the other end of the pipe and draw another arc that intersects the previous arcs.
- Intersection Points:
- The arcs will intersect at two points above and below the line . Mark these points clearly.
- Drawing the Perpendicular Bisector:
- Draw a straight line through these intersection points. This line is the perpendicular bisector and intersects at its exact midpoint.
- Marking the Centre:
- The point where the bisector crosses is the exact centre of the pipe. Mark this point, which will be the location for the sprinkler. Result: The centre of the pipe is now accurately marked, and this is where the sprinkler should be connected.
Part (c): Show the Area of the Field That Is Watered by the Sprinkler
Steps:
- Checking the Scale:
- The scale given is 1 cm = 20 metres. The sprinkler needs to water an area within a 40-metre radius, so we convert this distance on the diagram:
- Setting the Compass:
- Adjust your compass to a 2 cm radius. This represents the 40-metre reach of the sprinkler.
- Drawing the Circle:
- Place the point of your compass at the exact centre of the pipe (the point you just marked) and draw a circle with a 2 cm radius. This circle represents the area that the sprinkler will water.
- Shading the Area:
- Shade the circle to indicate the area of the field that is covered by the sprinkler. Result: The shaded circle on the diagram shows the area within which the sprinkler will water the field.