Marking Out & Measuring (Junior Cert Engineering): Revision Notes
Marking Out & Measuring
What is marking out?
Marking out is the process of drawing lines and making marks on a piece of material to show where cuts, holes, and shapes should be made. Think of it as creating a map or blueprint directly onto your workpiece. This process is essential because it helps ensure that your finished product matches the required dimensions and specifications exactly.
For marking out to be effective, the lines and marks must be clear, precise, and easy to see. The quality of your marking out directly affects the accuracy of your final product.
When working with bright materials like steel, you can apply a thin coating of copper sulphate or marking fluid to make your scribed lines more visible. For softer metals like brass, copper, or aluminium, it's better to use a hard pencil or brass scriber to avoid scratching the surface.
All marking out work starts from reference points called datum lines, datum edges, or datum surfaces. These act as your starting points for all measurements and ensure consistency across your work.
Basic marking and measuring tools
Scribers
A scriber is your primary tool for drawing lines on metal surfaces. These precision instruments are made from high-quality steel and come in two main types:
- Single-pointed scribers: Have one sharp, hardened point for drawing straight lines
- Double-pointed scribers: Feature points at both ends, with the body often knurled for better grip
When using a scriber, always keep it at the correct angle to your work. Hold it like a pencil against a ruler or square, ensuring the point stays in contact with both the guide and the workpiece.
Steel rules
Steel rules are essential measuring tools that can measure distances up to 300mm accurately. They're also available in 150mm lengths for smaller work. These tools feature different graduation markings:
- 10mm divisions for general measuring
- 1mm divisions for more precise work
- 0.5mm divisions for very accurate measurements

Key technique: When using a steel rule, position it on its edge rather than flat against the surface. This eliminates parallax error and gives you more accurate readings. Always ensure your eye is directly above the measurement point you're reading.
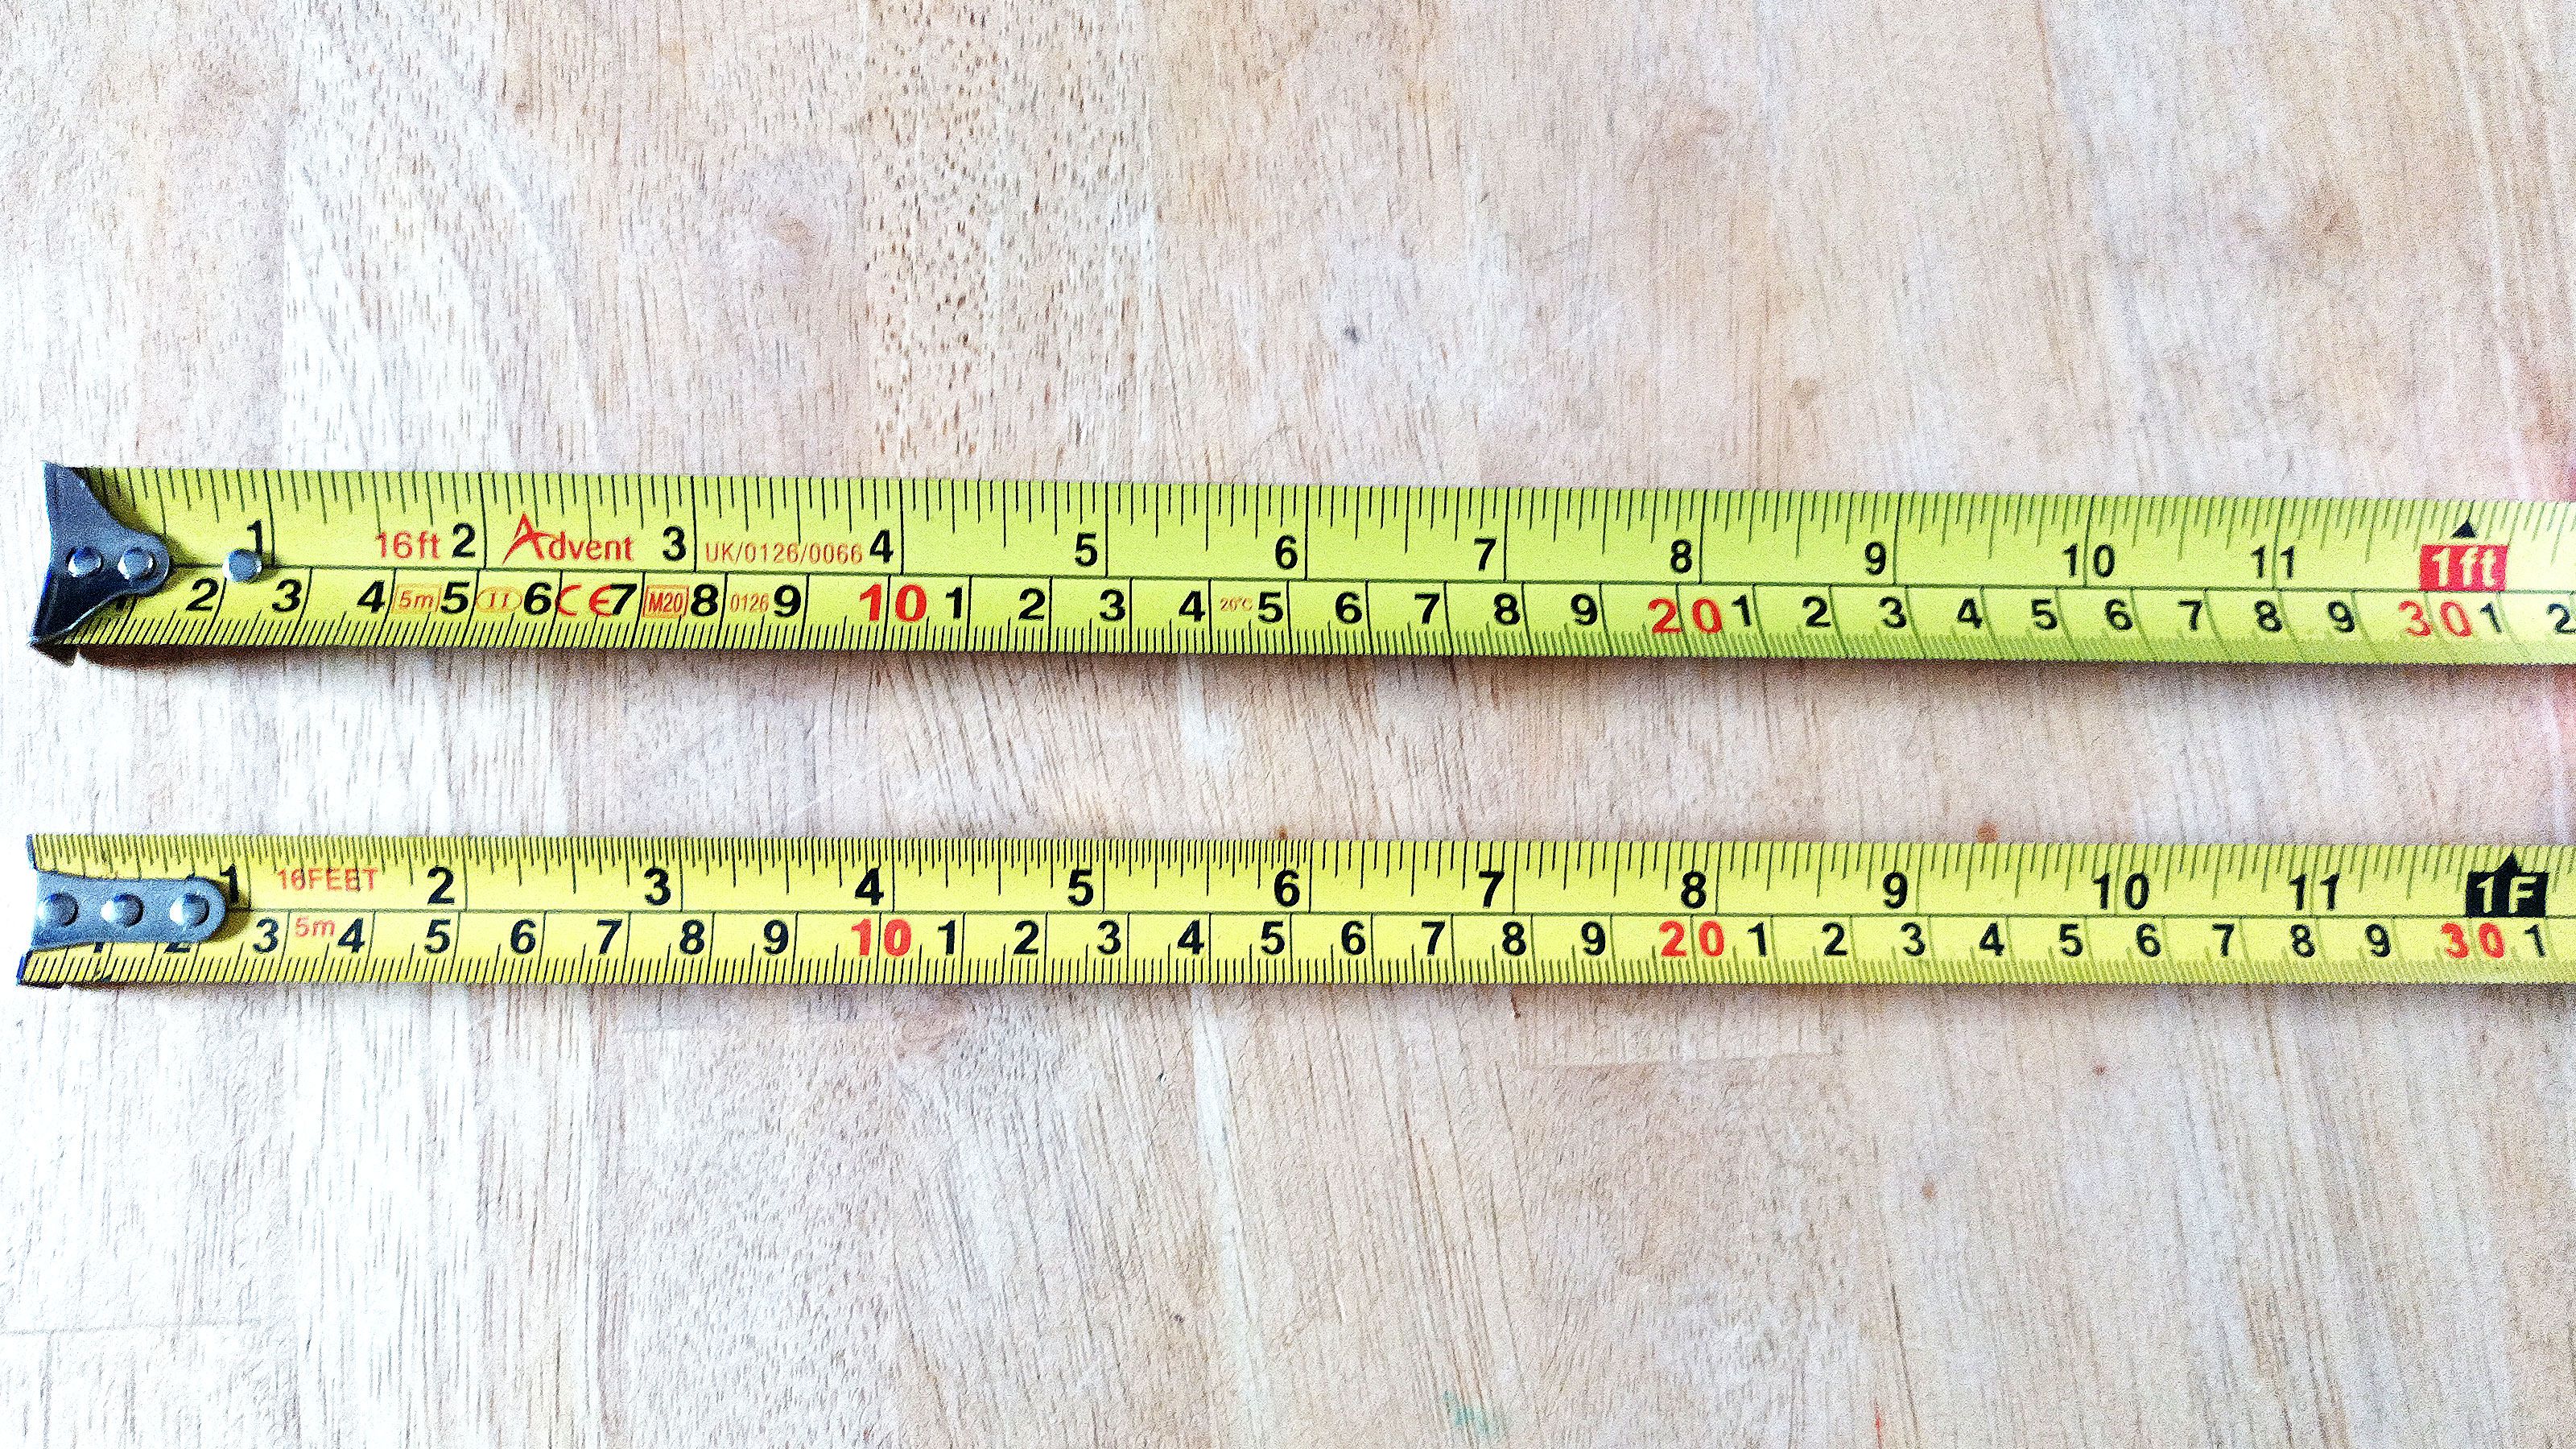
Tape rules
For longer measurements beyond what a steel rule can handle, tape rules are the perfect solution. These flexible measuring tools can extend up to 5 metres and are ideal for measuring larger workpieces or when you need to measure around curved surfaces.
The tape rule's flexibility makes it particularly useful when you need to measure from an edge or when working with materials that aren't perfectly straight.
Advanced marking tools
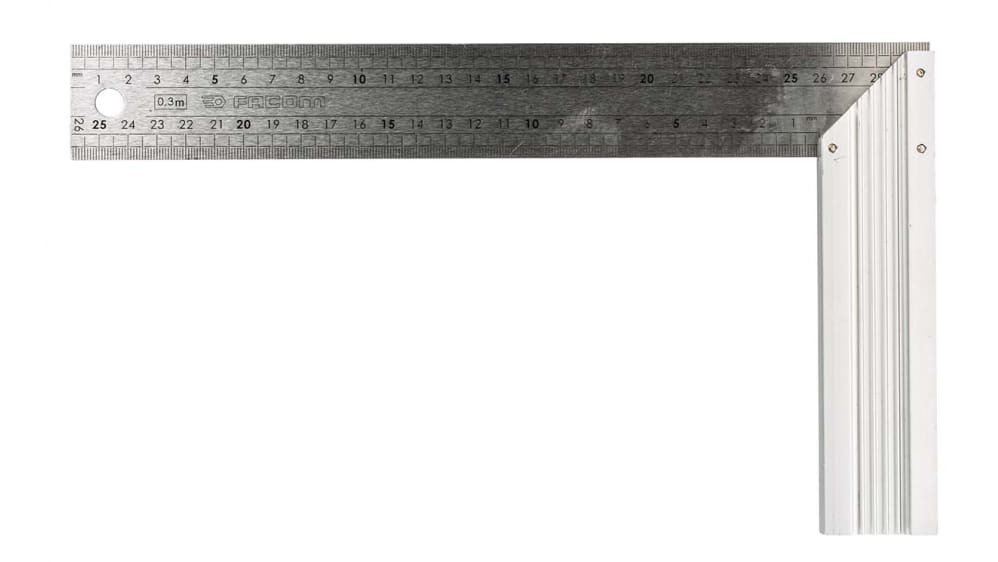
Engineer's try square
The engineer's try square is a precision instrument used for marking out and checking right angles (90°). It consists of two main parts:
- Stock: The thicker base section that sits against your workpiece edge
- Blade: The thinner measuring section, which is hardened and tempered for accuracy
The blade and stock are permanently joined at exactly 90°, and the blade often features a groove that helps prevent burring of the edges during use. This tool is perfect for marking perpendicular lines and checking that your cuts are square.
Centre punch
A centre punch serves multiple important functions in marking out work. This tool creates small indentations in metal that help you:
- Highlight important points on your marked-out lines
- Mark the exact centres where holes need to be drilled
- Provide starting points for drill bits (preventing them from wandering)
Most centre punches are made from high carbon steel with a point ground to 90°. Some workshops also use dot punches, which have a 60° point for creating smaller, more precise marks.

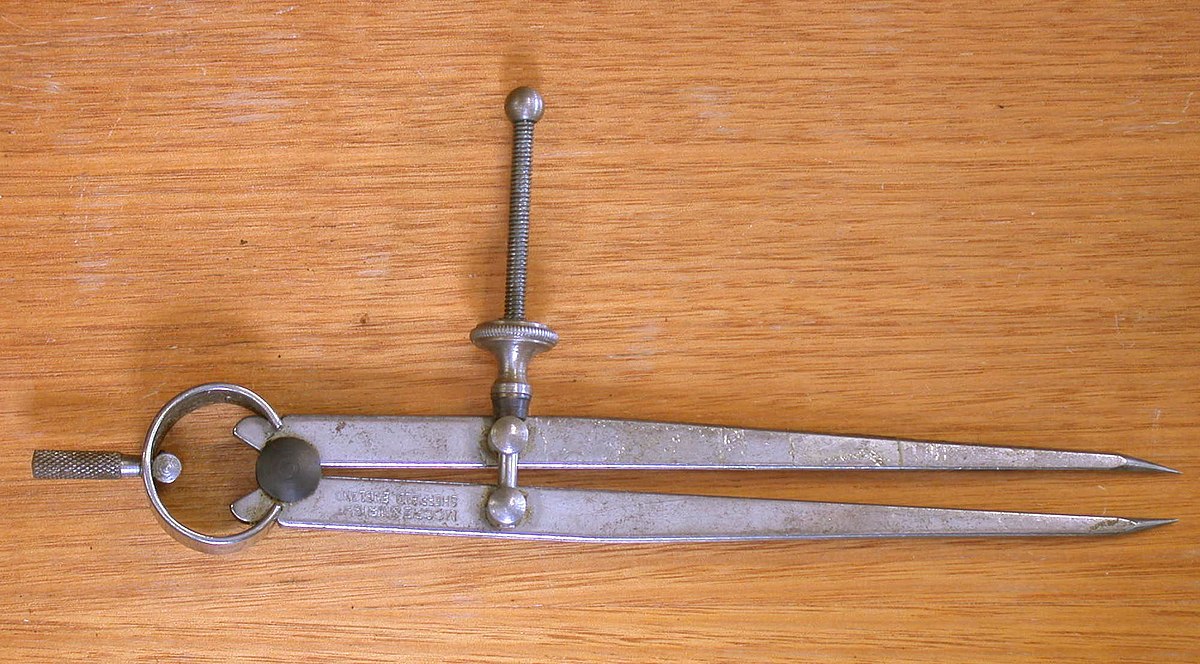
Dividers
Dividers are essential for drawing circles, arcs, and transferring measurements. The legs are made from tool steel with hardened points, and you can adjust the opening using the adjusting nut at the top.
These tools are particularly useful for:
- Drawing circles of specific radii
- Stepping off equal distances along a line
- Transferring measurements from one part of your work to another
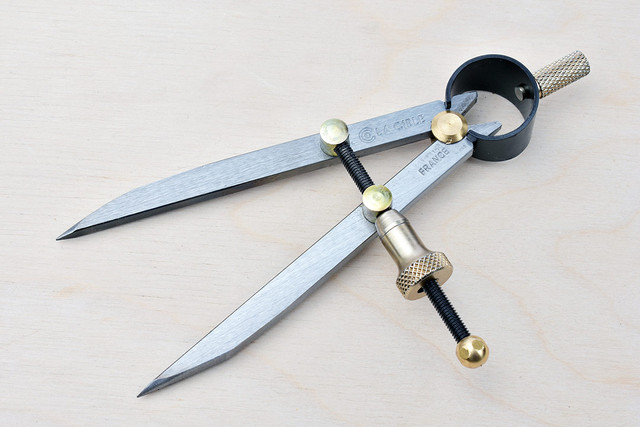
To set dividers accurately, adjust them until the points fit exactly into the required graduations on your steel rule.
Callipers
Callipers come in several types, each designed for specific measuring tasks:
Odd-leg callipers (jenny callipers) are used for drawing lines parallel to straight edges or scribing lines on round bars held in a laith. One leg has a point for scribing, while the other has a flat end that runs along your reference edge.
Outside calipers work with steel rules to measure external dimensions like diameters. They can be set from the end of a rule or from an accurately finished bar or gauge. The key is ensuring they slide smoothly over your workpiece without being too loose or tight.
Measuring instruments
Inside callipers
Inside callipers are designed for internal measuring tasks, such as checking the diameter of holes or internal dimensions of components. Like outside callipers, they come in both spring-type and firm-joint varieties.
To use inside callipers effectively, you can set them to a known dimension using a steel rule, or you can measure an unknown internal dimension and then check the measurement against a rule.
Bevel gauge
A bevel gauge (also called a bevel) is an adjustable tool for marking out and checking angles other than 90°. It consists of:
- Stock: The handle portion
- Blade: The adjustable arm
- Clamping screw: Locks the blade at the desired angle
You can set a bevel gauge to any angle by using it alongside a protractor, or you can use it to transfer an existing angle from one part of your work to another.
Engineer's protractor
An engineer's protractor is a semi-circular measuring instrument marked in degrees from 0° to 180°. It's used for measuring and marking out specific angles with great accuracy.
Combination set
The combination set is a versatile tool that combines multiple functions in one instrument. It consists of a steel rule and three different heads:
- Square head: Used for marking out right angles (90°) and 45° angles, and can function as a depth gauge
- Protractor head: Allows you to mark out and test any angle
- Centre head: Helps locate the centres of round bars and pipes
Both the square and protractor heads contain spirit levels, making them useful for checking that surfaces are level or plumb. This multi-functionality makes the combination set an extremely valuable tool in any workshop.

Specialised marking and measuring equipment
Centre square
A centre square is specifically designed for locating the centre point of round bars or discs. To use it, you draw two lines across the end of your round material from different positions. Where these lines intersect marks the exact centre of your workpiece.
Surface plate
The surface plate provides an extremely flat, stable reference surface for precision marking out work. Made from cast iron, it features three legs for stability and a ribbed underside structure for rigidity.
The flat surface allows you to place workpieces accurately and use other marking tools with confidence that your measurements will be precise.
When not in use, surface plates should be cleaned, oiled, and covered with a wooden cover to prevent damage and corrosion.
Surface gauge (scribing block)
A surface gauge is used on a surface plate to scribe lines parallel to the surface plate when marking out workpieces. Key components include:
- Base: Sits on the surface plate
- Spindle: Vertical adjustable column
- Scriber: The marking point
- Clamping nut: Locks the spindle at the desired height
This tool allows you to mark consistent heights across your workpiece, ensuring parallel lines that are perfectly aligned with your datum surface.

Vee blocks
Vee blocks are precision tools supplied in matched pairs for holding and marking round materials. The V-shaped groove securely holds round bars, pipes, and rods while you mark them out or perform machining operations.
They're essential when you need to work on cylindrical materials because they provide stable, repeatable positioning that keeps your workpiece from rolling or moving during marking or machining.
Depth gauge
A depth gauge measures the depth of holes, slots, grooves, and steps in materials. It consists of:
- Rule: The measuring scale
- Stock: The reference surface that sits on top of your workpiece
- Clamp: Locks the rule at the measured position
This tool is particularly useful when you need to ensure holes are drilled to specific depths or when checking that machined features meet dimensional requirements.
Precision measuring instruments
Micrometre
A micrometre is a precision measuring instrument capable of measurements accurate to 0.01mm. Micrometres are available in various sizes, typically with 25mm ranges (0-25mm, 25-50mm, 50-75mm, and so on).
How a micrometre works: The micrometre operates using a threaded spindle with a pitch of 0.5mm. This means one complete turn of the thimble moves the spindle exactly 0.5mm. The spindle's circumference is divided into 50 equal spaces, making each division worth 0.01mm ().

Worked Example: Reading a Micrometer
The sleeve shows a datum line with millimetre graduations on one side and half-millimetre markings on the other. To read a measurement:
Step 1: Read the millimetres from the sleeve scale
Step 2: Add any half-millimetre if visible
Step 3: Read the hundredths from the thimble scale
Step 4: Add all readings together
Example reading: Main scale = 15.5mm, Thimble scale = 0.23mm Total measurement:
Micrometer care:
- Never drop the instrument
- Keep the anvil and spindle faces clean
- Store in its protective case when not in use
- Check the zero reading regularly for accuracy
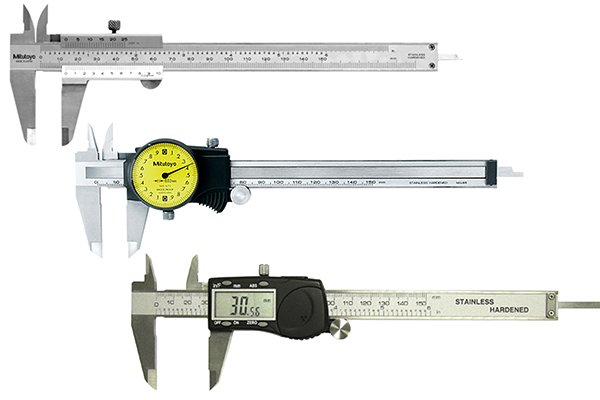
Vernier callipers
Vernier callipers are precision measuring instruments with a greater range than micrometres. A common workshop size measures up to 150mm and can read to an accuracy of 0.02mm.
Understanding the vernier principle: The main scale is graduated in millimetres, while the vernier scale is 49mm long but divided into 50 divisions. Each vernier division therefore equals 0.98mm (). This creates a 0.02mm difference between the main scale divisions and vernier scale divisions, giving you 0.02mm accuracy.
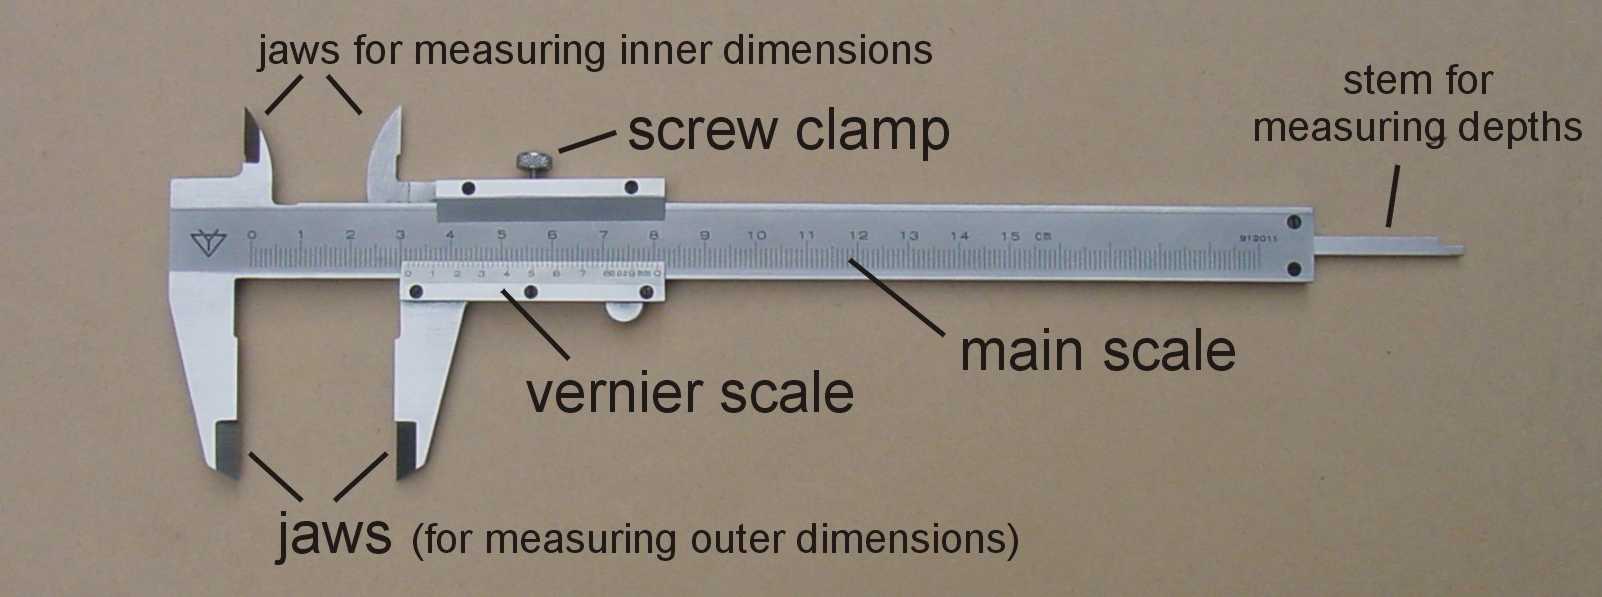
Worked Example: Reading Vernier Calipers
Step 1: Read the main scale at the last full graduation before the vernier scale zero
Step 2: Find which line on the vernier scale aligns exactly with a line on the main scale
Step 3: Multiply this vernier reading by 0.02mm
Step 4: Add both readings together
Example calculation:
- Main scale reading = 27.00mm
- Vernier scale alignment at line 21
- Vernier reading =
- Total measurement =
Like micrometres, vernier callipers require careful handling and should be returned to their case when not in use to maintain accuracy.
Other measuring gauges
Wire gauge
A wire gauge is a flat plate with various sized holes and notches used for measuring wire diameters and sheet metal thickness. You simply find the hole or notch that your wire or sheet fits into exactly.
Drill gauge
A drill gauge contains precisely sized holes arranged in rows, used for checking and identifying drill bit sizes. This is particularly useful when drill bits aren't clearly marked or when you need to verify a drill's size.
Radius gauge
Radius gauges are curved measuring templates with multiple radius profiles. They're used for checking both internal and external radii on machined parts. You simply match the gauge profile to your workpiece to verify the radius is correct.
Key Points to Remember:
-
Marking out is the foundation of accurate work - clear, precise lines lead to accurate final products
-
Always work from datum surfaces, edges, or lines - these provide consistent reference points for all your measurements
-
Choose the right tool for the job - steel rules for general measuring, micrometres and vernier callipers for precision work
-
Handle precision instruments with care - micrometres and vernier callipers are delicate and expensive tools that require proper storage and handling
-
Practice reading scales accurately - understanding how to read micrometre and vernier scales takes practice but is essential for precision work