The battles of Fulford, Stamford Bridge and Hastings (OCR GCSE History A (Explaining the Modern World)): Revision Notes
The battles of Fulford, Stamford Bridge and Hastings
What was the situation in the summer of 1066?
William received the support of the Pope for an invasion of England with a papal banner with which to lead his army into battle. William built a fleet, gathered troops and supplies and waiting for the opportunity to invade.
Harold prepared for an invasion from Normandy, stationing ships and positioning his army on the south coast.
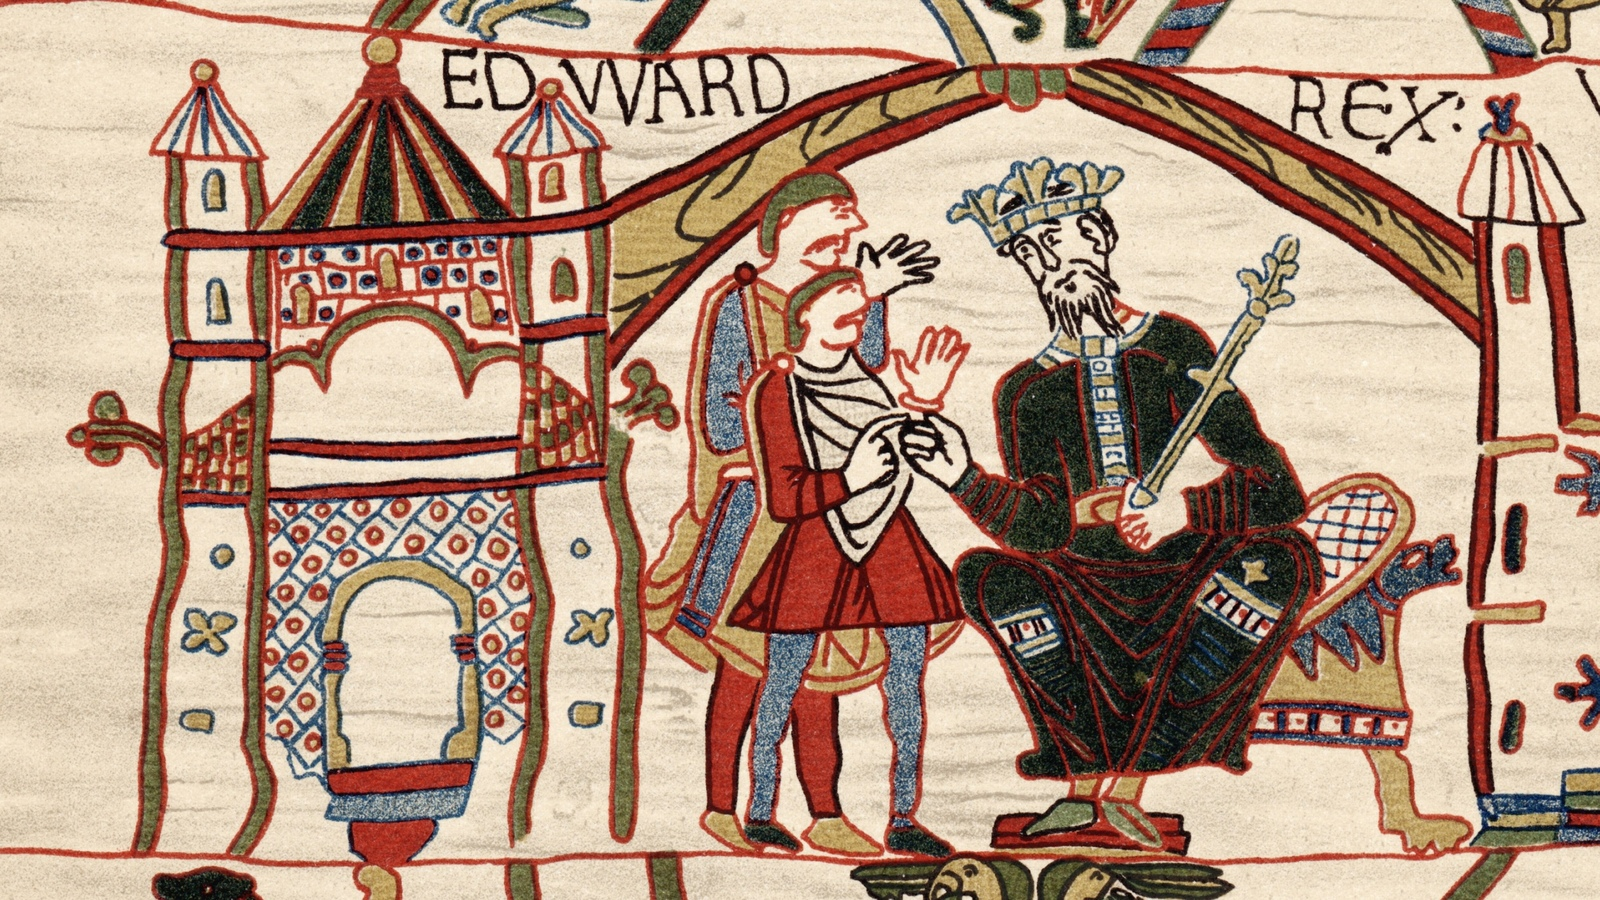
Harold had been crowned king on the day of Edward's burial. He had the support of the Witan.
Harold's coronation had greatly angered Harald Hardrada and William, Duke of Normandy. Both men were strong rulers of their own territories who began to prepare to invade England and take the throne.
Harold's brother, Tostig, was also a threat to him. Tostig had been exiled from England by Harold and was seeking allies to challenge his brother and win back some power in England. In 1066, he formed an alliance with Harald Hardrada.
The Battle of Fulford Gate
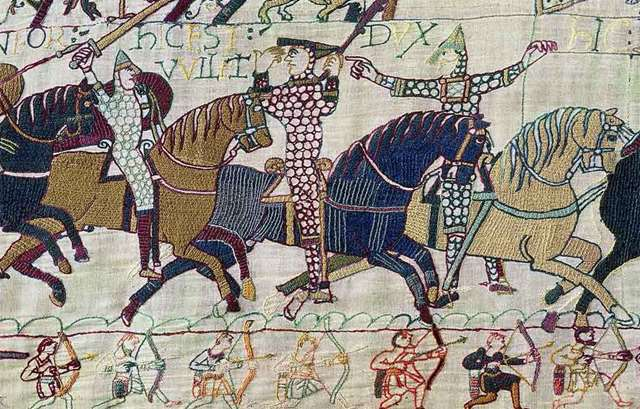
Harald Hardrada and his ally Tostig arrived in England on 18 September 1066. They sailed their ships up the Humber estuary and up the River Ouse, and headed towards York after disembarking. On 20 September, the forces of Hardrada and Tostig were intercepted by an Anglo-Saxon army led by Earls Edwin and Morcar.
The two armies fought at the Battle of Fulford and the result was a crushing defeat for the Anglo-Saxon army. Earls Edwin and Morcar escaped but a huge proportion of their army was killed by the ferocity of Hardrada's attack.
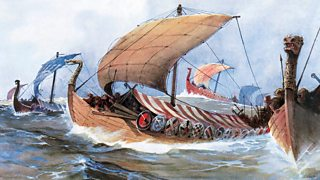
A depiction of a Viking longship
The defeat was a disaster for Harold Godwinson who had remained with his forces in the south of England to take on Duke William, hoping that his northern army would deal with the Norwegian invasion. Harald Hardrada's forces captured the city of York and made camp at Stamford Bridge. With William nowhere to be seen, Harold Godwinson decided to march northwards to defeat Hardrada himself.
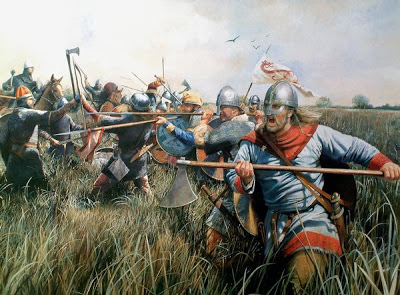
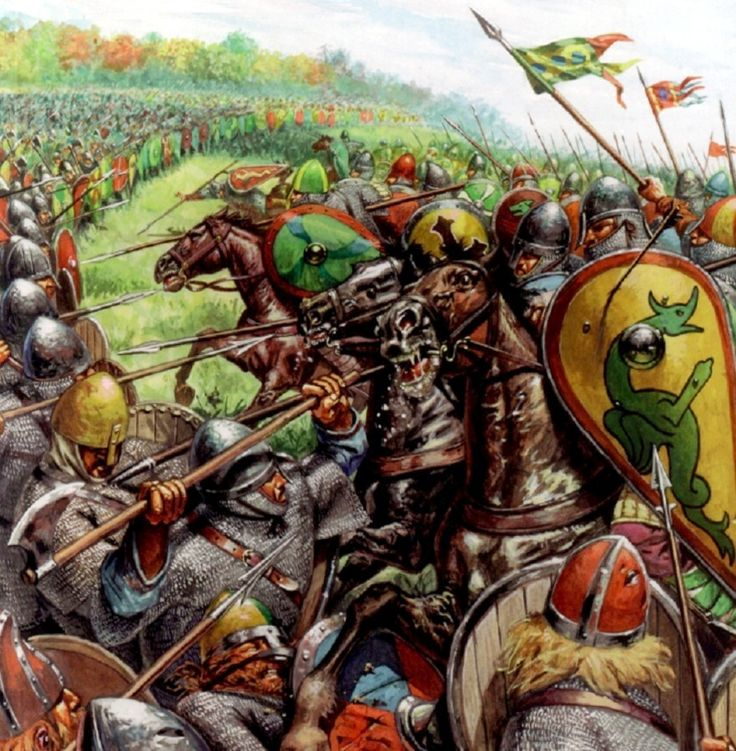
The Battle of Stamford Bridge
- Alerted to the defeat at Fulford by beacons, Harold marched his troops from London to Stamford Bridge in just five days.
- The troops he had with him were mainly his elite housecarls, and Harold leveraged other troops as he went.
- This was necessary because Harold had sent most of the ordinary soldiers, known as the fyrd, home so that they could gather the harvest.
- After covering a distance of 185 miles on foot, Harold's army arrived at Stamford Bridge on 26 September.
- They caught Hardrada's force completely by surprise. Their soldiers were resting and recuperating after the Battle of Fulford whilst Hardrada was waiting for hostages he had been promised by Edwin and Morcar.
- Harold's men were able to approach undetected, leaving the Norwegian soldiers unprepared when the attack began.
- As the Anglo-Saxon army came into view, the Norwegian forces scrambled to their feet and prepared for battle. One Norwegian is said to have held the bridge, killing English soldiers as they tried to cross.
- This delay gave the Norwegians time to organise themselves into a shield wall. Harold's army charged and, because the Norwegians lacked armour, were able to break through. Hardrada and Tostig were both killed.
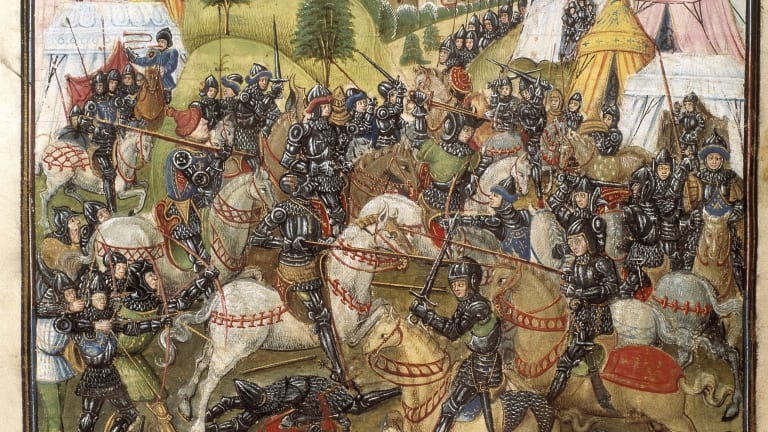
Artist's depiction of the Battle of Stamford Bridge
Norwegian reinforcements arrived but could only delay the inevitable. The Norwegian army disintegrated, with some survivors fleeing and others surrendering to Harold.
What were the outcomes of the battles?
Harald Hardrada
Deployed Soldiers: 9,000
Casualties: 4,000
Harold Godwinson
Deployed Soldiers: 15,000
Casualties: 5,000
- The threat from Norway had been eradicated.
- Harold Godwinson had lost a significant proportion of his army.
- Harold and his men were exhausted after their march northwards and the battle itself.
- Harold and his army were in the north when William, Duke of Normandy, arrived on the south coast.
- Harold may well have been over-confident after his victory and rushed to take on William.
The Battle of Hastings
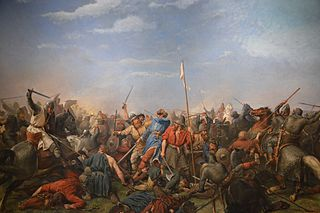
The Norwegian invasion, led by Harald Hardrada and Harold Godwinson's brother Tostig, came to an end with the bloody and violent Battle of Stamford Bridge. Less than three weeks later, Harold Godwinson faced Duke William of Normandy in the Battle of Hastings.
1066
27 September
The Norman fleet sets sail.
28 September
William's forces land at Pevensey
2 October
Harold leaves York and begins to march south
6 October
Harold arrives in London
12 October
Harold leaves London
14 October
The Battle of Hastings takes place
The events of the Battle
Harold had arrived in London on 12 October and found out that the Normans had been raiding settlements on the south coast for the last two weeks. It is believed that one of William's intentions in doing so was to goad Harold into fighting with him, giving William the prospect of a decisive early victory. William was successful and received news from his scouts that the Anglo-Saxon army was on its way.
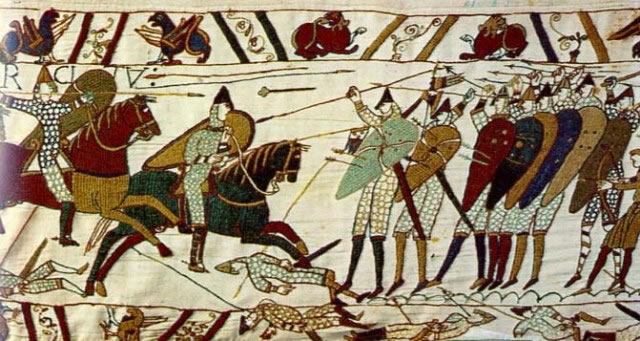
William led his forces inland to intercept Harold. The English took up position on the top of Caldbec Hill, advancing to Senlac Ridge where they formed a tight, defensive shield wall. The Normans were gathered in formation.
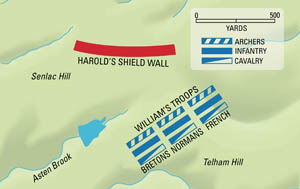
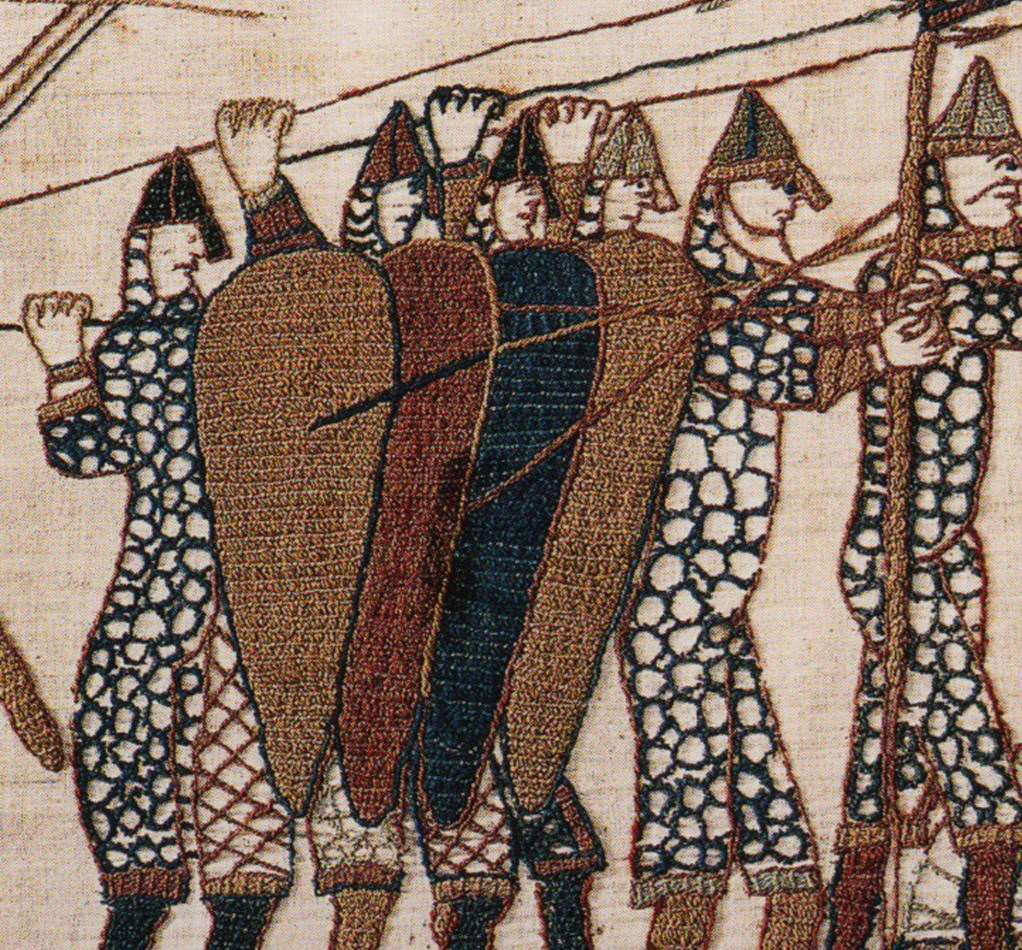
The Anglo-Saxon shield wall, depicted in the Bayeux Tapestry, c.1090
The battle began at around 9 am with an attack from the Norman archers. This was unsuccessful as the arrows were unable to penetrate the Anglo-Saxon shield wall.
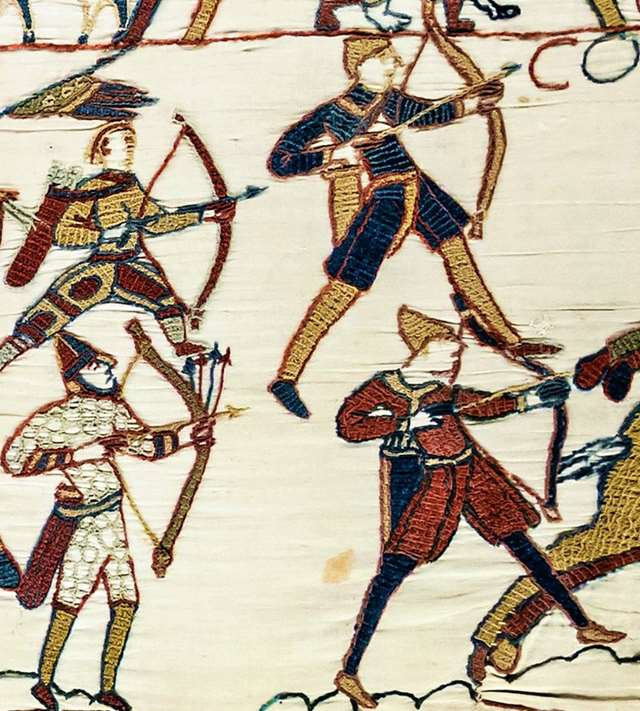
The Norman archers shown in the Bayeux Tapestry, c.1090
The unsuccessful Norman infantry attack
The Normans then attempted to break the shield wall with an unsuccessful infantry attack. This was followed by a cavalry assault, which again failed to break the shield wall.
Norman attacks on the shield wall continued but it stood firm and the morale of the Normans began to fail. A rumour went around that William had already been killed. Upon hearing the rumour, some of William's men turned and fled. They were pursued by some of the Anglo-Saxons from the shield wall.
William shown lifting his helmet to prove he is still alive, as depicted in The Bayeux Tapestry, c.1090
Seeing his men flee, William lifted his helmet to rally his troops and convince them to continue to fight.
Look at me! I live, and with God's help I shall conquer!
Words attributed to Duke William during the Battle of Hastings
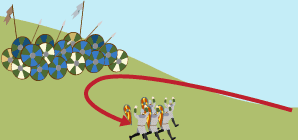
- The Normans, seeing that some Anglo-Saxons had broken away from the shield wall to chase the Normans, decided to retreat once more, this time as a trick.
- This so-called 'feigned retreat' had the effect of drawing the Anglo-Saxons away from the shield wall, weakening it and allowing the Norman cavalry charges to begin to break through Harold, along with two of his brothers, made a last stand on the top of the hill with their remaining forces. By this point, they were heavily outnumbered.
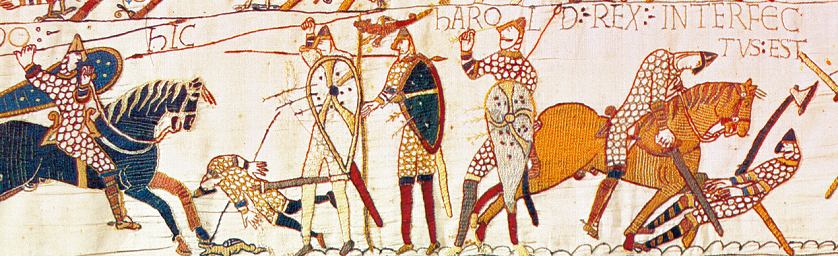
The death of King Harold, as shown in the Bayeux Tapestry, c. 1090
As the English shield wall completely broke apart under pressure from the Norman cavalry, the fighting came close to King Harold. He was killed, possibly dying from an arrow in the eye, in the late afternoon on 14 October. His two brothers and most of his housecarls died too.
The remainder of the fyrd fled. William was victorious.
Reasons for the Norman victory
LUCK
-
William's men were able to cross the channel when the wind changed.
-
William arrived on the south coast at the precise moment Harold was in the north.
-
Harold was killed towards the late afternoon. Had he not, the battle may have restarted the following day and the outcome may have been different. LEADERSHIP
-
William demonstrated good strategic understanding prior to the battle.
-
He ordered the construction of a castle to protect his troops.
-
He showed excellent leadership, maintained the discipline of his troops, and kept morale up.
TROOPS
- Norman troops had much more energy than Harold's men.
- William also had a greater variety of troops, which played key roles in the battle.
TACTICS
- William's use of the feigned retreat proved decisive for the outcome of the battle.
- The use of archers and cavalry charges had a huge impact.
English and Norman troops
| The Anglo-Saxons | The Normans | |
|---|---|---|
| Elite forces | • The housecarls, foot soldiers with years of training and experience • Armed with javelins, long axes and swords • Formed the front line of the shield wall | • Mounted knights with years of elite training • Had height advantage and the ability to launch a devastating charge • Armed with javelins, lances, maces and swords, and carried shields |
| Regular troops | • These were men that Harold had hastily levied from the fyrd on his way south • Some of the fyrd were thegns with good weapons, shields and armour • The general fyrd were not well equipped and some fought with only agricultural tools • There were not many Anglo-Saxon archers | • These were a mixture of Normans and mercenaries from all over Europe. Some lacked training. • The regular troops fought on foot and carried javelins, swords and shields • Some of the foot soldiers would have been archers and crossbowmen |
English and Norman tactics
Anglo-Saxons
- The main tactic used by Harold Godwinson's army at Hastings was the shield wall.
- By positioning his troops at the top of the hill and setting up the shield wall, Harold hoped that the Norman attacks would be unsuccessful, grinding the Normans down.
- As the enemy attempted to break the shield wall, the Anglo-Saxons used axes to attack the Normans, inflicting heavy casualties.
- This tactic was very successful initially.
Normans
- William was able to employ varied tactics, including the use of archers, cavalry and infantry charges.
- Whilst the shield wall held firm, none of these tactics made much of an impact.
- The most effective tactic was their 'feigned retreat', that caused some of the Anglo-Saxon shield wall to break formation, fatally weakening it.
- This tactic, combined with the Norman archers firing at the men of the shield wall and the Norman knights pushing through, brought them victory.
Glossary of terms
Feudal system
A social system where the nobility and lower classes held land in return for services
Fiefs
Estates of land, especially one held on condition of feudal service
Vassal
A person who owed loyalty and services to their feudal lord
Serfs
Persons in a condition of servitude, required to render services to a lord
Chevalier
A member of certain orders of knighthood
Succession crisis
A crisis that arises when an order of succession fails
Fyrd
A type of Anglo-Saxon army
Feigned retreat
The most effective tactic of Norman troops during the Battle of Hastings
Exam Practise
Task 1
Examine the sources carefully and make a substantial discussion about the strength of claim of the Duke of Normandy based on the sources. Include your inference about the claim of Harold Godwinson.
SOURCE A
Then came Duke William from beyond the sea with a great retinue of Frenchmen, and the king received him and as many of his companions as it pleased him and let him go again.
- Anglo-Saxon Chronicle (Worcester version) for winter 1051/2
SOURCE B
When they had come together in conference at Bonneville, Harold in that place swore fealty to the duke employing the sacred ritual recognised among Christian men. And as is testified by the most trustful and most honourable men who were there present, he took an oath of his own free will in the following terms: firstly that he would be the representative of Duke William at the court of his lord, King Edward, as long as the king lived; secondly that he would employ all his influence and wealth to ensure that after the death of King Edward the kingdom of England should be confirmed in the possession of the duke…
- William of Poitiers, Gesta Willelmi ducis Normannorum et Regis Anglorum, 1070s
Task 3
Analyse the source and answer the following questions:
- What is the purpose of the source?
- What is the message of the source?
- Do you think the source is an accurate representation of the events of the Battle of Hastings?
SOURCE C
So the Duke called his cohorts together
And said - 'Let's pretend that we're beat,
Once we get Saxons down on the level
We'll cut off their means of retreat.'
So they ran - and the Saxons ran after,
Just exactly as William had planned,
Leaving 'Arold alone on the hill-top
On his 'orse with his 'awk in his 'and.
When the Conqueror saw what had happened,
A bow and an arrow he drew;
He went right up to 'Arold and shot him.
He were off-side, but what could they do?
- Excerpt from Battle of Hastings, a poem by Marriott Edgar