Transformations (OCR GCSE Maths): Revision Notes
Transformations
What are Transformations?
Transformations involve moving objects, usually around a coordinate grid, in specific ways. There are four types of transformations you need to know:
Translation
Rotation
Reflection
Enlargement
For each type, you must be able to:
Perform the transformation yourself.
Describe the transformation, providing all the necessary information.
1. Translation
Translation is a movement in a straight line, described by:
A movement right/left (horizontal shift).
A movement up/down (vertical shift).
Describing Translations
To describe a translation, you need to specify the vector that defines the movement.
Example Vector:
Worked Example 1
Let's translate a blue object by the vector :
- Start with the blue object at its initial position on the grid.
- Move each point of the object units to the right and units up.
- Draw the new object in green at the new position.
Worked Example 2
Translate the blue object by the vector :
- Start with the blue object on the grid.
- Move each point of the object units to the right and units down (note the negative value).
- Draw the new object in green at the new position.

2. What is Reflexion?
Reflection occurs when an object is flipped across a specific line, called the line of reflection or mirror line, producing an exact replica (mirror image) of the object on the other side of the line. The new shape produced is called the Image.
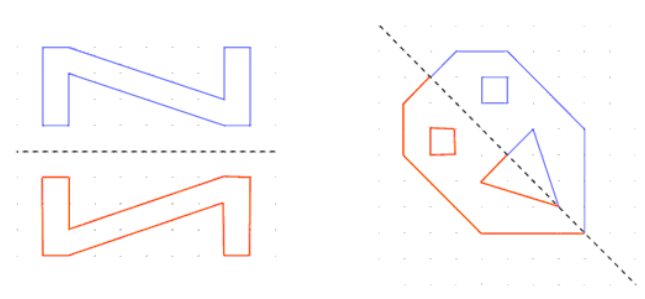
Key Characteristics of Reflexion:
- The image is the exact same shape and size as the original object.
- Every point on the image is the same distance from the line of reflexion as the corresponding point on the original object.
- The orientation of the image is reversed.
Describing Reflections
To describe a reflexion, you must specify the equation of the line of reflection or draw the line on the grid.
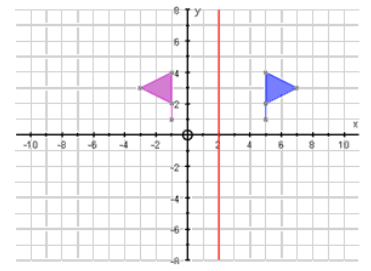
Worked Example 1: Reflection in a Vertical Line
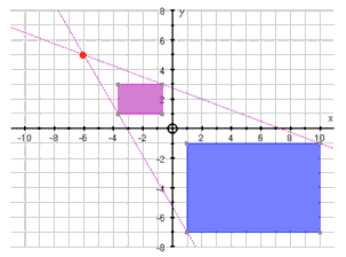
Reflect the blue object in the red line, given by the equation :
- Identify the line of reflection: The line is a vertical line passing through the grid where .
- Reflect each point of the blue object across the line .
- Draw the reflected object (purple) on the other side of the line, ensuring each point is the same distance from the line as the corresponding original point. Notice: Every point on the purple object is the same distance from the line of reflexion as the corresponding point on the blue object.
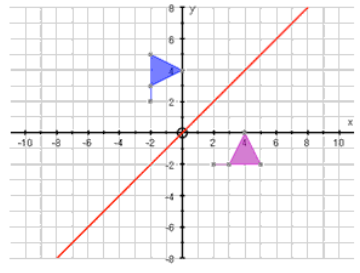
Worked Example 2: Reflection in a Diagonal Line
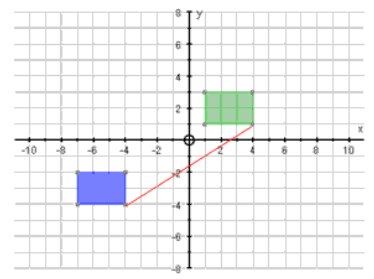
Reflect the blue object in the red line, given by the equation :
- Identify the line of reflection: The line is a diagonal line where every value equals its corresponding value.
- Reflect each point of the blue object across the line .
- Draw the reflected object (purple) on the other side of the line, ensuring each point is equidistant from the line. Notice: Reflecting across a diagonal line like can be more challenging, but the principle remains the same: each point on the reflected object is the same distance from the mirror line as the corresponding original point.
3. What is Rotation?
Rotation involves turning a shape around a specific point, called the centre of rotation, by a certain angle, in either a clockwise or anti-clockwise direction.
Key Characteristics of Rotation:
- The image (rotated shape) is the same size as the original but may be in a different orientation.
- The distance from the centre of rotation to any point on the shape remains the same before and after the rotation.
- Angle of rotation: This is typically .
- Direction of rotation: This can be clockwise or anti-clockwise.
Describing Rotations
When describing a rotation, you must provide the following information:
- Centre of Rotation: This is the fixed point around which the shape is rotated. It is often given as a coordinate, such as () or ().
- Direction of Rotation: Specify whether the rotation is clockwise or anti-clockwise.
- Angle of Rotation: This is the degree of rotation, which is usually , or .
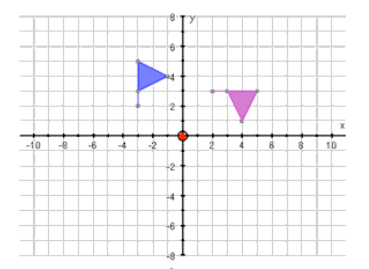
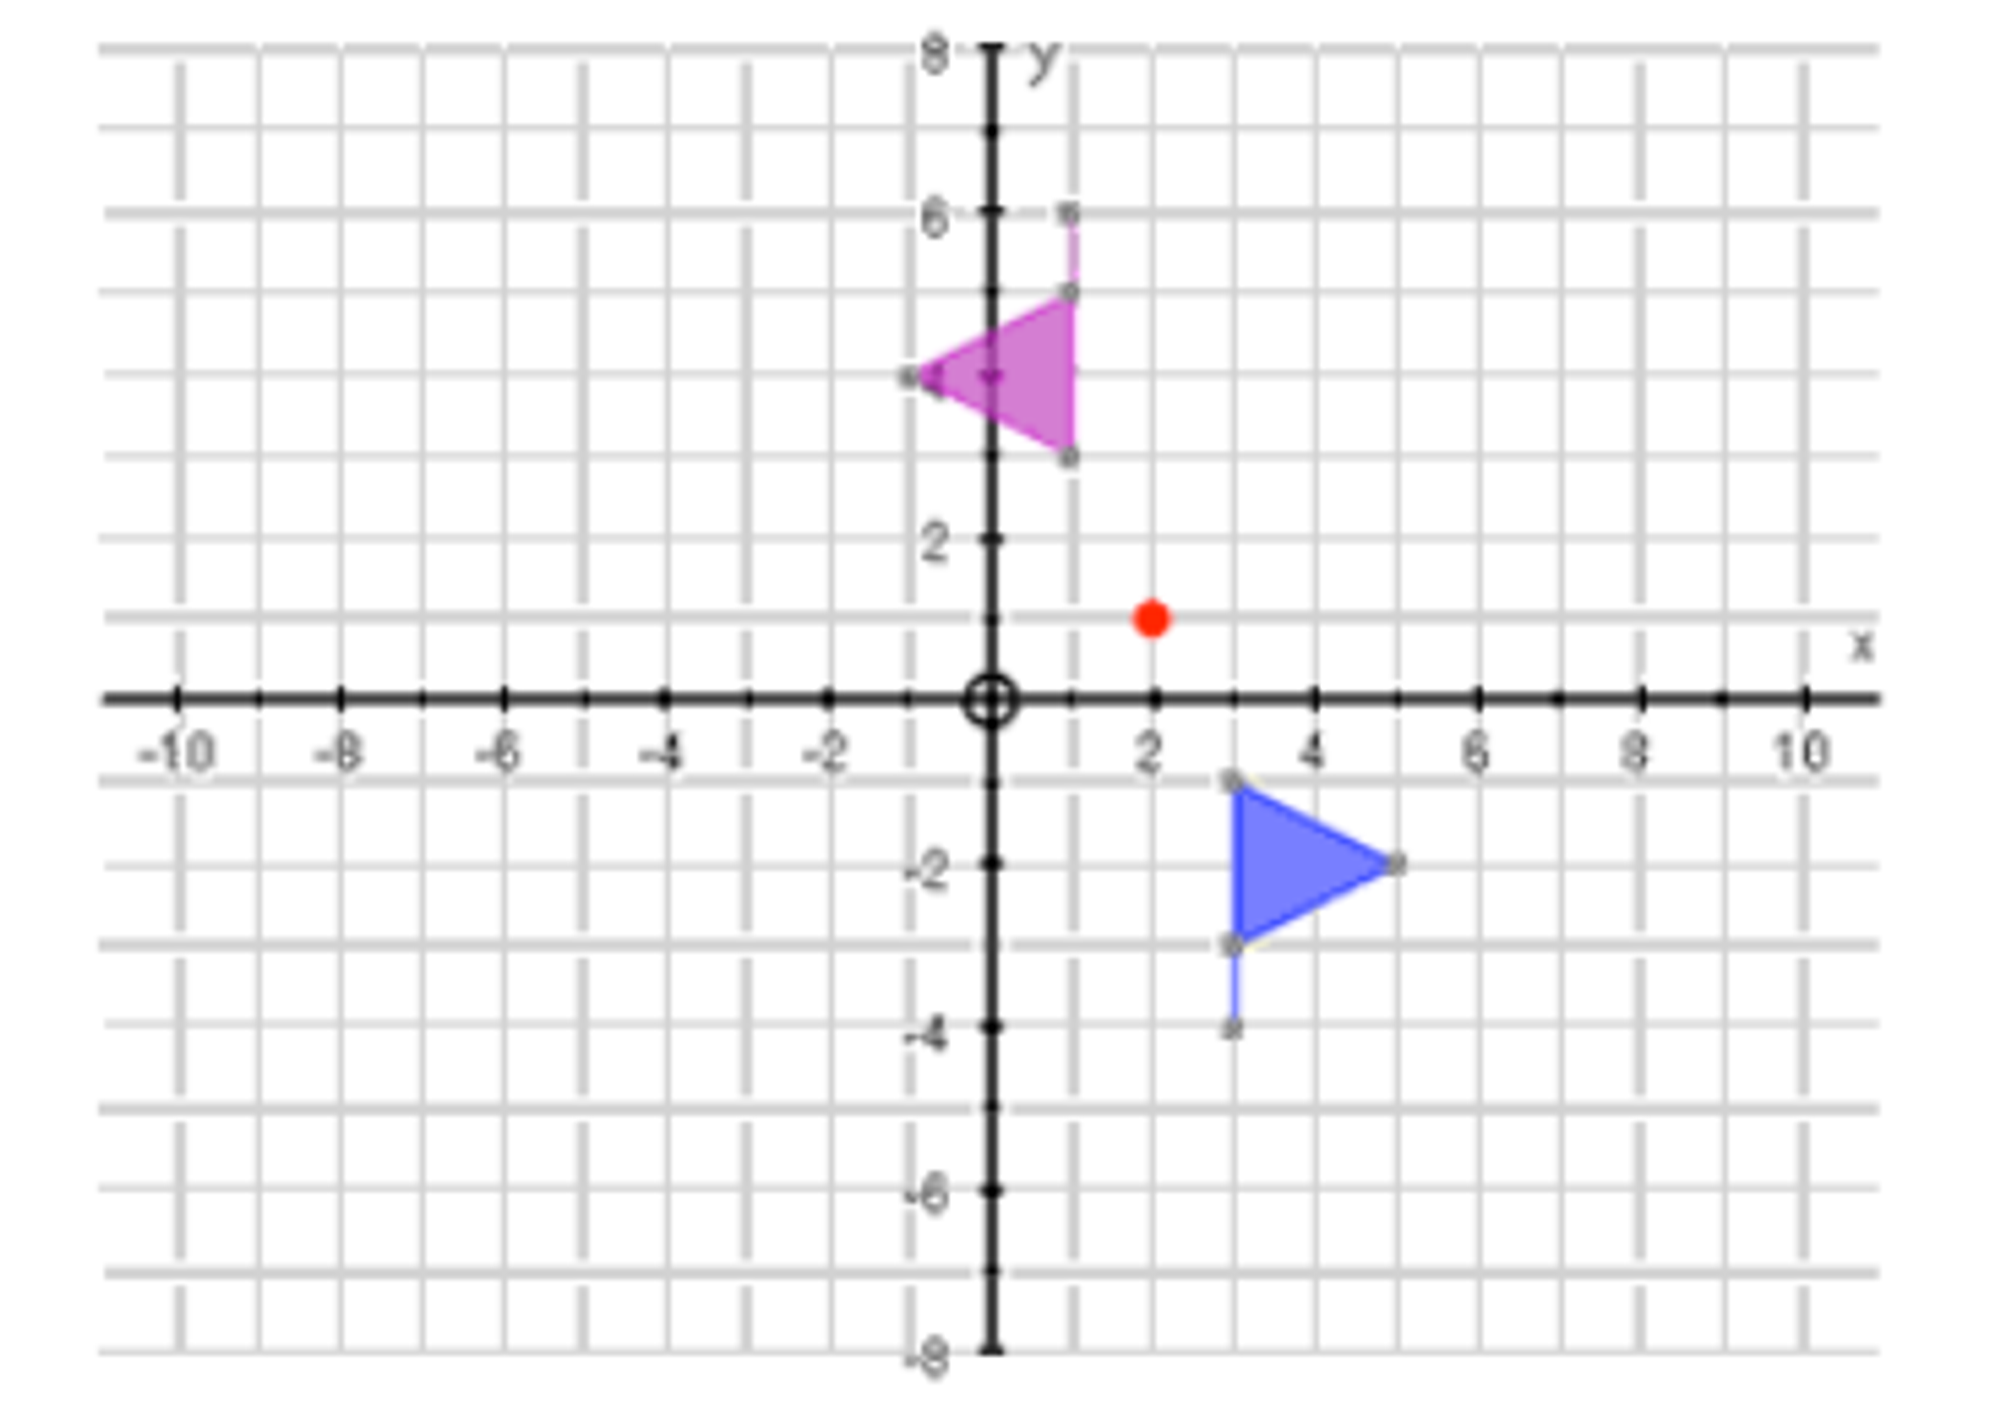
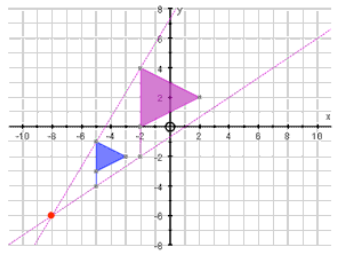
Worked Example 1: Rotating Around the Origin ()
Rotate the blue object to obtain the purple object with the following details:
- Centre of Rotation: () - the origin
- Direction of Rotation: Clockwise
- Angle of Rotation: Steps:
- Locate the centre of rotation at () on the grid.
- Rotate each point of the blue object clockwise around the origin.
- Plot the new points and draw the purple object. Notice: If you wanted to describe the same rotation differently, you could say it was a anti-clockwise rotation since both produce the same result.
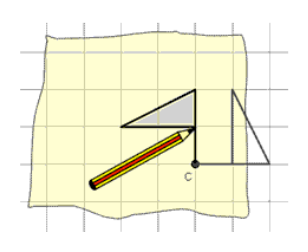
Worked Example 2: Rotating Around a Point ()
Rotate the blue object to obtain the purple object with the following details:
- Centre of Rotation: ()
- Direction of Rotation: Clockwise
- Angle of Rotation: Steps:
- Locate the centre of rotation at () on the grid.
- Rotate each point of the blue object clockwise around ().
- Plot the new points and draw the purple object. Notice: Whenever the angle of rotation is , the direction (clockwise or anti-clockwise) does not matter—the result is the same.
4. What is Enlargement?
Enlargement changes the size of a shape while preserving its proportions. Each side of the shape is multiplied by the same scale factor, which determines how much bigger or smaller the shape becomes.
Key Points:
- Scale Factor Greater than : The shape gets larger.
- Scale Factor Between and : The shape gets smaller.
- Negative Scale Factor: The shape is enlarged and also flipped (reflected).
Examples:
- If the scale factor is , the new shape will be three times as large.
- If the scale factor is , the new shape will be half the size of the original
Describing Enlargements
To fully describe an enlargement, you must provide:
- Centre of Enlargement: The fixed point from which the shape is enlarged. This is usually given as a coordinate.
- Scale Factor of the Enlargement: This tells you how much the shape has been enlarged or reduced.
Worked Example 1: Enlarging a Shape
Given:
- Centre of Enlargement: ()
- Scale Factor: Steps:
- Draw lines from the centre of enlargement through each vertex (corner) of the blue object.
- Measure the distance from the centre of enlargement to each vertex of the blue shape.
- Double the distance to find where the vertices of the purple shape should be, as the scale factor is .
- Plot the new points and draw the enlarged purple shape. Notice: The distance of each point in the purple shape from the centre of enlargement is twice that of the corresponding point on the blue shape.
Worked Example 2: Reducing a Shape (Fractional Scale Factor)
Given:
- Centre of Enlargement: ()
- Scale Factor: Steps:
- Draw lines from the centre of enlargement through each vertex of the blue object.
- Measure the distance from the centre of enlargement to each vertex of the blue shape.
- Reduce the distance by a factor of to find where the vertices of the purple shape should be.
- Plot the new points and draw the reduced purple shape. Notice: Since the shape got smaller, the scale factor is fractional (less than ). Each point on the purple shape is one-third the distance from the centre of enlargement as the corresponding point on the blue shape.