Home Preservation (Leaving Cert Home Economics): Revision Notes
Home Preservation
Home preservation encompasses various techniques used to extend the shelf life of food whilst maintaining nutritional quality and safety. These methods help reduce food waste and allow seasonal foods to be enjoyed throughout the year.
Understanding different preservation methods allows you to choose the most suitable technique based on the type of food, desired storage time, and available equipment. Each method works through different scientific principles to prevent spoilage.
Home freezing
Underlying principle of freezing
Freezing is a preservation method that involves reducing food temperature to -18°C or below, which stops the growth of microorganisms and slows down enzymatic reactions that cause food deterioration.
The freezing process works by:
- Making microorganisms inactive (though not destroying them completely)
- Slowing chemical changes that lead to spoilage
- Preserving nutritional content effectively
Freezing does not kill microorganisms - it simply makes them inactive. Once food is thawed, these microorganisms can become active again, which is why proper thawing and handling procedures are essential for food safety.
Methods of home freezing
Quick freezing involves rapidly reducing food temperature, which creates smaller ice crystals. This better maintains the cellular structure of foods, resulting in superior texture, taste, and nutritional retention when thawed. This method works particularly well for fruits, vegetables, meats, and fish.
Slow freezing occurs at standard home freezer temperatures and forms larger ice crystals. These can damage cell walls, potentially causing texture changes when the food is defrosted. This method is more appropriate for less delicate items such as baked goods.
Foods suitable for freezing
- Fruits and vegetables: Most varieties freeze well, particularly when blanched beforehand
- Meat and poultry: Both raw and cooked versions can be frozen with appropriate packaging
- Fish and seafood: Fresh or pre-cooked options work well with careful packaging
- Baked goods: Bread, cakes, and pastries maintain quality when frozen
- Prepared meals: Casseroles, soups, and stews are excellent candidates
Foods unsuitable for freezing
- High water content vegetables: Lettuce, cucumber, and radishes become soggy
- Dairy products: Milk, cream, and some cheeses may separate and become grainy
- Egg-based sauces: Mayonnaise and hollandaise can separate and curdle
- Fried foods: These lose their crispness and become soggy
Advantages of home freezing
- Convenience: Provides easy access to various foods at any time
- Nutritional retention: Vitamins and minerals are well preserved
- Waste reduction: Enables bulk purchasing and reduces food wastage
- Seasonal flexibility: Allows enjoyment of seasonal produce year-round
Disadvantages of home freezing
- Freezer burn: Air exposure can cause dehydration and oxidation
- Energy consumption: Requires continuous electricity to maintain temperature
- Storage limitations: Restricted by available freezer space
- Quality changes: Some foods may experience texture alterations
Guidelines for home freezing
Preparation and blanching
Cleaning and cutting food items properly ensures uniformity for even freezing and maintains cleanliness standards.
Blanching involves briefly boiling vegetables before plunging them into ice water to stop the cooking process. This technique inactivates enzymes that cause deterioration whilst preserving colour, flavour, and nutritional content.
Suitable vegetables for blanching include carrots, green beans, and broccoli.
Packaging
Proper packaging materials prevent freezer burn and maintain moisture:
- Freezer bags: Specially designed to retain moisture and prevent air exposure
- Aluminium foil and plastic wrap: Effective for wrapping solid foods like meats
- Rigid containers: Perfect for liquids and soft foods such as soups and stews
Labelling with the freezing date and food type helps track storage time and identify contents easily.
Freezing and storage
Maintain freezer temperature at -18°C or below for optimal preservation. Space items appropriately to allow cold air circulation, which speeds up the freezing process. Avoid overloading the freezer and freeze items in batches when necessary.
Organise frozen foods by type and date for easy access and proper rotation. Follow recommended storage times for different foods to maintain quality.
Thawing methods
- Refrigerator thawing: The safest but slowest method, ideal for meats and poultry
- Cold water thawing: Faster than refrigerator method, suitable for smaller items
- Microwave thawing: Quickest option, best used when food will be cooked immediately
Always control temperatures during thawing to prevent bacterial growth and avoid cross-contamination, particularly with meat juices.
Jam making
Underlying principle
Jam making involves cooking fruit with sugar until it reaches a gel-like consistency, which preserves the fruit by preventing microbial growth and extending shelf life.
The Three Key Components of Jam Making
The process relies on three key components working together:
- High sugar concentration: Sugar acts as a preservative by reducing water activity and inhibiting microbial growth
- Gel formation: Natural pectin in fruit combines with sugar and acid under heat to create the gel structure
- Acid balance: Acid naturally present in fruit or added separately helps pectin form a gel whilst enhancing flavour
Ingredients needed
Fruit provides the base flavour and natural pectin content. Choose ripe, flavourful fruits as overripe fruits lack pectin and underripe fruits are too acidic. Wash, peel if necessary, and chop or mash before use.
Sugar functions as a preservative and sweetener whilst helping gel formation. Typically use equal weight to fruit or adjust according to taste. Granulated sugar is commonly used, though jam sugar with added pectin works well for low-pectin fruits.
Pectin acts as the natural gelling agent. Fruits high in pectin include apples, citrus peels, and berries. Commercial pectin can be added for fruits with lower natural pectin levels.
Acid enhances flavour and assists pectin gel formation. Most fruits contain natural acid, but lemon juice is often added to fruits with lower acid content.
Method of jam making
- Weighing: Measure fruit and sugar accurately for best results
- Jar preparation: Sterilise jars and lids to prevent contamination
- Fruit preparation: Clean, peel, and cut fruit, crushing or mashing if required
- Cooking: Heat fruit to soften and release pectin, adding water if needed
- Sugar addition: Add sugar once fruit has softened and stir until dissolved
- Boiling: Cook mixture rapidly until it reaches setting point (105°C/220°F), removing any foam
- Potting: Pour hot jam into sterilised jars, leaving headspace
- Covering: Seal with wax discs and close lids tightly
- Labelling: Mark jars with contents and production date
- Storing: Keep in cool, dark location and refrigerate after opening
Setting tests
Testing Methods for Jam Setting Point
Wrinkle test: Place small plates in freezer before cooking. Spoon small amount of boiling jam onto cold plate. After a few seconds, push jam with finger - if surface wrinkles, jam has set.
Flake test: Dip spoon into boiling jam and lift horizontally above pot. When jam flows off in sheets or flakes rather than separate drops, it has reached setting point.
Thermometer test: Use candy thermometer to measure jam temperature accurately. Setting point occurs at approximately 105°C (220°F).
Common problems in jam making
Crystallisation produces gritty texture caused by:
- Overcooking leading to excessive sugar concentration
- Stirring whilst cooling
- Undissolved sugar before boiling
- Incorrect sugar-to-fruit ratio
Unset jam remains too liquid due to:
- Insufficient pectin in low-pectin fruits
- Incorrect cooking time preventing pectin activation
- Poor acid balance inhibiting gel formation
- Inadequate sugar proportion
Fermentation causes spoilage through:
- Microbial contamination from unsterilised equipment
- Inadequate sealing allowing air and microorganisms entry
- Undercooking failing to destroy all microorganisms
- Excessive moisture content promoting microbial growth
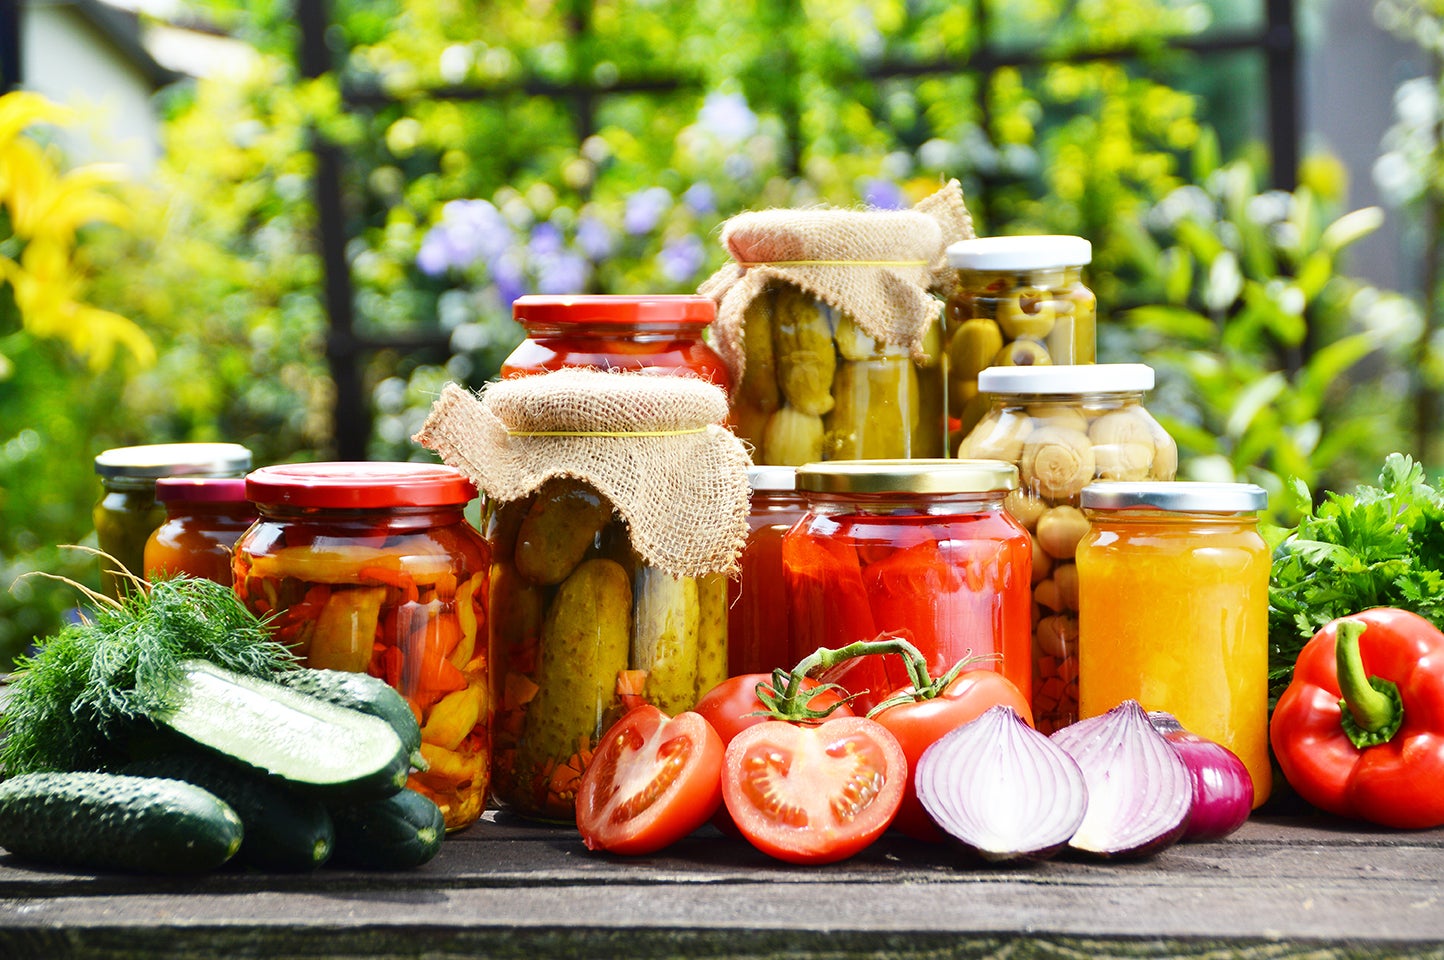
Chutney making
Underlying principle
Chutney is a preserved condiment originating from Indian cuisine, created from a mixture of fruits, vegetables, vinegar, sugar, and spices, ranging from sweet to savoury and mild to hot in flavour.
Chutney preservation works through the combined effects of vinegar and sugar. Vinegar creates an acidic environment that inhibits microbial growth, whilst sugar acts as a preservative by reducing water activity. The cooking process sterilises the mixture, further extending shelf life.
Method and ingredients
Key ingredients include:
- Fruits and vegetables: Provide primary flavour and texture - mangoes, apples, tomatoes, onions, and raisins are popular choices
- Vinegar: Functions as preservative and flavour enhancer - malt, apple cider, or wine vinegar work well
- Sugar: Balances vinegar acidity whilst preserving the chutney - brown or white sugar both work effectively
- Spices and seasonings: Add depth and complexity - ginger, garlic, cinnamon, and cloves are common, with salt for seasoning
- Optional additions: Nuts, seeds, or dried fruits provide extra texture and flavour
Equipment needed:
- Large heavy-bottomed pan for even cooking without burning
- Wooden spoon for stirring (metal spoons can react with vinegar)
- Sterilised jars for storage
- Measuring equipment for accurate proportions
- Cutting implements for preparing ingredients
Method for Making Chutney
- Preparation: Wash, peel, and chop all fruits and vegetables, then measure vinegar, sugar, and spices
- Cooking: Combine ingredients in pan, bring to boil, then simmer with continuous stirring to prevent sticking
- Consistency check: Cook until chutney reaches desired thickness - it should be thick and syrupy
- Jar sterilisation: Sterilise jars and lids by boiling in water or using hot oven
- Potting: Carefully spoon hot chutney into sterilised jars, filling to top to minimise air space
- Sealing: Seal jars whilst chutney remains hot to create vacuum seal
- Labelling and storage: Label with contents and date, then store in cool, dark place
Chemical preservation
Underlying principle
Chemical preservation uses substances such as sugar, salt, vinegar, or other chemical preservatives to inhibit bacterial, yeast, and mould growth, thereby extending food shelf life.
How Chemical Preservation Works
The preservation works through several mechanisms:
- Inhibition of microbial growth: Chemicals create hostile environments for microbes - high sugar or salt concentrations draw water from microbes through osmosis
- Acidification: Adding vinegar or lemon juice lowers pH, creating acidic conditions unsuitable for most microbes
- Dehydration: Removing moisture through chemical means such as salt or sugar prevents microbial activity
Types of chemical preservation
Jam making utilises sugar as the primary preservative by reducing water activity. Natural or added pectin helps form the gel structure, whilst acid enhances pectin's gelling ability and provides flavour balance.
Chutney making relies on vinegar as the main preservative, creating acidic conditions that inhibit microbial growth. Sugar also functions as a preservative whilst providing sweet counterpoint to vinegar's acidity.
Pickling uses vinegar to create acidic environments inhospitable to bacteria. Salt is often used in brine pickles, drawing moisture from foods and microbes whilst inhibiting growth. Spices and herbs add flavour and may have mild preservative effects.
Dehydration
Underlying principle
Dehydration preserves food by removing water content, which inhibits bacterial, yeast, and mould growth since these microorganisms require moisture to survive. This can be achieved through air drying, oven drying, or using food dehydrators.
Dehydration is one of the oldest preservation methods and works by creating an environment where microorganisms cannot survive due to lack of moisture. The process concentrates flavours and can significantly extend shelf life when done properly.
Suitable foods for dehydration
- Fruits: Apples, bananas, berries, and apricots are commonly dehydrated for snacks and baking
- Vegetables: Tomatoes, peppers, and mushrooms work well for dehydration
- Herbs: Basil, oregano, and mint can be dried for long-term storage
- Meats: Beef or turkey can be transformed into jerky through dehydration
Key Points to Remember:
- Freezing works by inhibiting microorganisms at -18°C or below, not by killing them
- Jam making requires the perfect balance of sugar, pectin, and acid to achieve proper setting
- Blanching vegetables before freezing helps preserve colour, flavour, and nutritional value
- Chemical preservation methods like vinegar and sugar create environments hostile to microbial growth
- Proper sterilisation of jars and equipment is essential for successful preservation methods