HTML Lists, Links, and Images (Grade 11 NSC Matric Computer Application Technology): Revision Notes
HTML Lists, Links, and Images
HTML lists
Lists are essential tools for organising information on web pages, just like you might create a shopping list or a to-do list on paper. HTML provides special tags that let you create two main types of lists: bulleted lists (where order doesn't matter) and numbered lists (where order is important).
Basic list structure
Every HTML list uses a combination of container tags and item tags. Think of the container tag as the wrapper that holds your entire list, whilst the item tags mark each individual point in your list.
The three essential list tags work together as a team. You cannot use list items (<li> tags) without first creating a container with either <ul> or <ol> tags.
The three essential list tags work together:
- <ul> and </ul> create an unordered list (bulleted list)
- <ol> and </ol> create an ordered list (numbered list)
- <li> and </li> mark each list item within either type of list
Basic Unordered List Example
Here's how a basic unordered list looks in HTML code:
<ul>
    <li>Milk</li>
    <li>Cheese</li>
    <li>Eggs</li>
</ul>
This creates a simple bulleted list that displays like this:
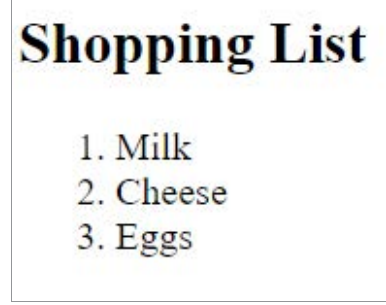
When you change the <ul> tags to <ol> tags, the same list items become numbered instead:
<ol>
    <li>Milk</li>
    <li>Cheese</li>
    <li>Eggs</li>
</ol>
Customising unordered lists
Unordered lists don't have to use the default solid circles as bullets. You can change the bullet style using the type attribute within the opening
- tag.
- disc creates solid circle bullets (this is the default)
- circle creates empty circle bullets
- square creates square-shaped bullets
- 1 for regular numbers (1, 2, 3...) - this is the default
- A for uppercase letters (A, B, C...)
- a for lowercase letters (a, b, c...)
- I for uppercase Roman numerals (I, II, III...)
- i for lowercase Roman numerals (i, ii, iii...)
The three bullet options give you flexibility in how your lists appear:
For example: <ul type="square"> will display square bullets for all items in that list.
Customising ordered lists
Ordered lists offer even more variety in their numbering systems. You can choose from different numbering styles depending on what suits your content best.
The type attribute for ordered lists accepts these values:
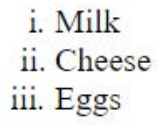
Using <ol type="i"> creates the lowercase Roman numeral style shown above. This formatting can be particularly useful for formal documents or when you want a classical appearance.
HTML links
Hyperlinks are what make the web truly interconnected. They allow users to jump from one page to another, or even to different sections within the same page, with a simple click. Without links, each web page would exist in isolation, making navigation nearly impossible.
Understanding hyperlinks
The power of HTML comes largely from its ability to create hyperlinks. These clickable elements can connect your page to other websites, link to files for download, or help users navigate within a long document.
When you move your mouse over a link, you'll notice the cursor changes to a small pointing hand, indicating that the element is clickable.
All HTML links use the same basic structure, regardless of where they lead:
<a href="http://www.facebook.com">This is the link</a>
The anchor tag structure
The anchor tag (<a>) is what creates every hyperlink. Unlike many other HTML tags, the anchor tag requires an opening and closing tag, with the clickable text placed between them. The most important part is the href attribute, which tells the browser where to go when someone clicks the link.
The href attribute must always contain the destination address in double quotation marks. This could be:
- A complete web address (like http://www.google.com)
- A filename (like page2.html)
- An internal bookmark (like #section1)
The text between the opening and closing anchor tags becomes the visible, clickable link text. This should be descriptive so users know what to expect when they click.
Link appearance and behaviour
By default, browsers display links in specific colours to help users understand their status:
- Blue and underlined for links you haven't visited yet
- Purple and underlined for links you have visited previously
- Red and underlined when you're actively clicking on a link
These colours can be customised using CSS, but the default colours provide a consistent user experience across the web.
External links and the target attribute
When linking to external websites, you might want the new page to open in a separate browser tab instead of replacing your current page. This keeps users on your website whilst still allowing them to access the external content.
Opening Links in New Tabs
The target attribute controls this behaviour:
<a href="http://www.google.co.za" target="_blank">Go to Google</a>
Setting target="_blank" forces the link to open in a new tab or window.
This prevents users from navigating away from your site entirely, which can be particularly important for business websites.
Internal links and bookmarks
For long web pages with lots of content, internal links help users jump to specific sections quickly. Creating internal links involves two steps:
Creating Internal Navigation
Step 1: Create a bookmark at your destination using the id attribute:
<a id="Place">Bookmark text</a>
Step 2: Create a link to that bookmark using a hash symbol (#) followed by the bookmark name:
<a href="#Place">Go to Place</a>
The id attribute gives your bookmark a unique name. This name should be a single word without spaces. When someone clicks the link, the browser will automatically scroll to the bookmarked location.
HTML images
Images significantly enhance the visual appeal and informativeness of web pages. They can illustrate concepts, break up large blocks of text, and make content more engaging for visitors. However, images in HTML work differently from word processing programmes - they're not directly embedded but rather linked to image files.
Understanding the image tag
The tag creates a placeholder or "map" that tells the browser where to display an image. The actual image file remains stored separately, either in a folder on your website or on another server. This linking system helps keep HTML files smaller and allows for more efficient website loading.
The image tag is unique because it's an inline element, meaning text and other content can flow around it. It's also a self-closing tag, so it doesn't need a separate closing tag like most other HTML elements.
Essential image attributes
Every image tag should include two crucial attributes for proper functionality and accessibility: src and alt. Missing these attributes can cause images to break or make your website inaccessible to users with disabilities.
Source (src): This attribute tells the browser exactly where to find the image file. You must specify the complete file path and include the correct file extension (like .jpg, .png, or .gif).
Basic Image Tag
<img src="images/kitten.jpg" />
If your image is stored in a subfolder called "images," you need to include that path. If it's in the same folder as your HTML file, you can use just the filename.
Alternative text (alt): This attribute provides a text description of the image. This text appears if the image fails to load and is essential for users with screen readers or other accessibility tools.
<img src="images/kitten.jpg" alt="small black kitten" />
Optional sizing attributes
While not required, height and width attributes can improve page loading performance by telling the browser how much space to reserve for each image before it fully loads.
Both attributes accept numerical values representing pixels:
- height="200" reserves 200 pixels of vertical space
- width="300" reserves 300 pixels of horizontal space
Be careful when specifying both dimensions - if you don't maintain the original aspect ratio, your image may appear stretched or distorted. Often it's better to specify only one dimension and let the browser calculate the other automatically.
Image positioning with the align attribute
The align attribute controls how images position themselves relative to surrounding text and other elements on the page.
The alignment options each create different text-wrapping effects:
- left places the image on the left side with text wrapping around the right
- right places the image on the right side with text wrapping around the left
- top, middle, and bottom align the image with surrounding text at different vertical positions
Image Positioning Example
<img src="cube.jpg" align="left" alt="A cube" />
This code positions the image on the left side of the page, allowing text to flow around its right side.
The align attribute is particularly useful when you want to integrate images smoothly with your text content rather than having them interrupt the flow.
Centring images
Note that align="centre" doesn't work with images. To centre an image, you need to use the <center> tag around the image element:
<center><img src="w3s.png" alt="Logo" /></center>
Key Points to Remember:
-
List structure: Use <ul> for bulleted lists, <ol> for numbered lists, and <li> for individual items within any list
-
Link essentials: Every hyperlink needs an anchor tag (<a>) with an href attribute containing the destination address in quotation marks
-
Image requirements: All images must have a src attribute (file location) and an alt attribute (description text) for proper functionality and accessibility
-
Customisation options: Use the type attribute to change bullet styles in lists, and align to control image positioning relative to text
-
Internal navigation: Create bookmarks with id attributes and link to them using href="#bookmarkname" for easy navigation within long pages