Text Formatting (Grade 11 NSC Matric Computer Application Technology): Revision Notes
Text Formatting
Making your web pages visually appealing is essential for engaging your visitors. In previous work, you may have noticed that basic web pages can look quite plain with all text appearing in the same font and aligned to the left. This unit focuses on using HTML attributes to transform boring web pages into more attractive and readable documents.
Understanding HTML attributes
HTML attributes are special instructions that you add to HTML tags to control how elements appear on your web page. Think of attributes as settings that you can adjust to customise the appearance and behaviour of your HTML elements.
Attributes are added to opening tags and they are used to modify how the element displays on the screen. They provide the flexibility that makes HTML so powerful for web design.
Anatomy of an attribute
Every HTML attribute follows a specific structure with two essential components:
- The attribute name - This identifies which property you want to modify
- The attribute value - This specifies exactly how you want to modify that property
Basic Attribute Structure:
<p align = "centre">The quick brown fox</p>
In this example, align is the attribute name, and "centre" is the attribute value.
Important syntax rules
When working with HTML attributes, you must follow these crucial rules to ensure your web pages display correctly:
Critical Syntax Rules:
Placement rule: Attributes are ONLY added to opening tags. Never include attributes in closing tags. For example, <p align="centre"> is correct, but </p align="centre"> is completely wrong.
Quote rule: Always enclose attribute values in quotation marks. While HTML5 sometimes allows you to skip quotes, it's best practice to always include them. This prevents errors and makes your code more reliable.
Spelling consideration: Some HTML attribute values use American spelling rather than British spelling. For instance, use "centre" instead of "centre" and "colour" instead of "colour". This is simply how HTML was originally designed.
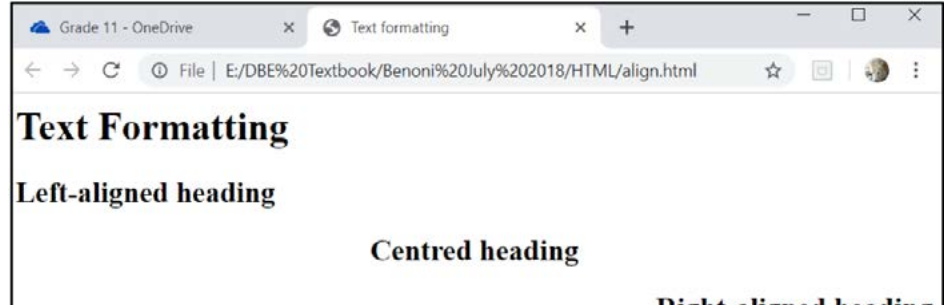
Text alignment
Text alignment determines where your text appears horizontally on the web page. The align attribute works with both paragraph tags (<p>) and heading tags (<h1> to <h6>) to control text positioning.
The alignment options provide different visual effects:
Left alignment serves as the default setting for most HTML elements, so you rarely need to specify it explicitly. Text flows naturally from the left margin, creating the standard reading pattern most users expect.
Centre alignment positions text in the middle of the available space, making it ideal for headings, titles, or text that needs to stand out. Remember to use the American spelling "centre" in your code.
Right alignment moves text to the right edge of its container, which can be useful for creating unique layouts or aligning specific content like dates or signatures.
Text Alignment Examples:
<p align="left">This text aligns to the left</p>
<p align="centre">This text appears in the centre</p>
<p align="right">This text aligns to the right</p>
You can also centre text using the <center> tag: <center><p>The quick brown fox</p></center>
Working with fonts
Fonts significantly impact how your text appears on screen. The tag allows you to modify the typeface, colour, and size of your text. This tag works through a technique called nesting, where the font tag is placed inside paragraph or heading tags.
Basic Font Tag Structure:
<p><font colour = "red">Paragraph text</font></p>
Notice how the font tag opens after the paragraph tag opens, and the font tag closes before the paragraph tag closes. This nesting ensures that the font styling applies only to the text within that specific paragraph.
Font attributes
Font face controls which typeface displays your text. You can specify any valid font name such as Arial, Times New Roman, or Comic Sans MS. When choosing fonts, consider that users must have the font installed on their computers for it to display correctly. Popular web-safe fonts include Arial, Georgia, and Verdana.
Font colour changes the text colour from the default black to any of HTML's 140 standard colour names. Popular choices include red, blue, green, purple, and many others. Choose colours that contrast well with your background to ensure readability.
Font size ranges from 1 (smallest) to 6 (largest), with 3 being the standard size. Larger numbers create bigger text, while smaller numbers create more compact text. Size 1 is quite small and should be used sparingly, while size 6 creates very large text suitable for major headings.
When selecting fonts, always consider web accessibility. Ensure your font choices are readable across different devices and that colour combinations provide sufficient contrast for users with visual impairments.
Combining font attributes
You can use multiple font attributes within a single font tag. The order of attributes doesn't matter, but consistency in your coding style helps maintain readable code:
Multiple Font Attributes:
<p><font colour = "blue" size = "4" face = "Arial Black">The quick brown fox jumps over the lazy dog</font></p>
This example combines colour (blue), size (4), and typeface (Arial Black) in a single font tag.
Horizontal lines
Horizontal lines, created with the
tag, help divide content sections and improve page organisation. Two key attributes control the appearance of these lines.
Size attribute determines the thickness of your horizontal line, measured in pixels. Keep in mind that 1 centimetre equals approximately 37.6 pixels. Browsers typically display horizontal lines as hollow rather than solid, which can make very thin lines difficult to see clearly.
Width attribute controls the length of the line and accepts two types of values. Pixel values (like 100) create fixed-width lines that remain the same size regardless of browser window changes. Percentage values (like 50%) create responsive lines that adjust proportionally when users resize their browser windows.
When using percentage widths, the line adapts to different screen sizes, making your web page more flexible across various devices and window sizes. This is particularly important for modern responsive web design.
Background colour
Adding background colour transforms plain white web pages into more visually interesting documents. The bgcolor attribute applies to the <body> tag and affects the entire page background.
When selecting background colours, prioritise readability above visual appeal. Dark backgrounds work well with light text, while light backgrounds suit dark text. Avoid colour combinations that strain the eyes or make text difficult to read, such as red text on a green background.
Setting Background Colour:
<body bgcolor = "lightyellow">
You can also use images as backgrounds by specifying a file path:
<body background="w3s.png">
Key Points to Remember:
- Attributes only go in opening tags, never in closing tags
- Always put quotes around attribute values to avoid errors
- Use American spelling for HTML values (centre, colour)
- Font tags must be nested inside paragraph or heading tags
- Choose background colours that ensure text remains readable
- Horizontal line width can be set in pixels (fixed) or percentages (flexible)