Simple IF Function (Grade 11 NSC Matric Computer Application Technology): Revision Notes
Simple IF Function
What is the IF function?
The IF function is one of Excel's most useful logical functions that helps you make decisions in your spreadsheet. Think of it as a way to ask Excel a question and get different answers depending on whether something is true or false. It's like having a digital decision-maker that can automatically choose between two options based on the conditions you set.
This function follows simple "if this, then that" logic that we use in everyday thinking. For example, "if it's raining, then take an umbrella, otherwise take a cap." Excel's IF function works exactly the same way, but with data in your spreadsheet.
Understanding the syntax
The IF function has a specific structure that you must follow for it to work properly. The basic format looks like this:
Let's break this down into three essential parts:
- Condition: This is the question you're asking Excel to check. It could be comparing two values, checking if something equals a specific text, or testing if a number meets certain criteria.
- Value_if_true: This is what Excel will display when your condition is correct (true). It can be text (in quotes), numbers, or even other formulas.
- Value_if_false: This is what Excel shows when your condition is incorrect (false). Like the true value, this can be text, numbers, or formulas.
How IF functions work
When Excel processes an IF function, it follows a logical sequence. First, it evaluates the condition you've specified. Then, depending on whether that condition is true or false, it returns the appropriate value. This happens instantly, making IF functions perfect for creating dynamic spreadsheets that respond to changing data.
The beauty of IF functions is their versatility. You can use them to categorise data, create automatic labels, perform conditional calculations, or even trigger other functions based on specific criteria.
Worked examples
Let's look at two practical examples that demonstrate how IF functions work in real situations.
Worked Example: Grade Checking
Imagine you want to automatically determine whether a student has passed based on their test score. You've decided that 60 is the passing mark.
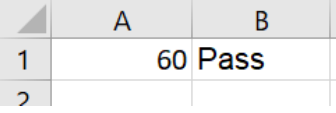
Step 1: Enter the score (60) in cell A1.
Step 2: In cell B1, create the IF function:
This formula checks whether the value in A1 equals 60. When it does, Excel displays "Pass". When the score is anything other than 60, it shows "Grounded".
Step 3: Press Enter to see the result.
Since our score was exactly 60, the function returned "Pass".

Worked Example: Weather Conditions
Here's another example using text conditions. Let's create a function that suggests what to take based on the weather.
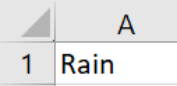
Step 1: Enter "Rain" in cell A1.
Step 2: In cell B1, enter the formula:
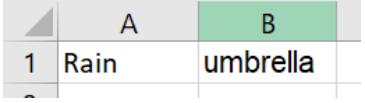
This function checks whether cell A1 contains exactly "rain". When it does, Excel suggests "umbrella". For any other weather condition, it suggests "cap".
Step 3: Press Enter to view the result.
Since A1 contains "Rain", the function correctly returned "umbrella".
Steps to create an IF function
Follow these steps whenever you need to create an IF function:
- Identify your condition: Decide what you want Excel to check. This could be comparing numbers, matching text, or testing ranges.
- Determine your outcomes: Choose what should happen when the condition is true and what should happen when it's false.
- Select your cell: Click on the cell where you want the IF function result to appear.
- Type the function: Start with =IF( then add your condition, followed by a comma, your true value, another comma, and your false value. Close with ).
- Press Enter: Let Excel process the function and display the result.
- Test your function: Try changing the input values to make sure your IF function responds correctly to different conditions.
Always test your function with different input values to ensure it works correctly in all scenarios. This step is crucial for avoiding errors in your spreadsheet calculations.
Practical tips for using IF functions
When working with IF functions, remember that text values must be enclosed in quotation marks, whilst numbers don't need quotes. Excel is case-sensitive when comparing text, so "Rain" and "rain" are treated as different values.
You can reference other cells in your conditions and outcomes, making your IF functions dynamic and responsive to changes elsewhere in your spreadsheet. This is particularly useful when creating templates or automated reports.
Always double-check your logic before finalising your IF function. Ask yourself: "Does this condition test exactly what I want?" and "Are my true and false values appropriate for all possible scenarios?"
Key Points to Remember:
- The IF function uses the syntax:
- Text values in IF functions must be enclosed in quotation marks
- Excel evaluates the condition first, then returns either the true or false value
- IF functions are perfect for creating automatic labels and categories based on your data
- You can use cell references in any part of the IF function to make it dynamic