Working with Different Views (Grade 11 NSC Matric Computer Application Technology): Revision Notes
Working with Different Views
When working with databases, you'll encounter two essential views that serve different purposes in table creation and management. Understanding how to switch between these views and knowing when to use each one is crucial for effective database work.
Understanding database views
Database applications provide different ways to view and interact with your data through various views. Think of views as different lenses through which you can examine and work with your database tables. Each view is designed for specific tasks, and switching between them allows you to work more efficiently.
The two primary views you'll work with are Datasheet View and Design View. These views complement each other - one focuses on the data itself, while the other focuses on the structure that holds that data.
Views are like different tools in a toolbox - each one is designed for specific tasks. Just as you wouldn't use a hammer to cut wood, you shouldn't try to enter data in Design View or modify table structure in Datasheet View.
Switching between views
To change from one view to another, you need to locate the View button, which appears on either the Home tab or Table Tools tab of your ribbon interface.
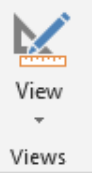
Toggle Functionality: The View button works as a toggle switch. This means:
- If you're currently in Datasheet View, selecting the View option will switch you to Design View
- If you're currently in Design View, selecting the View option will switch you to Datasheet View
This toggle functionality makes it quick and easy to move between the two views as you work on your database tables.
Datasheet view
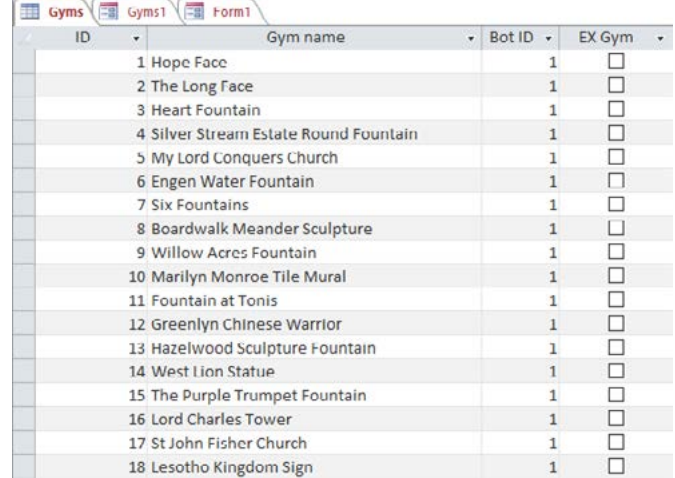
Datasheet View is where you interact directly with your data. This view presents your database table in a familiar spreadsheet-like format, making it intuitive for users who are comfortable with programmes like Excel.
What you can do in datasheet view
In Datasheet View, you can:
- Enter new data into your table by typing directly into the cells
- Edit existing records by clicking on any cell and making changes
- Navigate through records using scroll bars or keyboard shortcuts
- View all your data in an organised, tabular format
- Adjust column widths to better display your information
Limitations of datasheet view
Key Limitations in Datasheet View:
- You cannot change the fundamental structure of your table
- You cannot modify field properties such as data types
- You cannot set up validation rules or input masks
- You cannot establish relationships between tables
- Formatting options are very limited (you can only adjust column width)
Think of Datasheet View as being similar to entering information on a pre-printed form - you can fill in the blanks, but you cannot change the form's design.
Design view
Design View is where you create and modify the structure of your database tables. This view shows you the blueprint of your table rather than the actual data.
What you can do in design view
Design View allows you to:
- Create new fields and define their properties
- Set data types for each field (Text, Number, Date/Time, etc.)
- Configure field properties such as field size, format, and validation rules
- Establish primary keys to uniquely identify records
- Set up input masks to control how data is entered
- Create descriptions for fields to document their purpose
- Define default values that appear automatically in new records
Limitations of design view
Key Limitations in Design View:
- You cannot view or edit the actual data stored in your table
- You cannot see how your data will appear to users
- You cannot perform data entry tasks
Design View is like being an architect - you can design the building (table structure), but you cannot move in the furniture (enter data) until construction is complete.
Working effectively with both views
To create and maintain database tables successfully, you need to use both views strategically:
Worked Example: Recommended Database Workflow
Step 1: Start with Design View when creating a new table
- Define all your fields and their data types
- Set up field properties and validation rules
- Establish primary keys and relationships
Step 2: Switch to Datasheet View once your structure is ready
- Begin entering your actual data
- Test your validation rules and input masks
- Verify that your table design works as expected
Step 3: Return to Design View when you need to make structural changes
- Add new fields or modify existing ones
- Adjust field properties based on real-world usage
- Make improvements to your table design
Planning ahead
Before you begin creating tables, it's essential to plan your database structure carefully. Consider:
- What information you need to store
- How different pieces of information relate to each other
- What data types are most appropriate for each field
- What validation rules will help maintain data quality
Planning Tip: Remember that changing your table structure after entering large amounts of data can be complicated and potentially risky, so thorough planning in Design View will save you time and trouble later.
Practical tips for exam success
Key Strategies for Practical Assessments:
- Always check which view you're in before starting a task
- Use Design View first when creating new tables from scratch
- Switch to Datasheet View to verify your design works correctly
- Remember the toggle nature of the View button - it switches between the two main views
- Don't try to enter data in Design View or modify structure in Datasheet View
Understanding these views and when to use them demonstrates your grasp of database fundamentals and will help you work more efficiently in practical situations.
Key Points to Remember:
- Datasheet View is for working with data - entering, editing, and viewing records in a spreadsheet-like format
- Design View is for working with structure - creating fields, setting properties, and defining how your table operates
- Use the View button to toggle between these two views quickly and easily
- Start with Design View to create your table structure, then switch to Datasheet View to enter data
- Each view has specific strengths - use the right view for the right task to work most effectively