Mailings and References (Grade 11 NSC Matric Computer Application Technology): Revision Notes
References
Understanding how to properly reference sources and create professional documents is essential for academic success. When creating assignments for school or university, you need to show that you're not committing plagiarism by properly citing your sources. You'll also need to add helpful navigation features like captions for images and tables, and create a table of contents to help readers find information quickly.
This section covers the key referencing tools available in Microsoft Word: table of contents, table of figures, footnotes, captions, citations, bibliographies, and indexes. These features work together to create professional, well-organised documents that meet academic standards.
Professional document formatting requires combining multiple reference features. Each tool serves a specific purpose in creating documents that are easy to navigate and properly credited.
Table of contents
A table of contents serves as a roadmap for your document, helping readers navigate easily to specific sections. Think of it like the contents page in a textbook - it shows all the main headings and tells you which page to find them on. When viewing documents electronically, you can click on headings in the table of contents to jump straight to that section.
Tables of contents work best when added after you've finished writing and formatting your document. They're typically placed at the beginning, right after the title or cover page.
Critical Requirement: You must format all your headings using Word's built-in heading styles (found in the Home tab under Styles) before you can create a table of contents. Without proper heading styles applied, Word won't know which text should appear in your table of contents.
Creating automatic tables of contents
Word offers several automatic table of contents formats that do most of the work for you. The automatic approach is recommended for most users as it ensures consistency and updates easily when you make changes to your document.
Step-by-Step: Creating an Automatic Table of Contents
- Start on a blank page after your cover page
- Go to the References ribbon and find the Table of Contents group
- Click on "Table of Contents" and choose one of the automatic table options
- Word will scan your document for formatted headings and create the table automatically
Updating your table: If you make changes to your document later, simply click anywhere in the table of contents and select "Update Table" to refresh the page numbers and headings.
Creating custom tables of contents
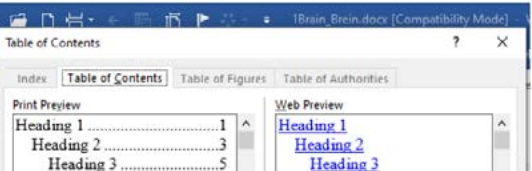
Sometimes you might want more control over how your table of contents looks. The custom option lets you adjust formatting details like fonts, spacing, and how many heading levels to display.
Step-by-Step: Creating a Custom Table of Contents
- Start on a blank page after your cover page
- Select "Table of Contents" from the References ribbon
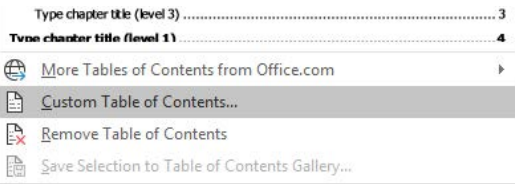
- Choose "Custom Table of Contents"
- Use the Options button to adjust which heading levels to include
- Modify fonts and formatting as needed
- Click OK twice to create your customised table
You can also remove headings you don't want by adjusting the Options settings, and change fonts by selecting "Modify" to customise the appearance further.
Table of figures
A table of figures creates a list of all the images, charts, graphs, and other visual elements in your document, along with their page numbers. This feature provides a quick reference for readers who want to find specific visual content.
Critical Requirement: You cannot create a table of figures until you've added captions to all your tables and figures first. This is because Word uses those captions to build the table of figures automatically.
Creating a table of figures
Once you've added captions to your visual elements, the process becomes straightforward:
Step-by-Step: Creating a Table of Figures
- Start on a blank page after your table of contents
- Go to the References ribbon and find the Captions group
- Select "Insert Table of Figures"
- Choose your preferred formatting options in the dialogue box
- Click OK to generate the table
The table of figures will automatically update whenever you add new captioned items to your document.
Footnotes
Footnotes provide a way to include additional information or explanations without interrupting the flow of your main text. They appear as small text at the bottom of each page and connect to numbered or lettered markers in your document.
Understanding Footnote Structure
Footnotes consist of two connected parts:
- A number or symbol in your main text showing where the footnote applies
- The actual footnote text at the bottom of the page
This dual structure allows readers to access additional information without losing their place in the main text.
Adding footnotes
Adding footnotes is straightforward and Word handles the numbering automatically:
Step-by-Step: Adding Footnotes
- Place your cursor exactly where you want the footnote marker to appear
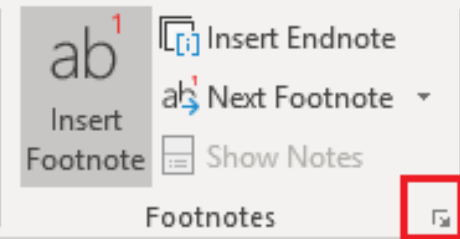
- Go to the References ribbon and click "Insert Footnote" in the Footnotes group
- Word automatically creates a numbered marker and takes you to the bottom of the page
- Type your footnote text in the space provided
You can customise footnote formatting by clicking the small arrow in the bottom-right corner of the Footnotes group. This lets you change numbering styles, positioning, and whether to use footnotes or endnotes.
Captions
Captions serve as numbered labels that explain what images, tables, charts, or equations show. They're essential for creating professional documents because they allow readers to easily reference specific visual elements in your text, and they enable Word to generate tables of figures automatically.
Word numbers captions automatically, so you don't need to worry about keeping track of figure numbers - if you add a new image, all the following numbers will update automatically.
Caption Positioning Guidelines
- Figure captions typically appear below the image
- Table captions typically appear above the table
- Equation captions usually appear below the equation
Adding captions to images
The caption feature ensures consistency across your document and enables automatic referencing:
Step-by-Step: Adding Captions to Images
- Select the image you want to add a caption to
- Go to the References ribbon and select "Insert Caption" from the Captions group
- In the Caption dialogue box, type your descriptive text after the figure number
- Make sure the Label is set to "Figure" and Position is "Below selected item"
- Click OK to add the caption
The caption will appear below your image and be automatically numbered. You can change the label from "Figure" to "Table" or "Equation" depending on what type of content you're captioning.
Citations
Using proper citations when writing reports, essays, or academic work demonstrates that you're not plagiarising and gives credit to original sources. Many students only encounter citation requirements during tertiary education, where incorrect citation can have serious consequences.
Microsoft Word's citation feature helps you insert properly formatted references from various academic sources with minimal effort. This tool supports multiple referencing styles and maintains consistency throughout your document.
Academic Integrity Warning
Failing to properly cite sources is considered plagiarism and can result in serious academic consequences including failing grades, disciplinary action, or even expulsion from educational institutions.
Building your source list
Before adding citations, you need to build a comprehensive list of all your sources. Word can handle many different source types including:
- Books and book chapters
- Journal and magazine articles
- Conference proceedings
- Reports
- Websites and online documents
- Electronic sources
- Audio/visual materials like films and recordings
- Interviews and legal cases
- Other miscellaneous sources
The fields you need to complete will vary depending on your source type.
Adding sources
Step-by-Step: Adding Sources to Your Library
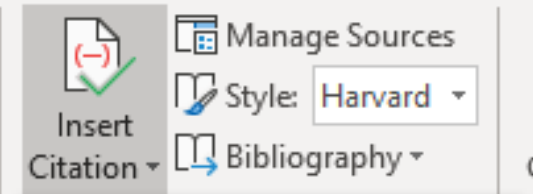
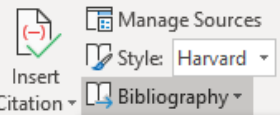
- Go to the References tab and select "Manage Sources" from the Citations & Bibliography group
- Click "New" to add a source
- Select your source type from the dropdown menu
- Fill in all the required fields for your source
- Check "Show All Bibliography Fields" if you need additional field options
- Click OK to save the source
Style-Specific Requirements
Different referencing styles require different information. The fields available will change based on the style you've selected (like Harvard or APA). Word stores your source information and makes it available for use in citations and bibliography generation.
Inserting citations
Once you've built your source list, inserting citations becomes a simple process:
Step-by-Step: Inserting Citations
- Place your cursor where you want the citation to appear in your text
- In the Citations & Bibliography group, click "Insert Citation"
- Choose the appropriate source from your list
- To add page numbers, click the dropdown arrow next to the citation and select "Edit Citation"
- Enter the page number(s) in the dialogue box and click OK
South African Academic Standards
Harvard and APA are the most commonly used referencing systems at South African universities. Harvard and APA styles are very similar, but they do have some differences in formatting requirements.
Bibliography
A bibliography provides a complete list of all the sources you referenced in your document. Word can automatically generate this list using all the sources you've added to your source manager, saving you time and ensuring consistent formatting.
Creating a bibliography
The bibliography generation process is automated once you've added your sources:
Step-by-Step: Creating a Bibliography
- Start on a blank page at the end of your document (a page break makes this easier)
- In the Citations & Bibliography group, click the dropdown arrow next to "Bibliography"
- Select the bibliography style you prefer - the most common option uses the heading "References"

Word automatically formats all your sources according to the selected referencing style and creates the bibliography. If you add more sources later, you can update the bibliography by clicking anywhere in it and selecting the update option.
Index
An index functions as an alphabetical reference guide that lists important names, subjects, concepts, and other key terms found throughout your document, along with their page numbers. Indexes help readers quickly locate specific information without having to search through the entire document.
Critical Requirement: You cannot create an index unless you have first inserted a bibliography or reference list into your document.
Creating index entries
Before generating an index, you must mark the terms you want to include. This process requires careful planning to ensure all important terms are captured:
Step-by-Step: Marking Index Entries
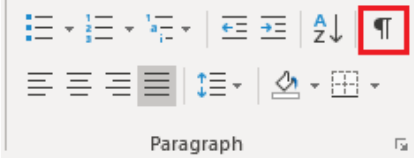
- Turn on "Show/Hide" in the Paragraph group on the Home tab (this displays formatting marks)
- Place your cursor next to the word you want to index
- Go to the References tab and select "Mark Entry" from the Index group
- Add a main entry name and any sub-entry details if needed
- Select "Mark" to mark this single instance, or "Mark All" to mark every occurrence of the word
Continue marking all the terms you want in your index. Each marked term will display with special formatting codes when Show/Hide is turned on.
Generating the index
Once you've marked all your entries, creating the final index is straightforward:
Step-by-Step: Generating the Index
- Create a new page after your bibliography
- Select "Insert Index" from the Index group on the References tab
- Choose your formatting preferences in the Index dialogue box
- Click OK to generate the index
Word will create an alphabetical listing of all your marked terms with their corresponding page numbers.
Key Points to Remember:
- Always apply heading styles first - Table of contents and navigation features depend on properly formatted headings using Word's built-in styles
- Captions before table of figures - You must add captions to all images and tables before you can create a table of figures
- Footnotes have two parts - The marker in your text and the explanatory text at the bottom of the page
- Build sources before citing - Use the source manager to add all your references before inserting citations in your text
- Harvard and APA styles - These are the most common referencing systems used in South African academic institutions
- Proper citation prevents plagiarism - Always credit your sources to maintain academic integrity