Page Layout and Design (Grade 11 NSC Matric Computer Application Technology): Revision Notes
Page Layout and Design
Understanding document themes
Microsoft Word provides a powerful design system called themes that helps you create professional-looking documents quickly and consistently. A theme is essentially a coordinated set of design elements that work together to give your document a polished appearance.
What is a Theme?
A theme is a collection of design elements specifically created to allow instant customisation of documents using a variety of colours, fonts, and styles. Think of it as a pre-designed template that coordinates all visual elements in your document.
Themes are particularly useful because they allow you to format an entire document instantly without needing to create custom templates or manually adjust every design element. Each theme combines carefully chosen colours, fonts, and styles that complement each other, ensuring your document looks professional and cohesive.
How themes work in Microsoft Word
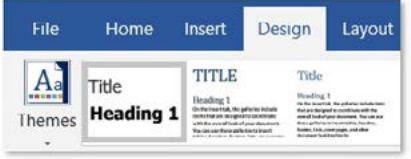
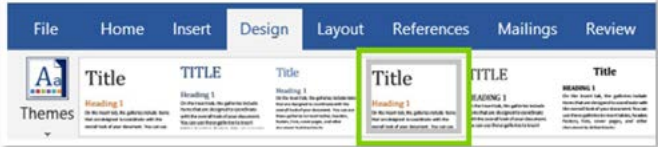
Themes are located under the Design tab in Microsoft Word's ribbon interface. This is your main control centre for all document design and formatting options. When you apply a theme, it affects the overall appearance of your document by changing several key elements at once.
The beauty of themes lies in how they interact with Word's Quick Style gallery. If you've already applied heading styles and title styles to sections in your document using the Styles feature, themes will enhance these existing styles rather than replacing them.
Key Concept: Enhancement vs Replacement
Themes enhance styles rather than override them. For example, if you've marked certain text as "Heading 1", applying a new theme might change all your Heading 1 text to use the theme's colour scheme while maintaining the heading structure.
Components of themes
Every theme consists of four main components that work together to create a unified design:
The Four Theme Components:
- Colours: Carefully selected colour palette for text, backgrounds, borders, and design elements
- Fonts: Specific typefaces for headings and body text, creating professional typography hierarchy
- Paragraph spacing: Controls space between paragraphs and around text elements for optimal readability
- Effects: Special formatting like shadows, reflections, and visual enhancements for shapes and images
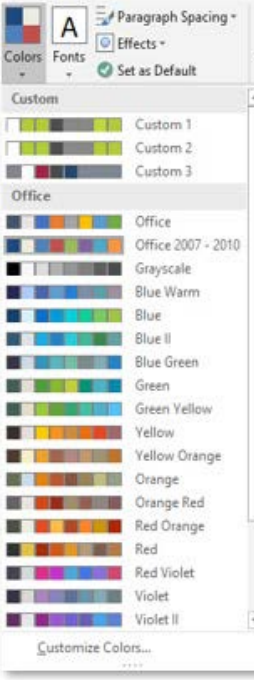
Colours: Each theme includes a carefully selected colour palette that ensures all elements in your document complement each other. These colours are used for text, backgrounds, borders, and other design elements.
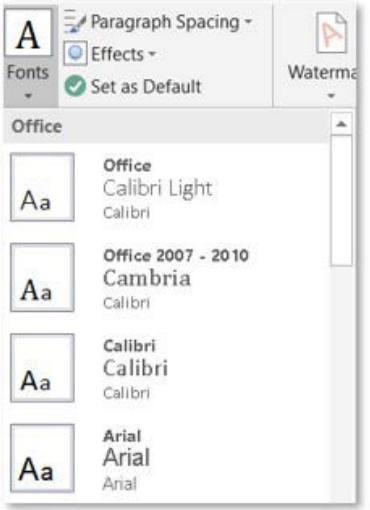
Fonts: Themes specify which fonts to use for different types of text in your document. They typically include one font for headings and another for body text, creating a professional typography hierarchy.
Paragraph spacing: This controls the amount of space between paragraphs and around different text elements, affecting the overall readability and visual flow of your document.
Effects: These include special formatting options like shadows, reflections, and other visual enhancements that can be applied to shapes, images, and other design elements.
Customising themes
While Word comes with many built-in themes, you can customise any theme to better suit your needs. The customisation options allow you to modify individual components while keeping the overall design cohesive.
You can change the colour scheme by selecting from predefined colour palettes or creating your own custom colours. Similarly, you can modify the fonts used in the theme, choosing different typefaces for headings and body text. Once you've customised a theme to your liking, you can even set it as the default theme for all new documents you create.
Theme Customisation Best Practice
Select and customise your theme early in the document creation process, before applying extensive manual formatting. This prevents conflicts and ensures the best visual results.
The customisation process is straightforward - simply select the theme component you want to change (colours, fonts, spacing, or effects) and choose your preferred options from the available selections.
Working with cover pages
Cover pages are professional-looking first pages that you can add to your documents to create a strong first impression. They're especially important for formal documents, reports, and assignments like your PAT (Practical Assessment Task), where having your personal details clearly displayed makes it easier for assessors to identify your work.
PAT Requirement Alert
Always include a cover page for formal assignments like your PAT. Having your personal details clearly displayed makes it easier for assessors to identify your work and creates a professional impression.
To add a cover page, you need to access the Insert tab in Word's ribbon interface. Here you'll find the Pages group, which contains the cover page options alongside other page-related tools.
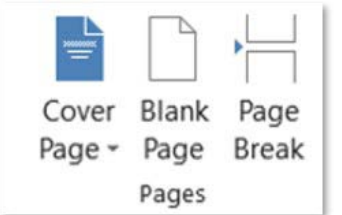
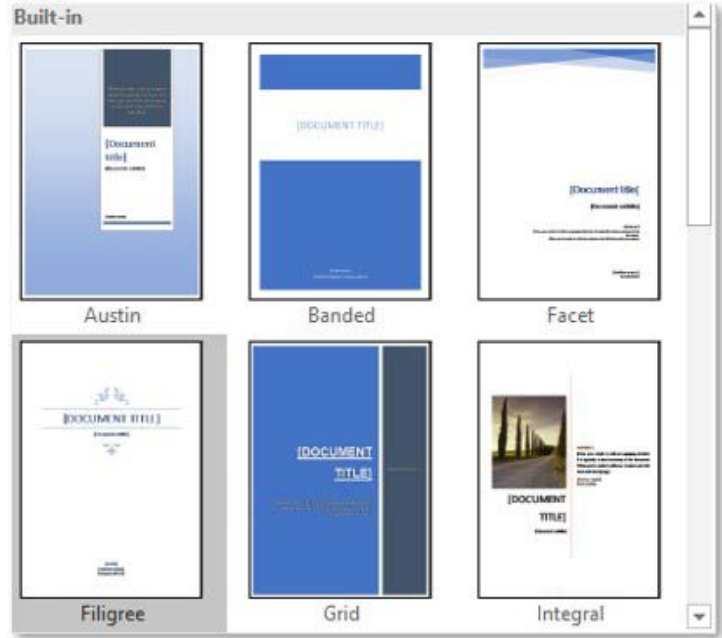
Built-in cover page templates
Word provides numerous professionally designed cover page templates that you can use immediately. These templates include popular styles like Austin, Banded, Facet, Filigree, Grid, and Integral, each with its own distinctive design approach.
Template Features
Built-in templates feature placeholders for common information such as document titles, subtitles, author names, and dates. You simply click on these placeholders and replace them with your own content. The templates automatically adapt to match your document's overall design scheme.
Step-by-step theme application process
Applying a theme to your document follows a logical sequence that ensures the best results:
Worked Example: Applying a Theme
Step 1: Access the Design tab Click on the Design tab in Word's ribbon interface to reveal all theme-related options.
Step 2: Select a theme Browse through the available themes and click on one that appeals to you. You'll see a live preview of how it affects your document.
Step 3: Customise colours If needed, use the Colours dropdown to select a different colour scheme that better suits your document's purpose.
Step 4: Adjust fonts Use the Fonts option to change the typefaces used in your document, ensuring they match your intended tone and readability requirements.
Step 5: Fine-tune formatting You can format individual text elements exactly as you would with non-themed text, giving you complete control over the final appearance.
Step-by-step cover page insertion process
Adding a cover page is equally straightforward:
Worked Example: Inserting a Cover Page
Step 1: Navigate to Insert tab Click on the Insert tab in the ribbon to access page insertion tools.
Step 2: Select Cover Page In the Pages group, click on the Cover Page dropdown arrow to see available options.
Step 3: Choose your template Browse through the built-in templates and select one that matches your document's style and purpose.
Step 4: Customise content Click on the placeholder text fields and replace them with your own information, such as document title, your name, date, and any other relevant details.
Practical applications and exam tips
When working on assessments or formal documents, remember that good design enhances readability and professionalism. Themes help ensure consistency throughout long documents, which is particularly important for research projects and reports.
For your PAT and other major assignments, always include a cover page with your personal details clearly displayed. This not only looks professional but also helps your assessor quickly identify your work.
Design Principle
Remember that themes are meant to enhance your content, not distract from it. Choose themes that are appropriate for your document's purpose - more conservative themes for formal reports, and more creative ones for projects where visual appeal is important.
Common pitfalls to avoid
Critical Warnings to Avoid Formatting Issues
- Don't change themes after extensive manual formatting - This may undo your custom formatting work. Select and customise your theme early in the document creation process.
- Avoid using too many different fonts or colours within a single document, even when customising themes. The built-in combinations are designed by professionals to work well together.
- Don't override theme consistency - Maintain design harmony by working with the theme rather than against it.
Summary
Key Points to Remember:
- Themes are found in the Design tab and provide coordinated colours, fonts, and styles for professional document appearance
- Themes enhance rather than override existing styles, making them perfect for use with the Quick Style gallery
- Cover pages are accessed through Insert tab > Pages group and provide professional first pages for important documents
- Customisation options allow you to modify theme components while maintaining design consistency
- Always include cover pages for formal assignments like your PAT to clearly identify your work and create a professional impression
- Apply themes early in the document creation process to avoid formatting conflicts
- Choose appropriate themes that match your document's purpose and audience