Further Practical Techniques (OCR A-Level Chemistry A): Revision Notes
Further Practical Techniques
Introduction
Preparing, purifying, and determining the melting point of organic solids are essential practical skills in organic chemistry. These techniques build upon previously learned methods such as distillation and heating under reflux using Quickfit apparatus. This note covers three important purification and analysis techniques used when working with solid organic products.
Preparation of organic solids
When carrying out organic synthesis, you may need to prepare solid products such as aspirin, salicylic acid, or ethanoic anhydride. These preparations often involve using Quickfit apparatus for reactions under reflux conditions. After the reaction is complete, the solid product must be separated from the reaction mixture before it can be purified.
For example, when preparing benzoic acid through alkaline hydrolysis, you would reflux methyl benzoate with aqueous sodium hydroxide using Quickfit apparatus, followed by acidification. The solid product that forms requires separation and purification before use.
Filtration under reduced pressure
Purpose and principle
Filtration under reduced pressure is a technique used to separate a solid product from a solvent or liquid reaction mixture more efficiently than simple gravity filtration. By applying suction, the filtration process is significantly faster, and the solid product can be partially dried on the filter.
Equipment required
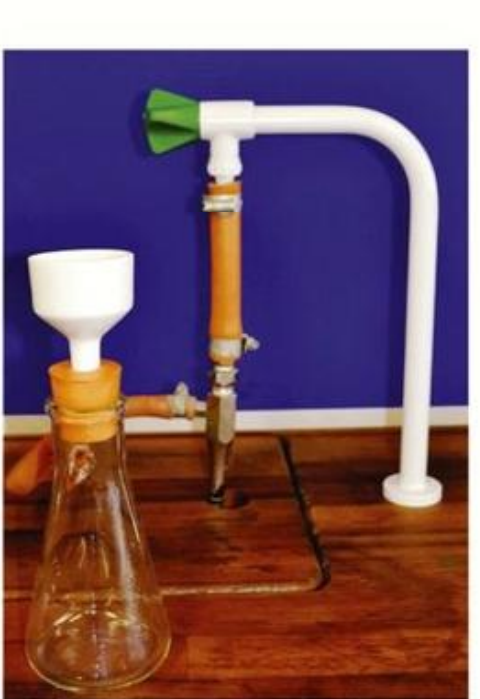
To carry out filtration under reduced pressure, you need the following apparatus:
- Büchner flask (thick-walled conical flask with side arm)
- Büchner funnel (porcelain or plastic funnel with perforated base)
- Pressure tubing (thick-walled rubber tubing)
- Filter paper (circular, sized to fit the Büchner funnel)
- Access to vacuum pump or water pump
Procedure
Setting up the apparatus: Connect one end of the pressure tubing to the side arm of the Büchner flask and the other end to the vacuum outlet (or water pump tap). Fit the Büchner funnel securely to the top of the Büchner flask using a rubber bung or Büchner ring to ensure an airtight seal.
Preparing for filtration: Switch on the vacuum pump (or turn on the tap if using a water pump) and test for good suction by placing your hand over the top of the funnel. You should feel strong suction pulling air through.
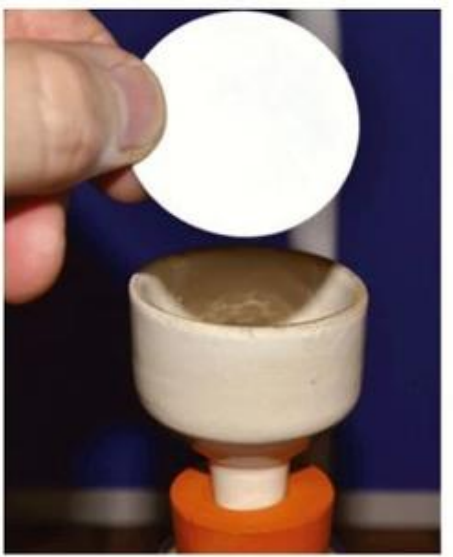
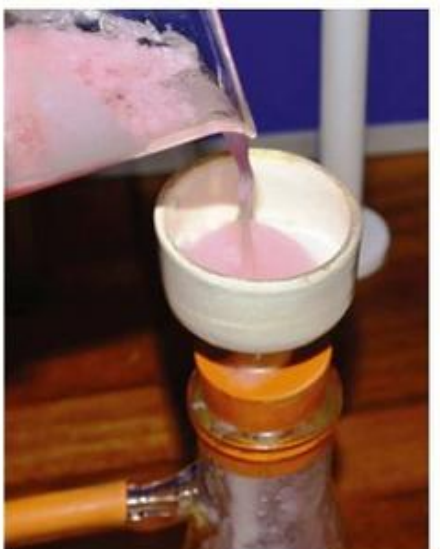
Filtering the sample: Place a piece of filter paper inside the Büchner funnel, ensuring it covers all the holes. Wet the filter paper with the same solvent used in your reaction - you should observe the paper being pulled down against the perforated base. Slowly pour your reaction mixture from a beaker into the centre of the filter paper, allowing the liquid to drain through.
Washing and drying: After all the mixture has been filtered, rinse the beaker with fresh solvent to collect any remaining solid crystals. Rinse the crystals in the Büchner funnel with additional solvent to remove impurities. Leave the crystals under suction for several minutes to remove excess solvent and begin the drying process.
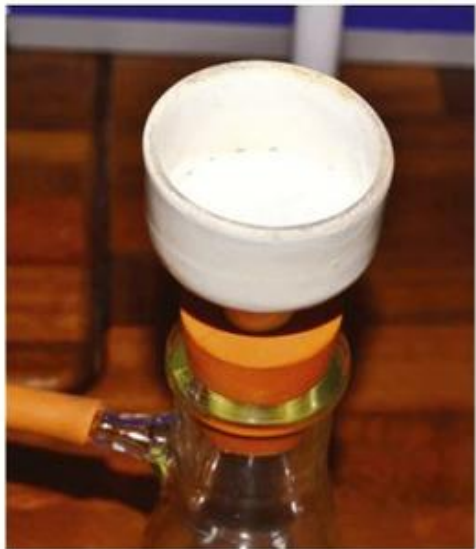
Always ensure the filter paper is wetted before adding your sample, as this creates a better seal and prevents solid from passing through gaps around the edges.
Recrystallisation
Purpose
Solid products obtained after filtration typically contain impurities that need to be removed. Recrystallisation is a purification technique that exploits differences in solubility between the desired product and its impurities. The principle is simple: dissolve the impure solid in a minimum volume of hot solvent, then allow the solution to cool slowly so that pure crystals form, leaving impurities in solution.
Choosing a suitable solvent
The ideal solvent for recrystallisation should:
- Dissolve the product readily when hot
- Have poor solubility for the product when cold
- Have different solubility characteristics for the impurities
- Be safe to heat (consider flammability)
Procedure
Dissolving the sample: Pour a quantity of chosen solvent into a conical flask. If the solvent is flammable, warm it gently over a water bath for safety. If using water as the solvent, you can place the conical flask on a tripod and heat with a Bunsen burner.
Transfer your impure solid sample into a second conical flask or beaker. Gradually add the warm solvent to the impure sample, using the minimum volume necessary to completely dissolve the solid. This is crucial - using excess solvent will reduce your final yield of pure product.
Worked Example: The Recrystallisation Process
Step 1: Dissolving
- Add warm solvent gradually to impure solid
- Stir continuously until solid completely dissolves
- Stop adding solvent immediately when dissolution is complete
Step 2: Cooling
- Remove heat source
- Allow solution to cool slowly to room temperature
- Pure crystals form as solubility decreases
Step 3: Collection
- Filter using reduced pressure when crystallisation is complete
- Collect dry, purified crystals
Cooling and crystallisation: Once the solid has completely dissolved, remove the heat source and allow the solution to cool slowly to room temperature. As the solution cools, the solubility of your product decreases, causing crystals of the pure product to form in the flask. The impurities, being in lower concentration or having different solubility properties, remain dissolved in the solvent.
Isolating pure crystals: When no more crystals appear to be forming, filter the mixture using filtration under reduced pressure (as described above) to collect the dry crystalline solid. The purified product is now ready for further analysis or use.
Common mistake: Adding too much solvent during recrystallisation is a frequent error. This results in a lower yield because more of your product remains dissolved in the cold solvent rather than crystallising out. Always add solvent gradually and stop as soon as the solid dissolves.
Melting point determination
Purpose and significance of melting points
Chemists use melting point determination to assess the purity of solid compounds. A pure organic substance typically has a very sharp melting point, occurring over a narrow range of just one or two degrees Celsius. This narrow melting range indicates high purity.
The melting range is defined as the difference between the temperature at which the sample begins to melt and the temperature at which melting is complete. When a compound contains impurities, two characteristic changes occur:
Effects of Impurities on Melting Point:
- The solid melts over a wider range of temperatures
- The observed melting point is lower than that of the pure substance
Sample preparation
Before measuring the melting point, ensure that:
- The sample is completely dry and free-flowing
- You have prepared a sealed capillary tube containing the sample
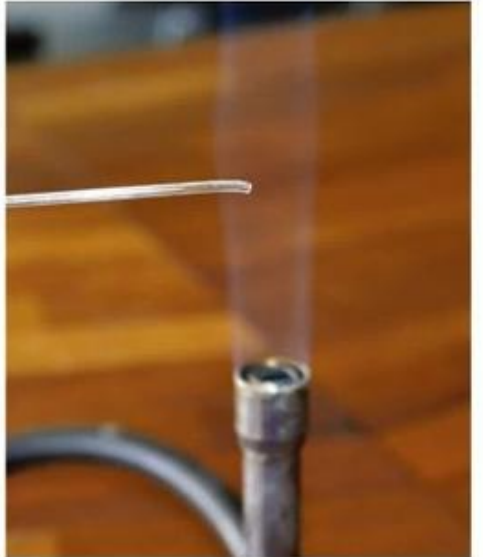
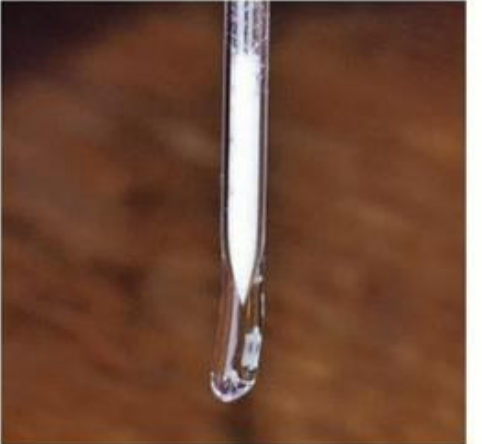
Preparing the capillary tube: Take a glass capillary tube (or melting point tube) and hold one end in the hot flame of a Bunsen burner. Rotate the tube continuously in the flame until the end seals closed. Allow the tube to cool completely.

Fill the sealed capillary tube with crystals to a depth of approximately 3 mm. This is typically done by pushing the open end of the tube into your solid sample, forcing some crystals into the tube.
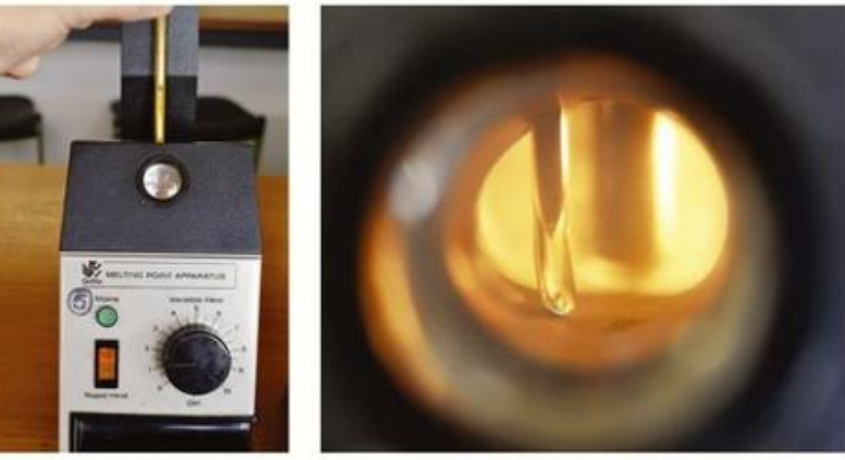
Method 1: Using an electrically heated melting point apparatus
This is the most common method used in schools and colleges due to its convenience and accuracy.
Setting up: Place the capillary tube containing your sample into the sample holder of the melting point apparatus. Insert a thermometer ( range) into the thermometer hole of the apparatus.
Heating and observation: Using the rapid heating setting initially, start to heat the sample while observing it through the magnifying window of the apparatus. As you approach the expected melting point region, switch to the slow heating setting.
Recording the melting point: When you observe the solid beginning to melt, record this temperature. Continue heating slowly and record the temperature when melting is complete. The melting range is the difference between these two temperatures.
Ensuring accuracy: To obtain a more accurate melting point, prepare a second sample in a fresh capillary tube. Heat this second sample using the slow heating setting from the start, particularly as you approach the melting point. This slower, more controlled heating provides a more precise determination.
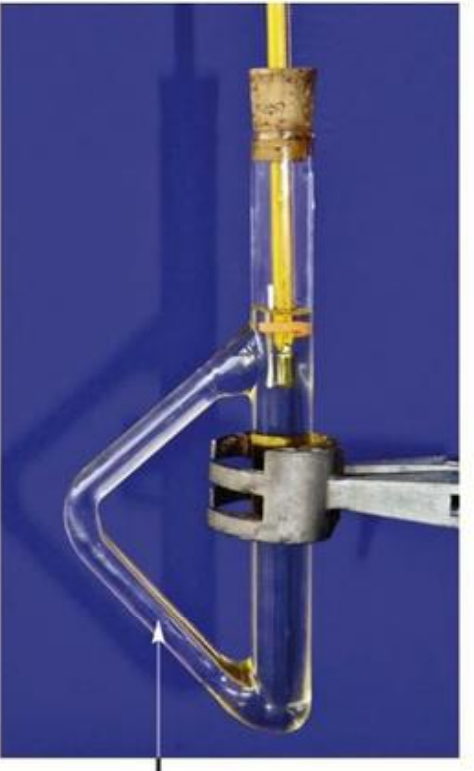
Method 2: Using an oil bath or Thiele tube
This traditional method is still used when electrically heated apparatus is unavailable.
Setting up the apparatus: Set up a Thiele tube or oil bath as shown in your practical manual. Attach the capillary tube containing your sample to a thermometer using a small rubber band, ensuring the sample is level with the thermometer bulb. Insert the thermometer through a hole in the cork (if using a Thiele tube) or clamp it in position (if using an oil bath). The thermometer and capillary tube should dip into the oil.
Heating and observation: Using a micro-burner, gently heat the side arm of the Thiele tube (or the oil bath directly) while continuously observing the solid in the capillary tube. Heat the oil slowly when approaching the melting point - this is essential for accuracy. It's advisable to repeat the determination a second time using even slower heating to ensure you obtain an accurate value.
When the solid begins to melt: Remove the heat source immediately and record the temperature shown on the thermometer. Continue observing until all of the solid has melted completely, then record this final temperature.
Always heat the oil slowly when approaching the melting point. Rapid heating can cause you to overshoot the actual melting point, resulting in an inaccurate determination. Pure substances require particularly careful observation as their melting range is very narrow.
Practical considerations and exam tips
Safety considerations:
- When heating flammable solvents during recrystallisation, always use a water bath, never a direct flame
- Ensure adequate ventilation when working with organic solvents
- Hot oil baths retain heat - allow adequate cooling time before dismantling apparatus
- Sealed capillary tubes can shatter if heated too rapidly
Improving purity: If your recrystallised product still shows a wide melting range, this indicates persistent impurities. The recrystallisation process can be repeated using fresh solvent to further improve purity.
Interpreting melting point data:
- A sharp melting point (range of ) indicates high purity
- A wide melting range (greater than ) suggests significant impurities present
- A melting point lower than the literature value also indicates impurities
Worked Example: Common Exam Questions
Question 1: Why must you cool the recrystallisation mixture before filtering? Answer: To maximize crystal formation and product yield - filtering while hot would allow dissolved product to pass through
Question 2: Why use minimum solvent volume? Answer: To maximize yield - excess solvent means more product remains dissolved
Question 3: Why heat slowly for melting point determination? Answer: To obtain an accurate measurement of when melting begins and ends
Remember!
Key Techniques and Principles:
-
Filtration under reduced pressure uses vacuum suction to rapidly separate solids from liquids and partially dry the product on the filter paper.
-
Recrystallisation purifies solids by dissolving them in minimum hot solvent and allowing slow cooling to form pure crystals - always use the minimum volume of solvent to maximize yield.
-
Melting point determination assesses purity: pure substances have sharp melting points (narrow range of ), while impure samples melt over wider temperature ranges and at lower temperatures.
-
Always heat slowly when approaching the melting point to obtain accurate measurements - rapid heating causes overshooting and inaccurate results.
-
For exam success, understand not just the procedures but the reasoning behind each step - why minimum solvent for recrystallisation? Why cool before filtering? Why slow heating for melting point?