Observing Mitosis in Onion Root Cells (VCE SSCE Biology): Revision Notes
Observing Mitosis in Onion Root Cells
Introduction to the investigation
This practical investigation allows you to observe the stages of mitosis (cell division) happening in real time under a microscope. By examining onion root cells, you can see the different phases of mitosis and work out how long each phase takes compared to the others.
Eukaryotic cells undergo a continuous cycle of growth and division called the eukaryotic cell cycle. This cycle has three main stages:
- Interphase - the cell replicates its DNA and prepares for division
- Mitosis - the replicated chromosomes (sister chromatids) separate into two new nuclei
- Cytokinesis - the cytoplasm and organelles divide to create two identical daughter cells
This investigation focuses specifically on mitosis, which consists of four distinct phases:
- Prophase
- Metaphase
- Anaphase
- Telophase
Why onion root cells?
Onion root cells are ideal for observing mitosis because they are constantly dividing and growing. This means that at any given moment, different cells will be at different stages of mitosis, allowing you to observe all phases in a single sample. The actively growing root tip region, called the meristem, contains cells that are rapidly undergoing mitosis to support the plant's growth.
Aim
To observe the various stages of mitosis in onion root cells and determine how long each stage takes relative to the others.
Materials required
You will need the following equipment and materials:
Biological materials:
- Onion root cells (fresh root tips)
Chemicals:
- 1 M hydrochloric acid (HCl)
- Feulgen stain (a DNA-specific stain)
- Distilled water
Equipment:
- Light microscope
- Microscope slides and coverslips
- Petri dish
- Plastic microtube
- Water bath (set to 60°C)
- Pipettes
- Forceps
- Scalpel or sharp knife
Safety equipment:
- Lab coat
- Safety glasses
- Gloves
Method
Part A: Specimen preparation
The first part of the procedure involves treating the onion root cells to make them easier to stain and observe:
Step 1: Use a sharp scalpel or knife to cut two onion root tips, each approximately 1 cm in length. Transfer these root tips into a plastic microtube.
Step 2: Fill two-thirds of the plastic microtube with 1 M hydrochloric acid (HCl).
Step 3: Place the microtube in a water bath heated to 60°C and incubate for 15 minutes. This heat treatment with HCl breaks down the cell walls and makes the DNA more accessible for staining.
Critical Step: The HCl and heat treatment is essential for success. This step breaks down the pectin in cell walls, separates cells from each other, and makes DNA accessible to the stain. Without proper treatment, cells won't stain effectively and will be difficult to observe.
Step 4: After incubation, carefully remove the microtube from the water bath and use forceps to transfer the root tips onto a small Petri dish.
Part B: Slide preparation
The second part involves staining the cells and preparing a microscope slide:
Step 5: Rinse the root tips thoroughly with distilled water three times to remove excess HCl.
Step 6: Add three drops of Feulgen stain to the root tips and allow them to rest for 15 minutes. Feulgen stain specifically binds to DNA, making the chromosomes visible under the microscope.
Step 7: After staining, use a pipette to remove the excess stain, then rinse the root tips three times with distilled water.
Step 8: Use the scalpel to carefully remove any portions of the root tip that haven't taken up the stain properly.
Step 9: Transfer the stained root tips onto a clean microscope slide and add a single drop of water.
Important Handling Note: Always handle microscope slides by their edges only. If you touch the surface, you'll leave fingerprints that will interfere with your observations and reduce image clarity.
Step 10: Place a coverslip over the root tips. To do this properly:
- Position one edge of the coverslip on the slide first
- Use forceps or a similar tool to gently lower the other edge down
- Avoid trapping air bubbles between the coverslip and the slide
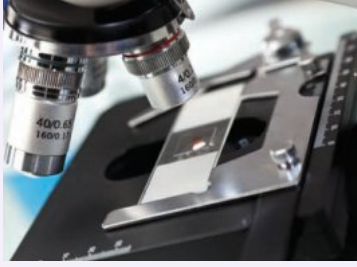
Step 11: Mount your prepared slide on the microscope stage. Use the coarse adjustment knob first to get the image roughly in focus, then use the fine adjustment knob for a clear, detailed view.
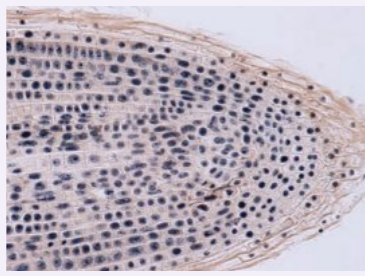
Step 12: Observe the root tip under the microscope at 400× magnification. Systematically scan the slide and count the number of cells you can see at each stage of mitosis.
Recording and analysing results
Understanding the results
Key Principle: The fundamental concept behind this investigation is that if you observe more cells in a particular stage of mitosis, it means that stage takes longer to complete. Cells spend more time in longer phases, so you're more likely to "catch" them in that stage when you look at a snapshot under the microscope. This relationship between cell count and phase duration forms the basis of all your calculations.
Avoiding counting errors
Be very careful not to count the same cell twice as you scan across the slide. It's helpful to work systematically - for example, scanning from left to right in rows.
Calculating percentages
To work out what percentage of cells are in each phase, use this formula:
Worked Example: Calculating Phase Percentage
If you counted 50 cells in prophase out of 200 total cells:
This means that 25% of the cells you observed were in prophase, suggesting that cells spend approximately 25% of the total mitosis time in this phase.
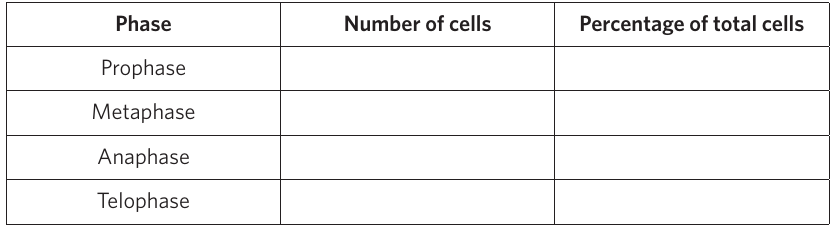
Recording your data
Record your observations in a table like this:
Discussion points
After completing the investigation, consider these important questions:
1. Purpose of cell replication
Why do cells need to replicate? Consider the roles of growth, repair, and reproduction in organisms.
Cell division is essential for multicellular organisms to grow from a single fertilized egg, replace damaged or worn-out cells, and in some cases, reproduce asexually. Each of these processes relies on accurate DNA replication and equal distribution of genetic material to daughter cells.
2. Describing each stage
Can you describe what happens during each phase of mitosis? What distinguishes prophase from metaphase, for example?
3. Identifying the longest stage
From your results, which stage had the highest percentage of cells? This indicates the longest stage. Why might this stage take longer than the others?
The longest stage is typically prophase because it involves complex processes including chromosome condensation, nuclear envelope breakdown, and spindle fiber formation. These processes require significant time for the cell to complete accurately before proceeding to chromosome alignment.
4. Drawing scientific diagrams
Based on your observations, sketch what cells look like during prophase, metaphase, anaphase, and telophase. Remember to label key features such as chromosomes, spindle fibres, and the nuclear envelope where visible.
5. Improving accuracy and precision
What modifications could you make to improve your experiment? Consider:
- Counting more cells for a larger sample size
- Using multiple onion bulbs to check for consistency
- Having multiple observers count independently to reduce bias
6. Sources of error
Think about potential errors in your investigation:
- Personal errors - mistakes you made (e.g., miscounting cells, counting the same cell twice)
- Systematic errors - consistent problems with equipment or method (e.g., stain too diluted, incorrect magnification)
- Random errors - unpredictable variations (e.g., uneven staining, variation between different root tips)
Key considerations for success
Why use HCl and heat?
The hydrochloric acid and heating step is crucial because it:
- Breaks down the pectin in cell walls, making cells easier to separate
- Makes the DNA more accessible to the Feulgen stain
- Helps to soften the tissue so it can be squashed on the slide
Why Feulgen stain?
Feulgen stain is specifically used because it:
- Binds only to DNA, making chromosomes clearly visible
- Produces a distinctive purple-magenta colour
- Allows you to distinguish between different stages of mitosis based on chromosome arrangement
Safety considerations
Safety Requirements:
- Always wear a lab coat, safety glasses, and gloves when working with hydrochloric acid
- Handle the scalpel carefully to avoid cuts
- The water bath is hot - use forceps or heat-proof gloves when removing the microtube
- Dispose of stained materials according to your school's safety guidelines
- Work in a well-ventilated area when handling chemicals
Typical results and interpretation
In most investigations of this type, students find that:
- Prophase typically has the highest percentage of cells (around 50-70%), indicating it's the longest stage
- Metaphase usually shows a moderate number of cells (around 10-20%)
- Anaphase often has the fewest cells (around 5-10%), as it's the quickest stage
- Telophase typically shows an intermediate number (around 10-20%)
These percentages give you a relative indication of how long each stage takes compared to the others. The actual percentages may vary depending on factors such as temperature, onion variety, and the specific root tip sample you're examining. The important pattern is the relative comparison between stages.
Remember!
Key Points to Remember:
- Onion root cells are ideal for this investigation because they're constantly dividing, allowing you to observe all mitosis stages in one sample
- HCl treatment and heating are essential - they break down cell walls and prepare the DNA for staining
- Feulgen stain specifically binds to DNA, making chromosomes visible under the microscope
- More cells in a stage means that stage takes longer - this is the fundamental principle behind the investigation
- Prophase is typically the longest stage of mitosis, which is why you'll usually count more cells in this phase
- Always handle slides by the edges to avoid fingerprints interfering with your observations
- Calculate percentages to compare stages fairly - don't just rely on raw counts